
Liquid Sculpey® and Original Sculpey® "Taken for Granite" Vase
Liquid Sculpey® and Original Sculpey® "Taken for Granite" Vase
Designed by Amy Koranek
Read More
Read Less
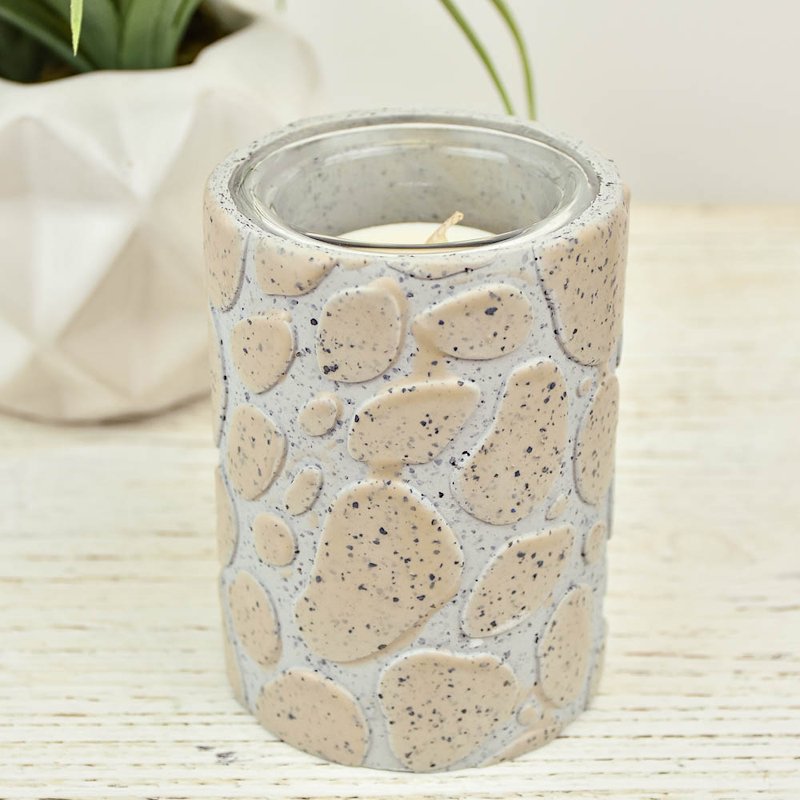
This combination of Sculpey granite-on-granite creates a unique and trendy vase or candle holder that’s simple to make and easy to enjoy.
ADDITIONAL SUPPLIES
- Small cylindrical glass vase
- Copier paper or deli sheet or other barrier paper
- Water spritzer
- Paper towel

Project Instructions
- Getting Started:
Start with clean hands, unwrap and knead clay until soft and smooth, or condition by running clay though a Pasta Machine. We recommend using a designated machine for clay purposes only. When working with multiple colors, clean hands with soap and water or baby wipes (we have found that baby wipes work best) before switching colors. Shape clay, pressing pieces firmly together. Wash hands after use.
- CLay Baking:
- Liquid Baking:
Condition 1/4 pound Original Sculpey Granite by hand until soft and smooth. Sheet the Granite through the pasta machine on the thickest setting. Make a sheet that is as wide as your vase is tall. In this photo I’m simply checking that the clay sheet is wide enough compared to the height of the glass.

Check again that the sheet will wrap completely around the vase loosely

Lay the clay sheet flat on top of a piece of copier paper or deli paper or other barrier sheet that is easy to pick up from your work surface. The pressure used to texture the clay can make the clay hard to pick up from the work surface. The barrier paper will alleviate this situation. Lay the Pebbles full texture sheet on top of the clay. If you wish, you can spritz the clay sheet very lightly with a water mist to act as a release between the clay and the texture sheet. Then place the texture sheet on top of the misted clay. Use your hands to carefully press the texture into the clay making sure that the texture is biting into the clay. Once the texture has bitten in in several different spots you can use the Acrylic Clay Roller to impress the texture as deeply as possible.

Carefully peel the texture sheet from the clay. Next, step the texture sheet over and repeat the design. Line up the texture sheet as closely as possible. If you want to spritz the untextured area with a light mist of water before texturing again you may. When you have the texture sheet in the second position, texture the design as deeply as you can once again as in Step 4.

Carefully peel the texture sheet from the clay. If you used a water mist, blot all water from the surface of the clay with paper towel. If there are little inconsistencies where the two texture patterns meet, these can be smoothed with the flat rubber tip of the Dual End Detail tools.

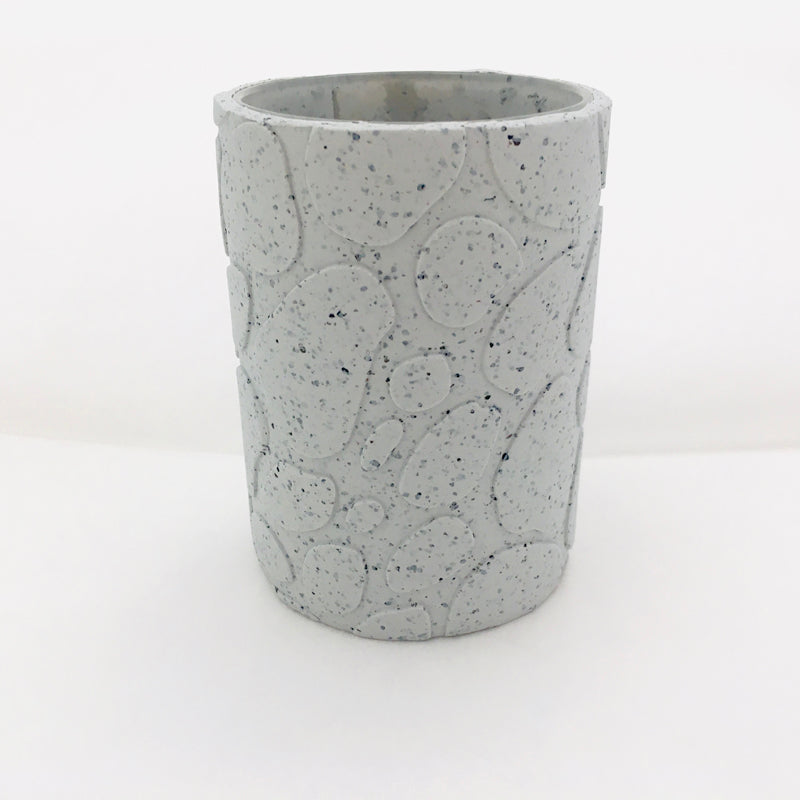
Trim a very straight edge with the Super Slicer along one of the short ends of the clay. Peel the barrier paper away from the back of the textured clay. Carefully wrap the textured sheet around the glass vase. Mark the place where the clay sheet should be trimmed to create one full wrap.
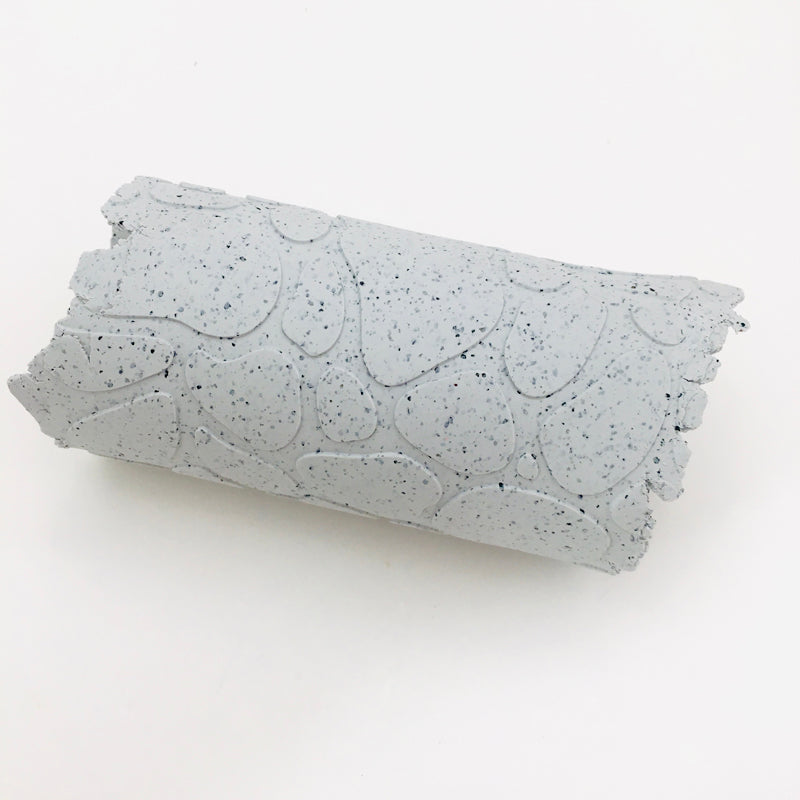
Cut the sheet to fit with the Super Slicer. Smooth the seam with your fingertips or with the flat rubber tip. Make sure to work out any air bubbles from between the glass and the clay with your hands. You will want to practice a firm but smooth touch that does not disturb your beautiful texture design too much. But still, the clay should be as snug to the glass as possible. Trim the bottom and top edges with the Super Slicer to make neat edges. Buff the cuts with your fingertips to take away sharpness.
Stir the Greige Granite Liquid Sculpey (LS) with one of the purple clay tools and replace the cap. You can squirt a drop of the LS onto one of the pebbles in the design directly from the bottle. Smooth the Greige color over just the raised pebble with your fingertip. Repeat adding dots of LS to the pebbles and smoothing to cover the raised surfaces with your fingertips. LS loves to bond with solid clays but in very thin layers. If you add the LS in a very thin layer, it will seep into the clay without dripping. If you add the LS in a thick layer, it will tend to drip. Carefully cover each of the pebbles with a thin layer of the LS. If you want to deepen the color of the LS, allow the first layer to seep into the clay for a few hours, and then repeat this process of adding the LS one pebble at a time.

Bake the glass and clay vase following the baking instructions for the Original Sculpey. Allow to cool completely before handling.
