

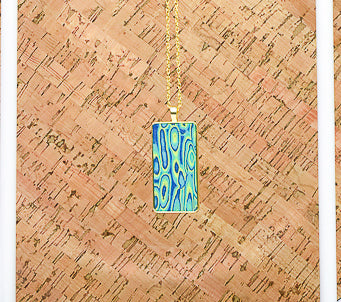
Shimmering Peacock Mokume Gane Pendant
Shimmering Peacock Mokume Gane Pendant
Designed by syndee holt
Read More
Read Less
Sculpey Premo™ and Sculpey Soufflé™ team up for this quick 5 minute Mokume Gane. Sculpey Premo™ clays add the shimmer while the Sculpey Soufflé™ colors add a contrast matte effect. You can mix and match colors from both Sculpey clay lines to create your own versions as well! This is a great project to use up those bits and pieces of clay colors we all collect.
TIME TO COMPLETION:45 minutes to make and bake
ADDITIONAL SUPPLIES
- Metal rectangular bezels – mine are from Amazon
- Instant glue
- Wooden dowel 1 inch in diameter (optional if you won't want to use the Sculpey Acrylic Roller why I prefer for this project)
Project Instructions
- Getting Started:
Start with clean hands, unwrap and knead clay until soft and smooth, or condition by running clay though a Pasta Machine. We recommend using a designated machine for clay purposes only. When working with multiple colors, clean hands with soap and water or baby wipes (we have found that baby wipes work best) before switching colors. Shape clay, pressing pieces firmly together. Wash hands after use.
- Baking:
Sheet about 1/3 of the conditioned clays out on the #4 (0 is my thickest setting) on the clay conditioning machine. Use the 1 inch square cutter to cut a square of each color. (If you are like me, you will cut 3 squares each and make 3 sets of mokume gane!)

Stack the colors as shown – Galaxy, Robins Egg, Peacock Pearl and Canary. Stack the squares on top of each other like a block.

Run the block through the Clay Conditioning Machine on the same #4 setting to get a long thin sheet of clay. Cut the sheet of clay in half as shown.

Restack the clay pieces in the same order. Line up the edges neatly.

Run the stack through the Clay Conditioning Machine again on the same setting. Cut again and restack.

Run the stack through one more time and position it on your acrylic roller (NOTE: I’m using a wooden dowel so you can see it better! The clay will stick better to the acrylic roller than it does to the dowel.) I liked the messier side that had all the colors showing through.

Use your Sculpey Clay Blade to carefully make slices against the curve of the roller and expose the layers inside the stack. These are very shallow slices that we are making! If you slice too far and hit the roller, don’t worry! Carefully remove the blade, lightly press the clay into place and turn the roller so that you are slicing from the opposite side now.

I prefer a combination of long and short slices. Make sure that you put your pieces you slice off on a clean sheet of paper to use later! Make these slices over the entire length and almost the whole width (if the sides are pretty I like to keep a little of it).

Carefully remove your thing piece of clay from the acrylic roller (or dowel) and place on your work surface (to admire it!) I love how the Galaxy lends sparkle and the Peacock Pearl lens shimmer while the Souffle colors act as a perfect matte partner to the Premo effects.

Depending on what you plan to do with your Mokume Gane piece, you can add a backing sheet of clay (or 2) or if you are using a bezeled pendant finding like me – check the depth of the bezel. Mine is fairly thin and my sheet as is fits perfectly. I’ve made a paper template of the bezel that I can trim around.

Fit your clay to the bezel and place the filled bezel on your baking sheet. Bake according to the directions in Step 1 above. Once the clay has baked and cooled, use a thin blade to pop the clay out of the bezel and glue it back into place. This second piece should be some sort of matching earrings – don’t you think?
