Skip to product information
1 of 1

Sculpey Soufflé™ Colorful and Clayful Earrings

Sculpey Soufflé™ Colorful and Clayful Earrings

Read More
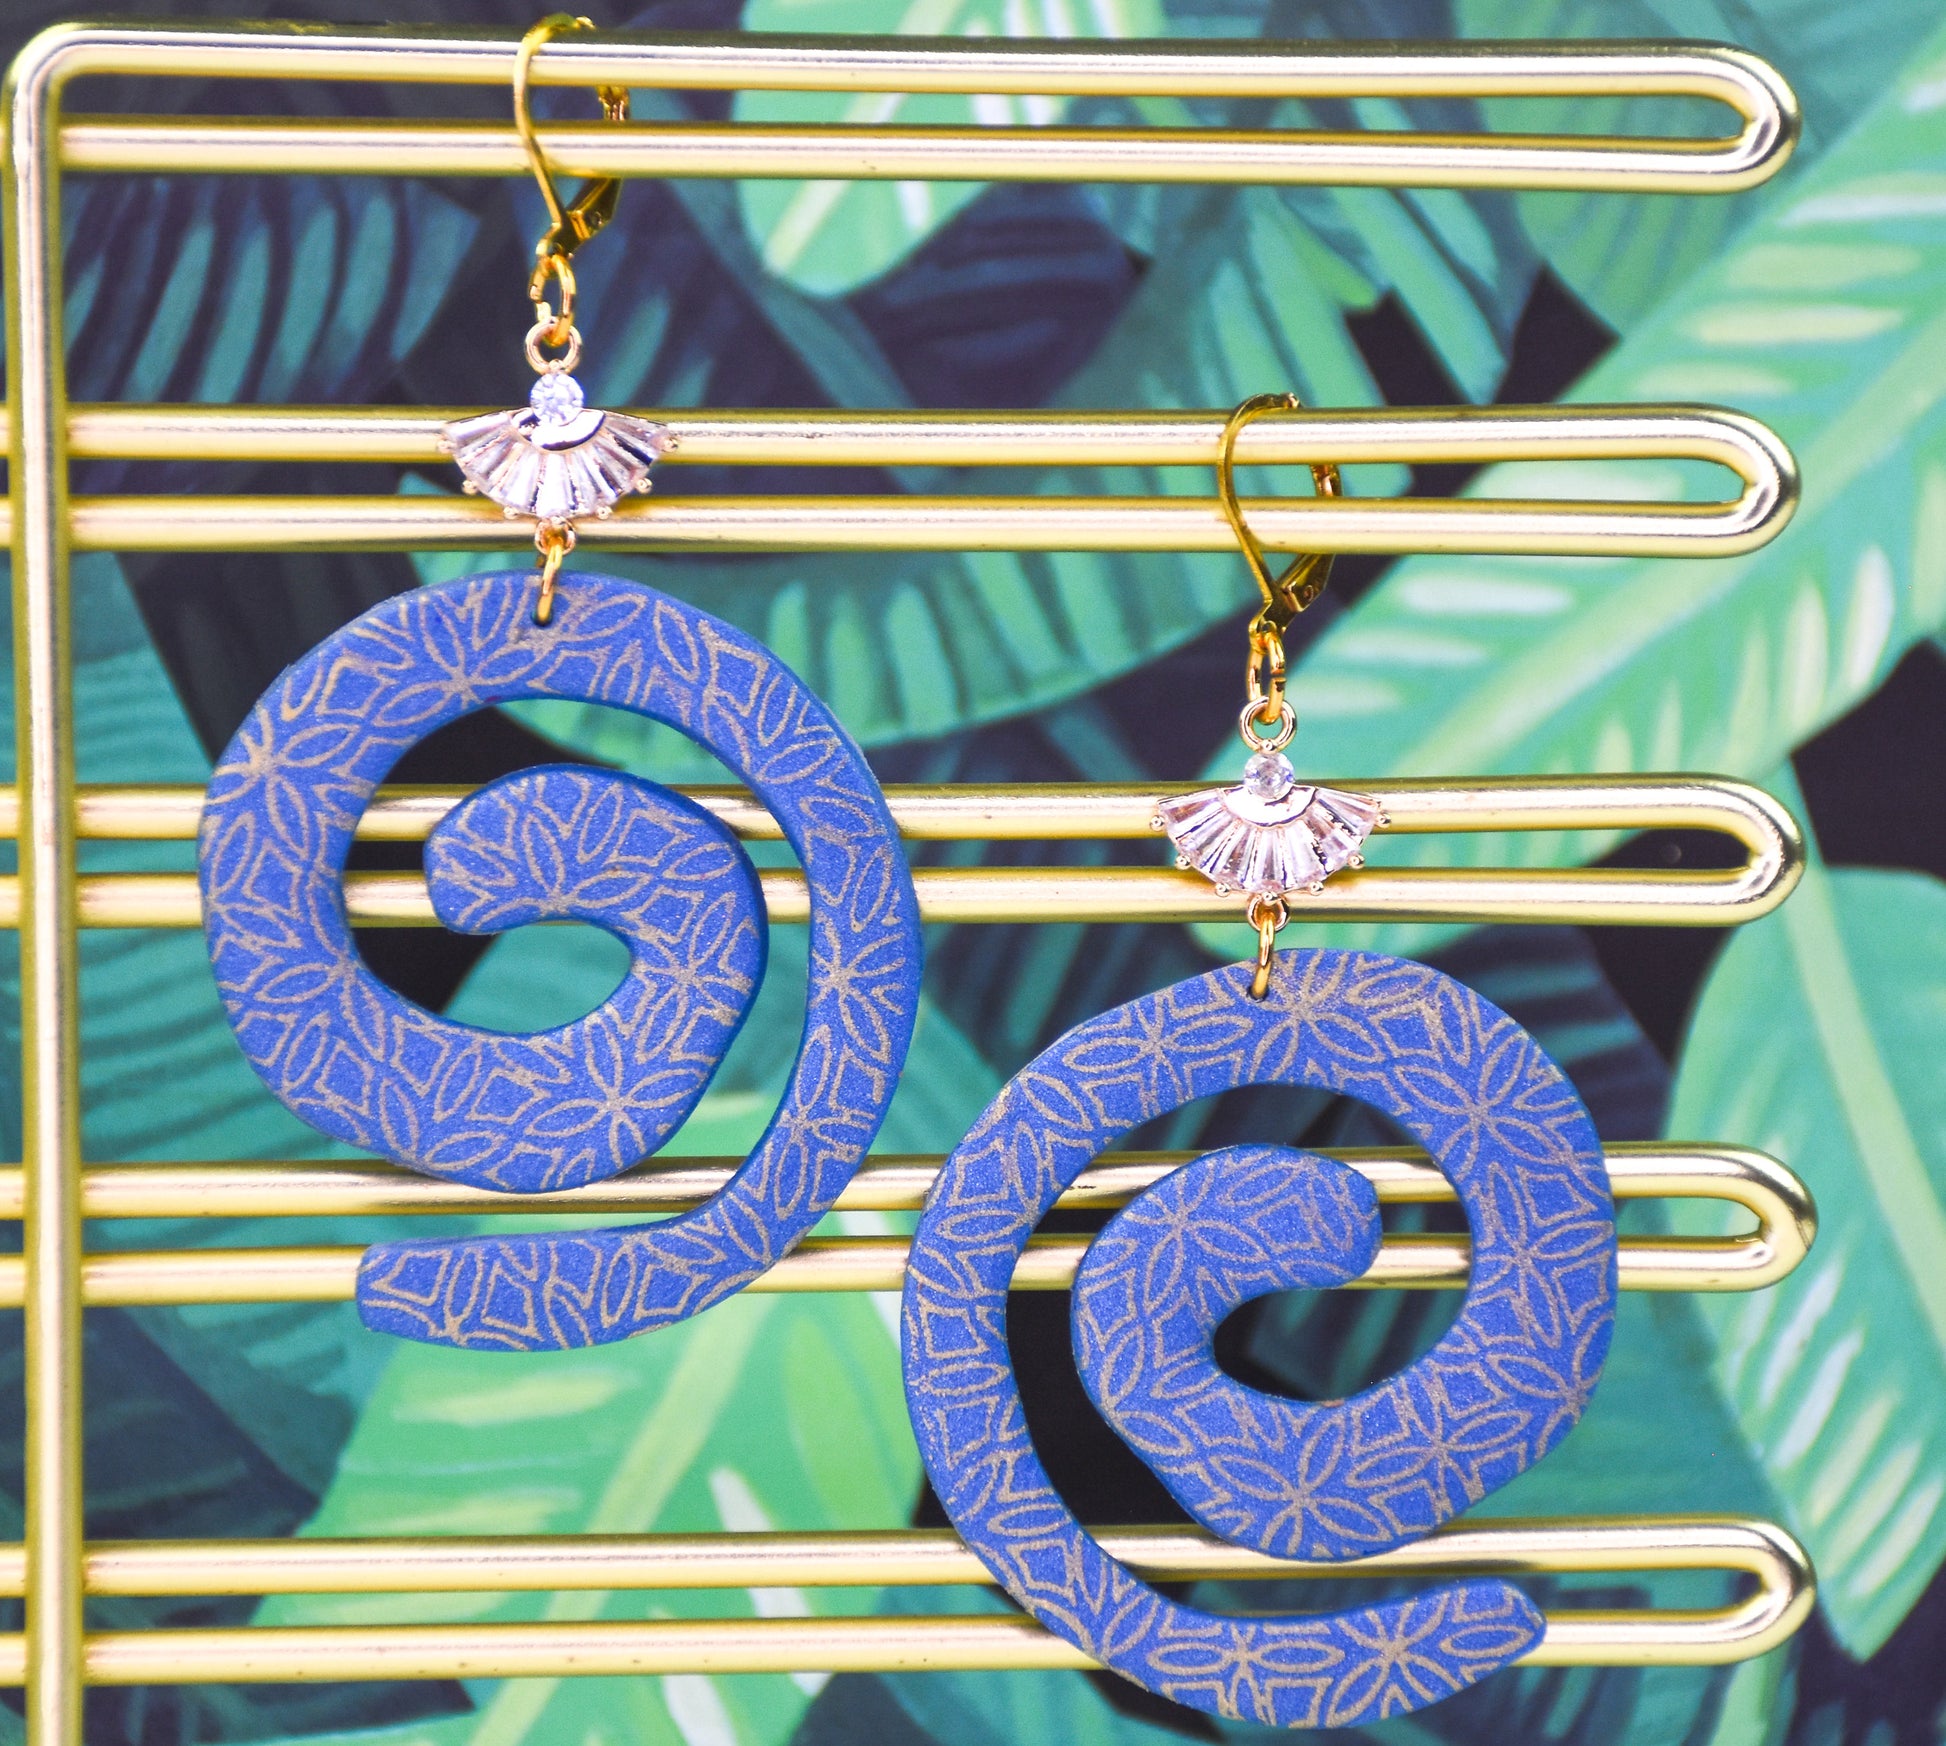
Team up Sculpey Soufflé™ Bluestone with Sculpey Premo™ Silver in a mix to start the sparkle quotient for these earrings. Up the sparkle with a golden silkscreened pattern and top them off with gold and rhinestone sparklers! Time to completion: 45 minutes to make / 30 minutes to bake/cure
Read Less
ADDITIONAL SUPPLIES
  • Otie Co. x Clayful Co. Collab – Hurricane Swirls cutters
  • Fan shaped charms (Etsy)
  • Gold acrylic paint (mine is Jacquard Lumiere Gold)
  • Optional: Rubber chisel paint brush for spreading the paint
  • Small paint brush for putting paint on spreader
  • Basin of water to rinse the silkscreen/brushes
  • Small towel for drying silkscreen (microfiber towels work the best!)
  • 5 mm gold-toned jump rings(4) NOTE: Mine are oval jump rings
  • Jewelry pliers for assembly
  • Lever Back Earring Round French Hook Ear Wire (2) - Amazon
View full details
Project Instructions

Step 1

Getting Started:

Please make sure your work area is covered and you are not working on an unprotected surface. We recommend working on the Sculpey® Oven-Safe Work Mat, wax paper, metal baking sheet, or disposable foil. Uncured clay may damage unprotected furniture or finished surfaces. Be sure to cover your crafting area appropriately.

Start with clean hands, unwrap and knead clay until soft and smooth, or condition by running clay though a Pasta Machine. We recommend using a designated machine for clay purposes only. When working with multiple colors, clean hands with soap and water or baby wipes (we have found that baby wipes work best) before switching colors. Shape clay, pressing pieces firmly together. Wash hands after use.

Baking (also called Curing):

Begin by preheating oven to 275 °F (130 °C). After you are done creating; for best results bake/cure clay on an oven-proof surface such metal, aluminum foil, an index card or the Sculpey® Clay Mat at 275°F (130 °C) for 30 minutes per 1/4" (6
mm) thickness according to package directions. Oven safe glass or ceramic
surfaces are also acceptable for baking/curing; however please note that the
baking/curing times may take longer as the glass or ceramic surfaces take
longer to heat up. For best baking results, use an oven thermometer. DO NOT USE
MICROWAVE OVEN. DO NOT EXCEED THE ABOVE TEMPERATURE OR RECOMMENDED BAKING TIME.

Step 2

Mix the 1 oz bar of Soufflé™ Cornflower with the 1 oz bar of Premo™ Silver and roll out with the acrylic roller to about the thickness of thin cardboard.

NOTE: If you are using a clay dedicated pasta machine, I’ve used a #3 or medium thickness.

Step 3

Apply a small amount of your selected paint to your spreader and quickly spread across the silkscreen.

Remove the silkscreen and wash/dry it before repeating the design on the remaining sheet of clay.

NOTE: If you don’t get a good silkscreen, you can immediately wash the paint from the sheet of clay and thoroughly dry the sheet before screening again!

Step 4

Here is my first silkscreen! I’m ready to screen the second one.  Be careful not to disturb your first pattern if it hasn’t dried completely yet!

Step 5

Once both my silkscreens are completely dry, I can use my cutter to cut out my design. 

NOTE: You can see that there is going to be some non-screened space in the cutter design –don’t worry, we will just trim that off!

Step 6

I like to put a small block of wood on my cutter and then firmly press down on the wood to evenly distribute my hand pressure.  

After a successful cut, I can see that there is still a little clay left to cut, so I
just carefully slide my blade across the bottom of the cutter to remove the
excess clay.

Step 7

Remember those unsilkscreened areas of clay in the cutter?  I used my rubber chisel attachment to gently start pressing the clay out of the cutter in those two areas (as shown).

Step 8

Once those two areas are out of the cutter, it was pretty easy to remove the rest of the clay from the cutter. Don’t forget to remove the clay that is in the voided area of
the cutter as well!

Step 9

Here is my clay removed from one of the cutters.

Step 10

Use the blade tool attachment for the 5-in-1 Tool to trim away any unscreened areas of the design as shown.

Repeat for the second silkscreened design.

Step 11

Use the needle tool to place the holes for assembly in your two designs and bake as directed in Step 1 above.

Step 12

Here is the assembly layout for my earrings. 

NOTE: I have found that matching pairs of jewelry pliers make assembly MUCH easier to complete!

Step 13

The big reveal – the finished earrings!  I decided to use these Lever Back Earring Round French Hook findings for several reasons – they take less “space” in the vertical design of the earrings and my friends with long hair swear by them as being more secure than the standard French hook  earring finding.