

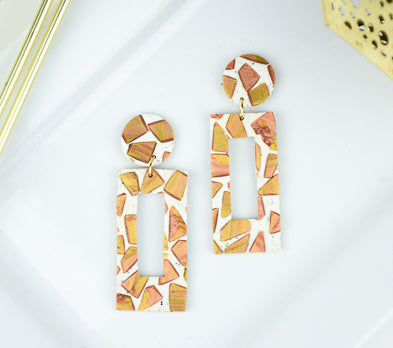
Sculpey™ Premo White Granite Terrazzo Earrings
Sculpey™ Premo White Granite Terrazzo Earrings
Designed by syndee holt
Read More
These cool textured earrings are so quick and easy to create and the colors will lend themselves to just about everything in your closet! Don’t have cutters? You don’t need them for this project – we will be using the Sculpey Tools™ Jewelry Template.
TIME TO COMPLETION: 60 minutes including baking and assembly
Read Less
ADDITIONAL SUPPLIES
- Sheets of plain paper
- Craft knife (like Exacto)
- Smooth work surface
- Post backs (2)
- Gold jump rings (2) I prefer to use Oval Jump rings as they give more room between the earring elements without sticking out really far. Mine are 8x6 mm 20 Gauge.
- Optional: small sheet of deli paper, small piece of graphing paper
Project Instructions
- Getting Started:
Start with clean hands, unwrap and knead clay until soft and smooth, or condition by running clay though a Pasta Machine. We recommend using a designated machine for clay purposes only. When working with multiple colors, clean hands with soap and water or baby wipes (we have found that baby wipes work best) before switching colors. Shape clay, pressing pieces firmly together. Wash hands after use.
- Baking:
Roll small snakes of the conditioned Antique Gold, 18K Gold and Copper using about 1/4 of the block. Mine are about 1/4 in diameter by 3 inches. Stack them together as shown.

Twist the snakes. I flatten them with my hand and then roll through the Clay Conditioning Machine again (on widest setting), roll it up, twist again. Repeat if necessary. ALWAYS TRY TO ROLL WITH THE STRIPES AS VERTICAL AS POSSIBLE.

Once I like the variety of the twists, I flatten the sheet out on the widest setting and then move to the setting just smaller than the medium setting and sheet the clay out.

Sheet out about 1/3-1/2 of the conditioned White Granite clay on the second to widest setting.

Now just chop small pieces from the marbled clay and add them to your sheet of White Granite, making sure to leave space between each piece since we are going to gently press them into the White Granite sheet.
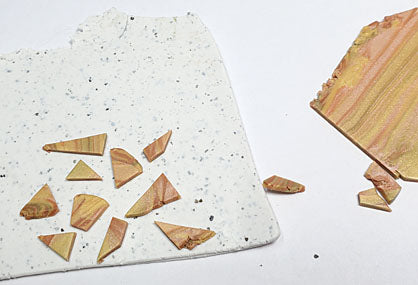
Here is my sheet once I had completed all of Step 6. I’ve checked for gaps and/or pieces too close together.

Fold a sheet of plain white paper in half and put the sheet of clay between the paper. Gently SLIDE your roller across the sheet to help press the marbled pieces into the clay. Repeat this from all 4 sides of the sheet. NOTE: I am using a sheet of deli paper, which I prefer to use on the top of the sheet instead of white paper so I can watch the process. And also so you can see it! Check the progress frequently, by gently peeling up the edge of the paper. The goal is to press the pieces into the White Granite, but not to smear the edges. As you can see, my pieces are still sharp and they are NOT flush with the White Granite – this will add the texture!

Cut 2 1x2 inch pieces of this sheet. I like to use graphing paper to help me keep the blade straight. Set the rest of the sheet aside for now.

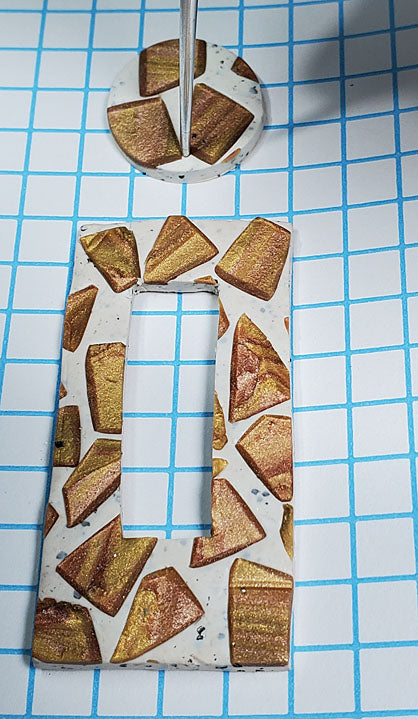
Move the clay piece to a smooth surface like this sheet of glass and position the middle long rectangle in the Jewelry Template on the clay. If you cut to 1 inch, it is pretty easy to align the edges with the templates next to the one we are using. I like to line it up with the top of the earring a little more narrow than the bottom. Use your craft knife to trace the rectangle. Keep your hand relaxed and let the template guide the blade.

Once you have cut out the center, slide your clay blade underneath and move the clay piece to your baking tray. The inside corners can be cleaned up AFTER baking with the craft knife. Repeat for the second rectangle.

Cut two circles out of the remaining sheet of clay.

I like to use a small piece of graphing paper to help me line up my earring elements and position the holes. Use your favorite needle tool to make the holes (I’m using an Etch n’ Pearl).
If you are going to make these into post earrings, I highly recommend that you use the Sculpey Oven Bake Adhesive to completely secure your post. Flip circle over and put a drop of Adhesive that is about the size of the post back. Gently press the post into that drop until it reaches the clay. The Adhesive will slowly flow around the post. (You can speed the process up with a toothpick!) Once the earring is baked, the post will be neatly and permanently embedded.

Okay, link your earrings with the jump ring and you are all set to wear your new earrings!

- Choosing a selection results in a full page refresh.
- Opens in a new window.