Skip to product information
1 of 1

Sculpey Premo™ and Soufflé™ Clever Charm Bracelet

Sculpey Premo™ and Soufflé™ Clever Charm Bracelet

Read More
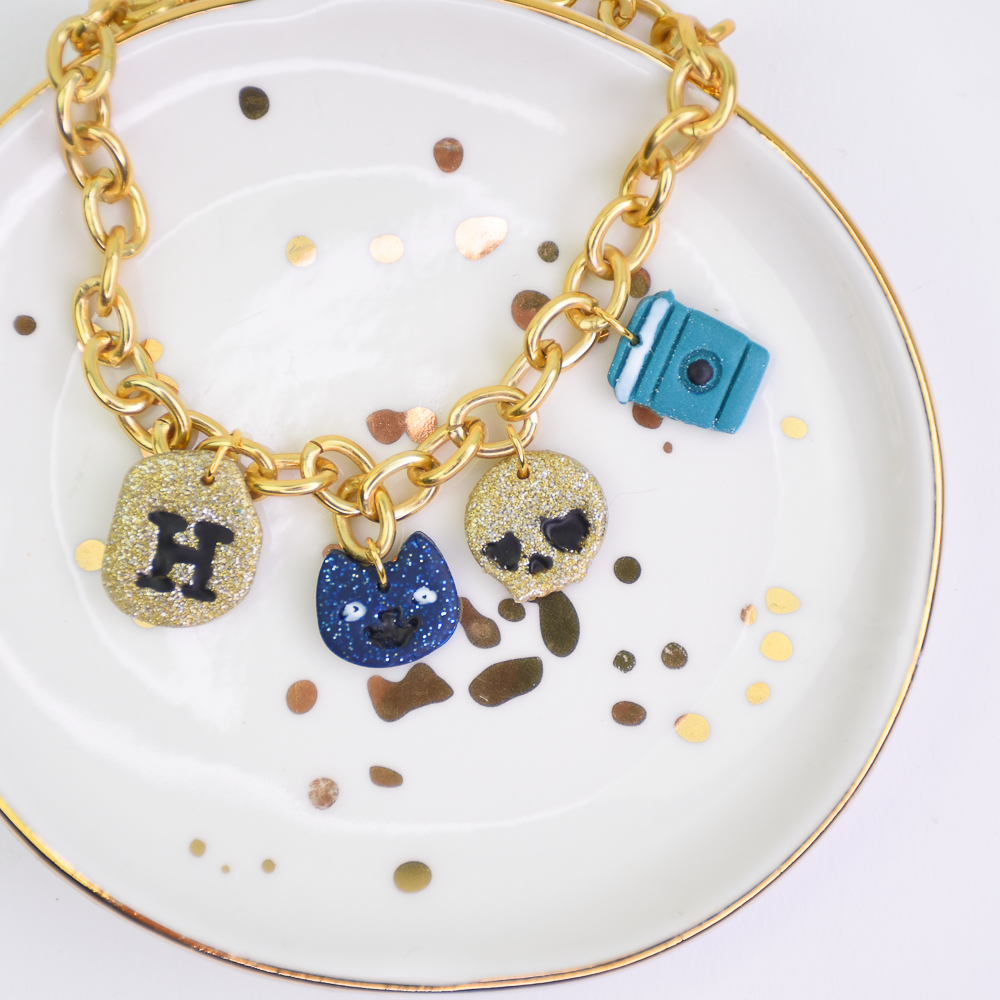
Sculpey Premo™ and Soufflé™ team up to help create these cool little charms with detail highlights created with Liquid Sculpey®. Just add a chunky chain and clasp and your new on-trend charm bracelet will be sure to become a favorite! TIME TO COMPLETION: 40 minutes to make 30 minutes to bake Designed by syndee holt
Read Less
ADDITIONAL SUPPLIES
  • Small cutters (mine are ClayLab)
  • Small tile to work on
  • Toothpicks (about 6)
  • Chunky chain (enough to wrap your wrist)
  • Bracelet closure (mine is a snap clasp)
  • 6-7 jump rings (I’ve used oval 6mm)
  • Jewelry pliers
View full details
Project Instructions

Step 1

Getting Started:

Please make sure your work area is covered and you are not working on an unprotected surface. We recommend working on the Sculpey® Oven-Safe Work Mat, wax paper, metal baking sheet, or disposable foil. Uncured clay may damage unprotected furniture or finished surfaces. Be sure to cover your crafting area appropriately.

Start with clean hands, unwrap and knead clay until soft and smooth, or condition by running clay though a Pasta Machine. We recommend using a designated machine for clay purposes only. When working with multiple colors, clean hands with soap and water or baby wipes (we have found that baby wipes work best) before switching colors. Shape clay, pressing pieces firmly together. Wash hands after use.

Baking (also called Curing):

Begin by preheating oven to 275 °F (130 °C). After you are done creating; for best
results bake/cure clay on an oven-proof surface such metal, aluminum foil, an
index card or the Sculpey® Clay Mat at 275°F (130 °C) for 30 minutes per
1/4" (6 mm) thickness according to package directions. Oven safe glass or
ceramic surfaces are also acceptable for baking/curing; however please note
that the baking/curing times may take longer as the glass or ceramic surfaces
take longer to heat up. For best baking results, use an oven thermometer. DO
NOT USE MICROWAVE OVEN. DO NOT EXCEED THE ABOVE TEMPERATURE OR RECOMMENDED
BAKING TIME.

Step 2

Roll a small amount (about ½ block) of your conditioned clay out to about 1/8-inch (3-4 cm) thickness.  If you are using a clay dedicated pasta machine, use the widest setting.  Test with on of the cutters to see if it is thick enough to catch all the small detail of the cutters.   

Repeat for each of the colors.

Step 3

Stir the Liquid Sculpey (LS) Black and White colors and squeeze a small dot of each
out on your work tile. I opted to use a toothpick to highlight the details.

Step 4

Make sure to punch your hole for assembly with a clean toothpick as well!  I chose to fill the skull with just Black LS.

Step 5

I filled both the cat eyes with White LS and then added a tiny dot of Black LS.  The dot will grow a little larger in just a few seconds. Then I filled the mouth/nose area with Black LS. Don’t forget to poke your holes for assembly!

Step 6

I used the large pebble shape to create the background for my monogram.  NOTE: this clay will also be embossed, so I used a medium setting on my clay conditioning machine.

Step 7

Use your favorite letter stamp to emboss the charm. NOTE: 20/20 Hindsight tells me that it would probably be easier to emboss the letter first, then center the cutter and cut out the shape! Make sure to poke your hole for hanging!

Step 8

Fill the letter with Black LS. I used a toothpick again to do this.

Step 9

Set all the finished charms on your baking sheet and bake according to the directions in Step 1. 

Step 10

Once the charms have baked and cooled, center the charms on your bracelet and use the jump rings to attach them. Add your closure as well.

Step 11

Here is a look at my finished bracelet. I had enough charms leftover to make a bracelet for my BFF as well! OH! You can also make matching earrings with the remaining finished charms as well.