Skip to product information
1 of 1

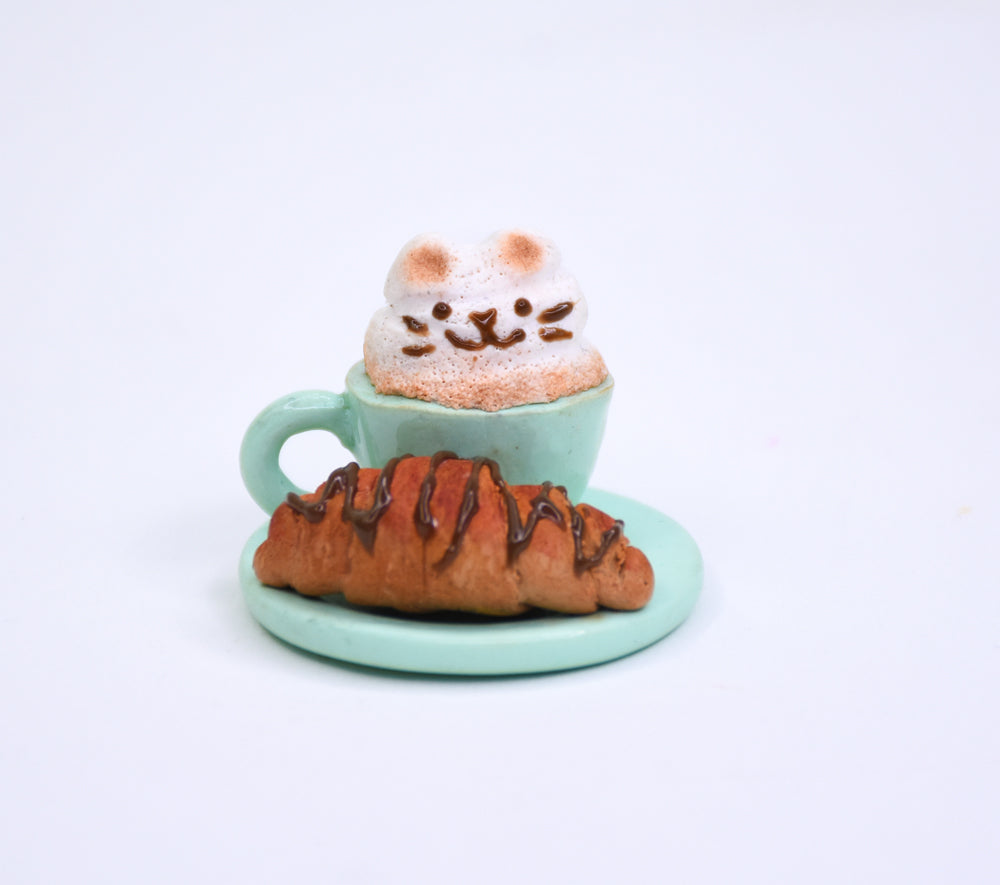
Sculpey Premo™ Mini Latte and Croissant

Sculpey Premo™ Mini Latte and Croissant

Read More
Warm and cozy is always a welcome sight and this delicious looking sculpted mini latter and croissant will always be waiting for you. TIME TO COMPLETION: Make time: 45 mins Bake time: 40 mins Designed by LMedina
Read Less
ADDITIONAL SUPPLIES
  • Flat circular object, like an extra-large marker or bottle cap, about 1 inch diameter
  • (for plate indent)
  • Regular marker or wooden dowel, 3/8 diameter (for cup form)
  • Craft knife
  • Needle tool
  • Chalk pastels (yellow, brown, dark brown, and reddish brown)
  • Small paint brush (to apply chalk pastels)
  • Popsicle stick (for mixing)
View full details
Project Instructions

Step 1

Getting Started:

Please make sure your work area is covered and you are not working on an unprotected surface. We recommend working on the Sculpey® Oven-Safe Work Mat, wax paper, metal baking sheet, or disposable foil. Uncured clay may damage unprotected furniture or finished surfaces. Be sure to cover your crafting area appropriately.

Start with clean hands, unwrap and knead clay until soft and smooth, or condition by running clay though a Pasta Machine. We recommend using a designated machine for clay purposes only. When working with multiple colors, clean hands with soap and water or baby wipes (we have found that baby wipes work best) before switching
colors. Shape clay, pressing pieces firmly together. Wash hands after use.

Baking (also called Curing):

Begin by preheating oven to 275 °F (130 °C). After you are done creating; for best results bake/cure clay on an oven-proof surface such metal, aluminum foil, an indexcard or the Sculpey® Clay Mat at 275°F (130 °C) for 30 minutes per 1/4" (6
mm) thickness according to package directions. Oven safe glass or ceramic
surfaces are also acceptable for baking/curing; however please note that the
baking/curing times may take longer as the glass or ceramic surfaces take
longer to heat up. For best baking results, use an oven thermometer. DO NOT USE
MICROWAVE OVEN. DO NOT EXCEED THE ABOVE TEMPERATURE OR RECOMMENDED BAKING TIME.

Step 2

Start with the plate – use any color you’d like. I’m using Premo mint green. Use about the size of a grape, flatten into a small uniform disk, 1-inch diameter. Alternatively, you can use a pasta machine to your desired thickness and cut a circle with a circle cutter.

Step 3

Don’t be afraid to get creative with your tools! I used an extra-large marker to indent the center to resemble a plate.

Step 4

Use the end of a wooden dowel or marker that is about 3/8 diameter around to form a small cup.

Step 5

Trim edge, all the way around, with a craft knife for a level edge.

Step 6

Make a tiny snake to form the cup handle, make the handle as big or little as you’d like. Use a craft knife to cut one end at a diagonal.

Step 7

Attach the diagonal cut edge to the cup using a fine tipped tool. Blend the edges together. Gently position the handle as you’d like.

Step 8

Trim excess clay at a diagonal using a craft knife.

Step 9

Attach the diagonal cut edge to the cup using a fine tipped tool. Blend the edges together.

Step 10

Cut a long triangle of Premo tan color to form the croissant about 1/16 inch thick. My largest end is a little longer than my cup.

Step 11

Roll the triangle up starting from the largest edge.

Step 12

Once rolled up, pinch ends lightly and push inwards to condense the shape. Texture using a needle tool.

Step 13

Use chalk pastels, or pan pastels, to give the croissant a baked look. I used a little golden yellow, brown, reddish brown and dark brown.

Step 14

Apply chalk pastel with a small brush. Start with lightest color, yellow. Build color slowly with very small amounts until you get the desired shading. Add more texture if needed.

Step 15

Apply lightest brown chalk pastel.

Step 16

Mix, and apply, dark brown and reddish brown.

Step 17

Form a mound of Souffle Igloo for the latte’s foam. Use your cup as a guide. It should be fuller at that bottom.

Step 18

Indent the middle for cat ears.

Step 19

Add some gentle ridges with a dotting tool or similar. Add small indents to the front of the ears.

Step 20

Mix equal parts of black and raw sienna to create dark brown for the chocolate drizzle, you only need a very small amount. Add some Liquid Sculpey® Clear.

Step 21

Mix well, until smooth with no clumps. A popsicle stick works well for this. Add more clear liquid clay, as needed, until you have a drizzle consistency.

Step 22

Drizzle chocolate sauce onto croissant carefully using a needle tool.

Step 23

Add Premo tan clay into the middle of cup.

Step 24

Attach the foam on top of this so it sits flush to the cups edge. Add texture to the foam with a needle tool.

Step 25

Add brown chalk pastel with a small paint brush at the base where the latte and foam would bleed together. Add some brown in the ears too for extra cuteness.

Step 26

Using the chocolate sauce you made earlier draw eyes, nose, mouth and whiskers using a needle tool.

Step 27

Apply Sculpey Oven Bake Adhesive to your plate where you want to place your cup and croissant. Arrange all your pieces. Bake for 40 mins at 275 degrees.

Step 28

(OPTIONAL) Liquid clay bakes to a matte finish. Once your piece is cooled you can apply Sculpey Gloss Glaze or UV craft resin to any areas you like. I coated the chocolate accents to bring back the shine and also coated the cup and plate!