
Liquid Sculpey® and Sculpey Premo™ Oil Slick Bracelet
Liquid Sculpey® and Sculpey Premo™ Oil Slick Bracelet
Designed by Amy Koranek
Read More
Read Less
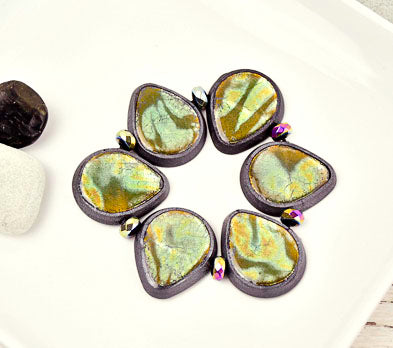
The Sculpey Tools™ Silicone Bezel Mold makes it easy for you to frame a Liquid Sculpey® technique. This bracelet features variegated leaf to make the oil slick look.
TIME TO COMPLETION: 75 minutes
Designer’s Note - When I’m all finished with a project, I fill the mold with any remaining tinted LS and bake the pieces to save for later projects. Then I bake the silicone cup with the residue of the LS in it. When it is completely cool, the residue can be peeled out of the cup and discarded. Wipe out the cup with paper towel and store to use again later. The silicone cups I use are from the baking department and designed for use as cupcake liners.
ADDITIONAL SUPPLIES
- Paper towels
- Silicone baking cup for mixing Liquid Sculpey®
- Pencil
- Variegated composite leaf
- 2” head pins (6)
- Heat gun for clearing the Clear Liquid Sculpey®
- Coordinating crystal spacer beads
- 24” Black gossamer floss
- Needle
- Scissors

Project Instructions
Getting Started with Sculpey Bar and Liquid Clays:
Please make sure your work area is covered and you are not working on an unprotected surface. We recommend working on the Sculpey® Oven Safe Work Mat, wax paper, metal baking sheet, or disposable foil. Uncured Liquid Polymer Clay may damage unprotected furniture or finished surfaces. Be sure to cover your crafting area appropriately.
Getting Started with Premo Clay:
Start with clean hands, unwrap and knead clay until soft and smooth, or condition by running clay though a Pasta Machine. We recommend using a designated machine for clay purposes only. When working with multiple colors, clean hands with soap and water or baby wipes (we have found that baby wipes work best) before switching colors. Shape clay, pressing pieces firmly together. Wash hands after use.
Getting Started with Liquid Sculpey
Stir Liquid Sculpey® completely. Thin with Sculpey® Liquid Clay Softener as needed - Wash hands after use (we have found that baby wipes work best) .
Getting Started with Premo Clay:
Start with clean hands, unwrap and knead clay until soft and smooth, or condition by running clay though a Pasta Machine. We recommend using a designated machine for clay purposes only. When working with multiple colors, clean hands with soap and water or baby wipes (we have found that baby wipes work best) before switching colors. Shape clay, pressing pieces firmly together. Wash hands after use.
- Baking:
Getting Started with Liquid Sculpey
Stir Liquid Sculpey® completely. Thin with Sculpey® Liquid Clay Softener as needed - Wash hands after use (we have found that baby wipes work best) .
- Baking:
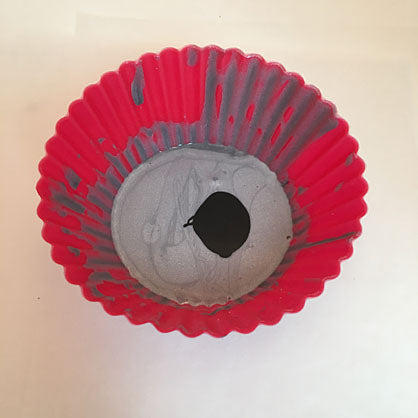
Preheat the oven to 300 degrees F and place the Bezel mold inside. While the mold is pre-heating, mix Silver Liquid Sculpey® (LS) with a small amount of Black LS in a silicone baking liner. Mix the colors completely with a Purple Clay Tool. Thin with Sculpey® Liquid Clay softener so that it is slightly runny. Always stir the liquids completely, especially when mixing softener or tints into them. Remove the heated mold from the oven and allow it to cool for 2 minutes.
Carefully touch the mold with your hand. If you can touch the mold comfortably with your hand and feel that it is still quite warm, it is ready to fill.
Pour the tinted Liquid Sculpey® into the mold starting with the frame area but don’t overfill. Tap the filled mold on a flat smooth surface to release air bubbles.
Place the filled silicone mold in the preheated oven and cure for 20 minutes.
For this project we will need one each of the six medium tear drop shaped bezels in Silver/Black.
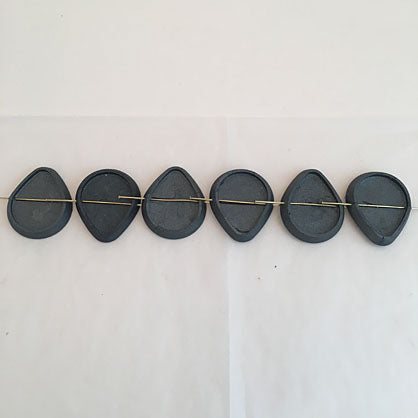
When the bezels are completely cool release them from the mold by gently flexing it. Find the vertical center of each teardrop bezel. Mark this point along both edges with pencil. Carefully pierce the frame of the bezel at the pencil marks.

Insert a 2” head pin through the holes that you made with the needle tool. This will make a channel for stringing the bracelet later.

Repeat for each of the teardrop bezels.
Sheet Graphite Pearl through the clay conditioning machine to the second thickest setting. Lay the sheet on your work surface and make sure it is as flat as possible. Carefully apply a sheet of variegated leaf to the surface of the clay. Rub out any air bubbles with your fingertips.

Take a teardrop bezel and gently press it bezel side down into the leaf/clay sheet. This will make a mark in the leaf/clay that you can trace with the 5-in-1 clay knife tool to remove it from the sheet.

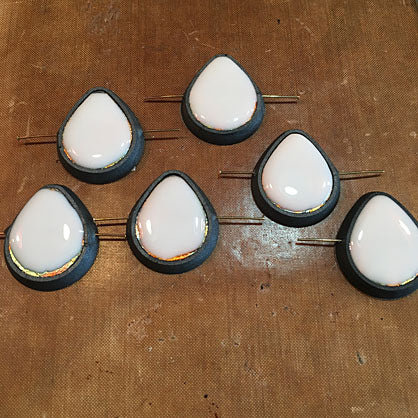
Carefully press the leaf/clay teardrop shape into one of the bezels sandwiching the eye pin in place. This may create a small ridge where the eye pin is under the leaf/clay but it will disappear when the finished pieces are glazed. Repeat this process for all six bezels. Bake following the instructions for Premo Sculpey® making sure your oven temperature is reset to 275F.

Stir Clear LS completely to make sure that any lumps in the liquid are completely broken up and stirred in. When the bezels are completely cool, use one of the purple clay tools to apply Clear LS to the leaf. Bake again at 275F to set the Clear LS. It will still look foggy at this temperature.
Because we have Premo under the LS, we don’t want to bake the Clear LS at it’s clearing temperature of 300F because this temperature would burn the Premo. It’s best to use a heat gun to clear the Clear LS completely without burning the Premo. Set the heat gun on hi and hold it 4”-6” from the clay pieces. Continuously move the heat gut over the surface of the Clear LS and you will see it go completely clear and shiny when it is cured. As soon as you see this, turn the heat gun off.
Remove the eye pins from each bezel. Thread the black gossamer floss through a needle to the half way point. String the teardrop shapes alternating with the crystal spacer beads as shown. Alternate the orientation of the teardrops each time you string one on.
Remove the eye pins from each bezel. Thread the black gossamer floss through a needle to the half way point. String the teardrop shapes alternating with the crystal spacer beads as shown. Alternate the orientation of the teardrops each time you string one on.

Tie off the floss with an overhand knot and trim with scissors.

- Choosing a selection results in a full page refresh.
- Opens in a new window.