Skip to product information
1 of 1

Sculpey Premo™ Teal Textured House Numbers

Sculpey Premo™ Teal Textured House Numbers

Designed by Lauren Medina
Read More
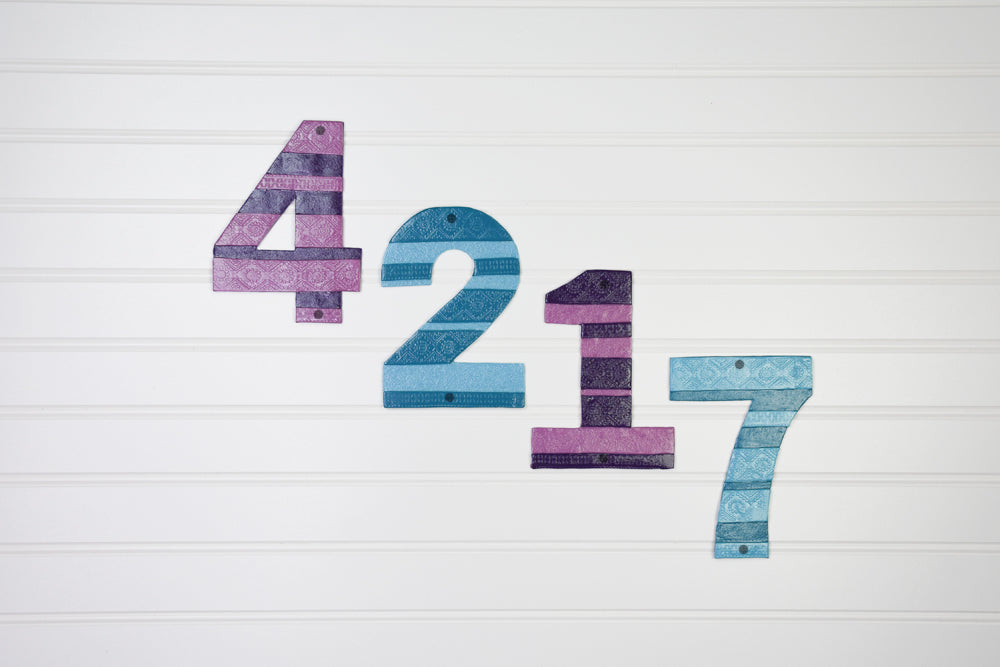
Dazzle your neighbors and guests with custom color clay house numbers. These gorgeous textured numbers in rich colors will surely liven up the old neighborhood! Project time About 30 mins per number Bake Time 45 mins
Read Less
ADDITIONAL SUPPLIES
  • Silicon Texture Sheet
  • Number stencils
  • Craft knife
  • Ceramic tile (preferably one for each number)
  • Brush to apply glaze
  • Drill bit sized for screws to mount the numbers
View full details
Project Instructions

Step 1

Getting Started:

Please make sure your work area is covered and you are not working on an unprotected surface. We recommend working on the Sculpey® Oven-Safe Work Mat, wax paper, metal baking sheet, or disposable foil. Uncured clay may damage unprotected furniture or finished surfaces. Be sure to cover your crafting area appropriately.

Start with clean hands, unwrap and knead clay until soft and smooth, or condition by running clay though a Pasta Machine. We recommend using a designated machine for clay purposes only. When working with multiple colors, clean hands with soap and water or baby wipes (we have found that baby wipes work best) before switching colors. Shape clay, pressing pieces firmly together. Wash hands after use.

Baking (also called Curing):

Begin by preheating oven to 275 °F (130 °C). After you are done creating; for best results bake/cure clay on an oven-proof surface such metal, aluminum foil, an index
card or the Sculpey® Clay Mat at 275°F (130 °C) for 30 minutes per 1/4" (6
mm) thickness according to package directions. Oven safe glass or ceramic
surfaces are also acceptable for baking/curing; however please note that the
baking/curing times may take longer as the glass or ceramic surfaces take
longer to heat up. For best baking results, use an oven thermometer. DO NOT USE
MICROWAVE OVEN. DO NOT EXCEED THE ABOVE TEMPERATURE OR RECOMMENDED BAKING TIME.

Step 2

You’ll need about 4 ounces of Premo Mauve, 4 ounces Purple, 4 ounces Turquoise and a 4 ounces of Teal. Roll out each color on your thickest setting on the pasta machine or about ⅛ inch thick.

Step 3

For best results place your sheet of clay onto a ceramic tile or baking mat before using the stencil. Use a stencil to trace out your number. The tile will help the clay number stay in place. You want to avoid moving the numbers before baking as they easily distort once moved.

Step 4

Carefully peel off the stencil.

Step 5

Using a texture sheet, roll out an accent color. I’m using mauve as a base and purple as the accent color. Choose an area of the stencil to create a few strips.

Step 6

Cut off a portion of the pattern, I like the middle section and some of the top portion. I’m going to create thick and thin stripes out of these.

Step 7

Lay strips of texture onto the number and trim off excess. Add some texture to the smooth mauve layer with any texture tool you have. You can even use a balled up piece of aluminum foil or an old toothbrush.

Step 8

Cut out as many numbers as you’d like of your first color.

Step 9

Alternate your color choices for the next numbers, perhaps the opposite of the first number you created. Place and trim stripes onto the number. Press gently together.

Step 10

After adding all the stripes, repeat the background texture.

Step 11

Use two other colors, in this case Teal and Turquoise. Cut using stencil.

Step 12

Create strips using a texture mat. Trim desired sections and repeat as needed.

Step 13

Apply texture to the base layer.


Step 14

Reverse colors, use the darker color for the base this time.

Step 15

Create stripes using the Teal clay. Trim excess.

Step 16

Add the background texture.  Finally, look at your existing house numbers to determine where to place the holes for mounting your new numbers.  Bake all numbers at 275°F for 30 mins, leave on the tiles while baking and cooling.