
Sculpey Soufflé™ and PanPastel Shoulder Duster Earrings
Sculpey Soufflé™ and PanPastel Shoulder Duster Earrings
Designed by syndee holt
Read More
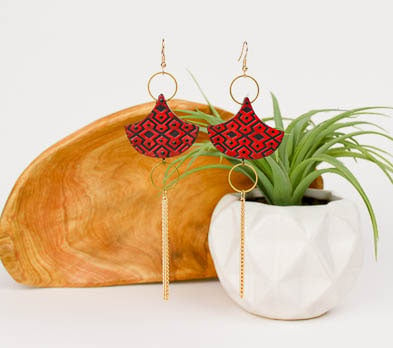
Sculpey Soufflé™ Poppy Seed and PanPastels team up with a favorite Sculpey Tools™ texture sheet and the Geometric Jewelry Mold to create a dramatic pair of earrings. Black Liquid Sculpey® dots and gold metal accents further highlight the drama.
Read Less
ADDITIONAL SUPPLIES
- PanPastel Red (or color of your choice!)
- Sofft Knife No. 2 (Flat) with Cover
- Small Sofft Sponge for glaze
- Large gold-toned metal rings (4)
- 6 mm gold-toned jump rings (2)
- Gold-toned screw eye pins or gold-toned eye pins (2)
- Gold-toned ear wires (2)
- Small(ish) link gold-toned chain (about 12 inches)
- Jewelry pliers
- Needle tool
- Instant glue (optional)

Project Instructions
- Getting Started:
Start with clean hands, unwrap and knead clay until soft and smooth, or condition by running clay though a Pasta Machine. We recommend using a designated machine for clay purposes only. When working with multiple colors, clean hands with soap and water or baby wipes (we have found that baby wipes work best) before switching colors. Shape clay, pressing pieces firmly together. Wash hands after use.
- Baking:
Roll about a ball of the conditioned Poppy Seed clay that is about 1 inch or a little less. Place the ball in your jewelry mold and press it firmly into the mold.

Trim the excess clay from the mold, from the MIDDLE out to each side.
Don’t worry if you have a slightly uneven surface once you have trimmed the excess clay away.
Don’t worry if you have a slightly uneven surface once you have trimmed the excess clay away.

Place your selected texture (I used Diamonds) on the mold and carefully look through the texture sheet to line up mold.
Use your fingers to firmly press the texture onto the clay.
Remove the texture sheet and admire your texture!
NOTE: You *may* have to spray a light spray of water on your texture sheet to prevent it from sticking to the clay surface. I find I usually don’t have to do that with Soufflé clay however. Make sure that you let the moisture completely evaporate before moving on to the next step.

Slide the square sponge on the applicator and lightly swipe is across the Red Pan Pastel.
Gently wipe the pastel across the clay surface, repeating application as necessary to build up the color to the desired depth.
Gently wipe the pastel across the clay surface, repeating application as necessary to build up the color to the desired depth.

I like to gently bend the mold to pop the clay out of the mold. (NOTE: You can also remove the clay from the mold BEFORE applying the PanPastel – I just prefer to do it in the mold so I don’t accidentally damage the perfect shape.)

Look at how the PanPastel defines and highlights the wonderful texture!

Use your needle tool to carefully twist a hole HALFWAY through the edge of the top point of the design. Repeat from the opposite side until the holes meet.

Drill a small hole at the center bottom of the design for the eye pin or screw pin you will be inserting.

Stir the Black Liquid Sculpey (LS) and squeeze a small dot of it on the corner of your mold.
Lightly dip the tip of the black stylus tool into the LS and touch the tip to the pattern to add a black dot. Repeat across the pattern as shown in Step 11 below
Lightly dip the tip of the black stylus tool into the LS and touch the tip to the pattern to add a black dot. Repeat across the pattern as shown in Step 11 below

Here is a look at the earring with all the dots and one without. The LS dots really add to the texture!
NOTE: See the 3 small dots in the corner of my work paper? That is where I dotted to remove excess LS on my tool before adding to the clay.
NOTE: See the 3 small dots in the corner of my work paper? That is where I dotted to remove excess LS on my tool before adding to the clay.

Bake the clay according to the directions in Step 1 above. Once the clay has baked and cooled it is best to seal the PanPastel to the surface. I opted for the Sculpey Satin glaze to give a soft highlight to the upper surface of the texture and contrast with the more matte surface of the untouched Soufflé in the lower parts of the pattern. Allow the glaze to dry before assembling.
I find that these makeup sponges are terrific for applying a small amount of glaze to the upper surfaces of a texture!
I find that these makeup sponges are terrific for applying a small amount of glaze to the upper surfaces of a texture!

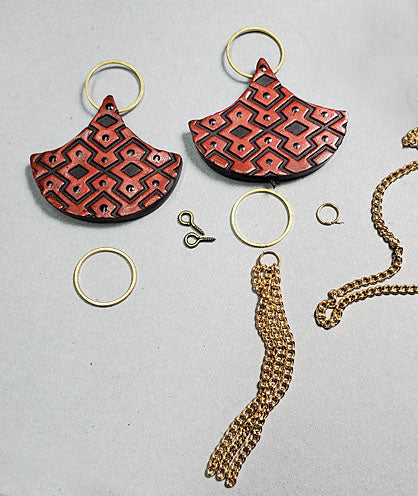
My large metal rings were solid rings, so I gently cut the top two rings with my wire cutters to create a large jump ring that I could slide through the hole at the top.
I threaded my chain onto the smaller jump ring and trimmed to the length I wanted (about 3 inches) and added two more lengths to the jump ring before repeating with the second jump ring.
I put a small drop of instant glue on the threaded eye pin before twisting it into the hole I created before baking. Then I added the jump rings with the chains.
Finally, I added the ear wires to the top circles to complete my earrings. Here is a look at my final assembly.
