

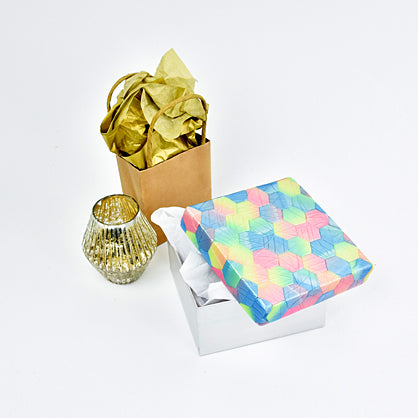
Sculpey Premo™ Shine & Shift Treasure Box
Sculpey Premo™ Shine & Shift Treasure Box
Designed by Amy Koranek
Read More
Read Less
Iridescent Premo in hexagon shapes makes a special box top that shines as the colors shift.
COMPLETION TIME:2 Hours and to make and bake
ADDITIONAL SUPPLIES
- Cardboard or paper mache box with removable lid. My box lid is approximately 5” x 5” x 1”. This is a great way to repurpose or recycle an existing box.
- Pearl acrylic paint
- Paintbrush
- Deli sheet or wax paper or smooth copier paper
Project Instructions
- Getting Started:
Start with clean hands, unwrap and knead clay until soft and smooth, or condition by running clay though a Pasta Machine. We recommend using a designated machine for clay purposes only. When working with multiple colors, clean hands with soap and water or baby wipes (we have found that baby wipes work best) before switching colors. Shape clay, pressing pieces firmly together. Wash hands after use.
- Baking:
Paint the box bottom and lid with the Pearl paint. Use as many coats as you need to finish the box. Allow the paint to dry while we prepare the clay.

For my box lid which measures 5” x 5” x 1”, I needed 2 ounces of each of the Iridescent colors. If your box is smaller you may not need as much clay. You can always make the blended sheet in batches and make more as needed. Sheet each color through the pasta machine on the thickest setting. Each color should be approximately 1/3 the width of the pasta machine rollers.

Overlap the color strips just slightly.

Roll over the overlapping seams with the Acrylic Clay Roller to press them together.

Fold the sheet in half across the stripes matching like color to like color. Press through the pasta machine on the thickest setting. Repeat folding and pressing - always placing the fold through first - until you have created a pretty blend of the stripes. This is a loose variation of the Skinner Blend.

I wanted there to be a purple blend in the sheet so I removed approximately half of the Pink from the right side and hand pressed it to the Blue on the left.

Fold the sheet again matching color to color and press through on the thickest setting. You can fold and press as many times as you like to get the blend that you desire. I like blends that are incomplete because I think it adds more detail especially when using clays that have lots of mica in them. The incomplete blending really highlights the mica trails.

Roll a thin rope of Pearl Premo. Lay the rope diagonally across the blended sheet. Press the rope into place with your fingertips to make sure it stays put.

Fold the sheet across the stripes again and press through the pasta machine on the thickest setting.

Repeat folding and pressing until you are once again happy with the blend. I stopped blending when I had a nice blend of the colors and some of the Pearl worked in.

Use the Needle Tool to drag a network of diagonal lines using shallow pressure across the clay

Press the sheet through the pasta machine on the second thickest setting to smooth out the shallow lines. This will reduce the shallow engraved lines to mica trails.

Use the large Hexagon Mosaic Cutter to cut as many shapes from the clay sheet as possible. It’s pretty easy to line each successive cut up with the last so that you will have very minimal waste. Even the partial pieces around the edges will come in handy later.

Since polymer clay likes to stick to acrylic paint, no adhesive will be necessary. Start in one corner and cover the box lid with the hexagon shapes. I snugged mine together as closely as possible to create a solid sheet. Choose colors randomly from the Hexagons and turn them randomly to mix up the colors and patterns.

Continue covering the top of the lid with as many whole pieces as possible.

Add whole pieces folding them over the edges. Use partial pieces to fill in areas as needed. Trim pieces to make custom fits to the corners.

Here’s a look at my completely covered box lid.

Place a piece of barrier paper over the clay tiles. Use the Acrylic Clay Roller as a brayer over the barrier paper to smooth all the pieces together. Carefully apply pressure to make sure gaps fill in between tiles. Carefully peel the barrier paper away.

Carefully flip the lid over. Trim the clay away from the lid edge with the Super Slicer. Smooth the cut edges with your fingertips.

Flip the box bottom upside down so that the flat bottom is facing up. Place the lid on the flat box bottom. This will create a secure support of the lid while it bakes and will keep the weight of the clay on the lid from sagging. Bake the entire box following the baking instructions for Premo.

When the lid is completely cool, remove it from the box bottom, flip the box bottom right side up and replace the lid. Fill with your favorite treasures.
