

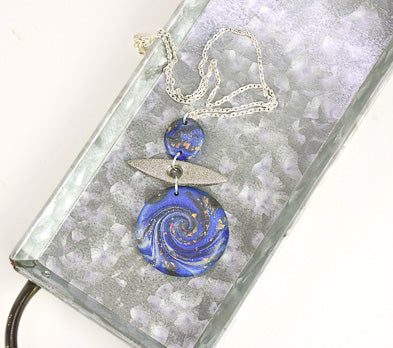
Sculpey Premo™ Indigo Lentil Necklace
Sculpey Premo™ Indigo Lentil Necklace
Designed by Amy Koranek
Read More
The lentil bead design is a really great way to use up scraps of clay. In this tutorial I’m focusing on the Indigo color but you can use any combination of colors that you like.
COMPLETION TIME:
90 Minutes to make, bake, and assemble
Read Less
ADDITIONAL SUPPLIES
- 20” Bright silver tone chain with clasp
- 8 mm Bright silver tone jump ring
- 10 mm Bright silver tone jump rings (2)
- Flat nose pliers
Project Instructions
- Getting Started:
Start with clean hands, unwrap and knead clay until soft and smooth, or condition by running clay though a Pasta Machine. We recommend using a designated machine for clay purposes only. When working with multiple colors, clean hands with soap and water or baby wipes (we have found that baby wipes work best) before switching colors. Shape clay, pressing pieces firmly together. Wash hands after use.
- Baking:
To create a lentil bead you will need to make a marbled bit of clay. You can use your own marbling technique or you can use the instructions here. From 1/4 bar of Indigo Metallic make a thick rope. Make very thin ropes of Pearl, White Gold Glitter, and Graphite Pearl.

Border the thick Indigo rope with the smaller ropes.

Roll and twist the thick log until it’s a thinner rope about 1/4” thick.

Fold the twisted rope in half and then in half again.

Roll the rope one more time to a thick rope about 3/8” thick.

Coil the rope up into a ball. At this point I knew that the amount of clay was going to be too big for the bead, so I trimmed some of it away.

Roll the marbled clay up into a ball.

Make a super thin sheet from Opal with the Acrylic Clay Roller. Make the sheet thin enough that you can kind of see through it. Tear off random bits from the Opal sheet and press them to the side of the clay ball.

Roll the ball to smooth the Opal to the sides of the bead.

Now we will turn the ball shape into a lentil shape. Place the bead under the Lentil Bead Maker. Hold the Lentil Bead Maker level to the work surface. Grasp the Lentil Bead Maker on opposite sides with both hands.

While holding the Lentil Bead Maker with both hands, rotate the tool level with the work surface so that the clay bead is rolling between the work surface and the tool. After a few rotations, the clay bead will take on the shape of a bi-cone bead with points on two sides. If the ball does not form two points, add a little more hand pressure but always keep the tool level and even. If the ball compresses till it has two points but is very skinny, apply less hand pressure.
As you are rotating the tool and the clay bead, always make sure you rotate the tool in the same direction. It doesn’t matter if you rotate clockwise or counter clockwise, but always go the same direction.
Watch the bead as it rotates to see how the spiral pattern is developing. More rotations will create more spirals. Also notice how the sparkles in the both the White Gold Glitter and the Opal follow the pattern of the rotations. This is why when I make lentil beads I always include some of the glitter clays in the color combination.

When the spiral pattern is as developed as you like, slow your rotations down and make smaller circles. As you do, the bi-cone shape will turn into a lentil shape - thicker in the middle and thinner around the outer edge.

Carefully remove the tool from the clay. Smooth the edges of the lentil bead with your fingertips.

From the scrap of marble clay that was left over from Step 7, make a ball that is 5/8” diameter.

Flatten the smaller ball to a little patty that is proportionate to the lentil bead.

Roll White Gold Glitter to a sheet about 1/8” thick. Use the flexible blade to cut a freehand ellipse shape from the sheet of White Gold Glitter. Poke a hole in the center with the Needle Tool. Then gradually make the hole larger with the tool.

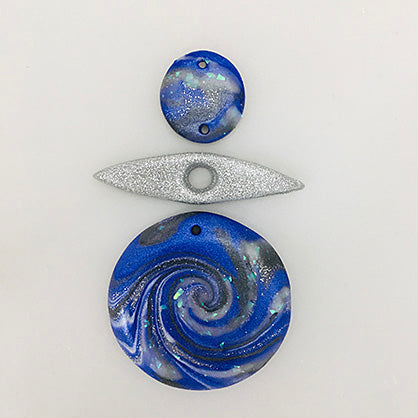
Lay out the pieces to determine how you want the finished project to be assemble. Poke holes in the lentil bead and in the flat patty bead. Make sure the holes are large enough to accommodate the jump rings.
Bake the pieces on the soft baking cushion that is included in the Bead Making Kit. The baking cushion is ideal for pieces that are not quite flat, holding them gently and supporting them without changing the shape. It also keeps the clay from getting a flat shiny spot which can happen when the clay comes into contact with a shiny metal or glass baking sheet. Allow the pieces to cool completely before handling.

Here’s a look at the layout for our baked pieces. The Opal colored areas have a color shifting effect after baking which looks super cool!

Assemble the pendant as shown using flat nose pliers to open and close the jump rings.

- Choosing a selection results in a full page refresh.
- Opens in a new window.