

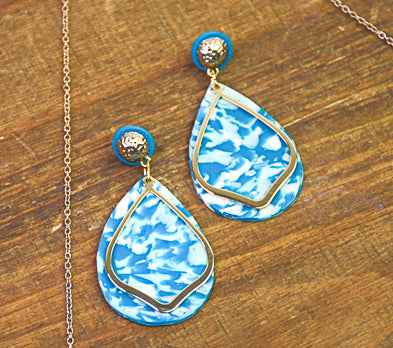
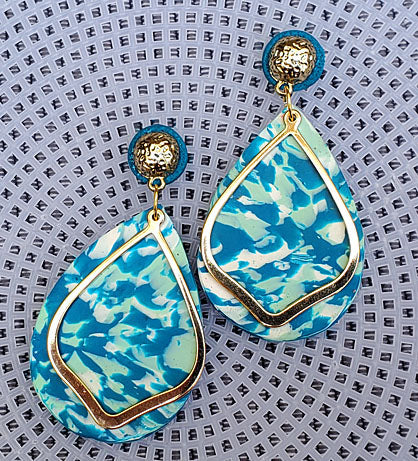
Sculpey Premo™ Terrazzo Marbled Teardrop Earrings
Sculpey Premo™ Terrazzo Marbled Teardrop Earrings
Designed by syndee holt
Read More
Sculpey Premo™ is a perfect clay to combine to classic techniques – terrazzo and marbling. Add a few hints of bling with the gold-toned metal accents as well!
TIME TO COMPLETION: 1 hour including baking and assembling
Read Less
ADDITIONAL SUPPLIES
- Exacto-type blade
- Small smooth tile
- Gold-toned metal accents – mine are also a teardrop shape
- Gold-toned posts – mine are in the popular hammered metal look and I added a small circle of the Premo Teal behind them
- Gold-toned jump rings (2) NOTE: Mine are oval jump rings
- Optional: Instant Glue – I prefer Gorilla glue – to attach the Teal circle of clay to the post back
- Small pieces of paper to work on. I’m using Patty Paper that butchers use between hamburger patties. I can buy the paper at Smart n Final.
Project Instructions
- Getting Started:
Start with clean hands, unwrap and knead clay until soft and smooth, or condition by running clay though a Pasta Machine. We recommend using a designated machine for clay purposes only. When working with multiple colors, clean hands with soap and water or baby wipes (we have found that baby wipes work best) before switching colors. Shape clay, pressing pieces firmly together. Wash hands after use.
- Baking:
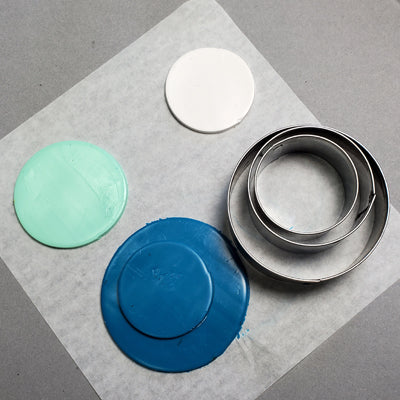
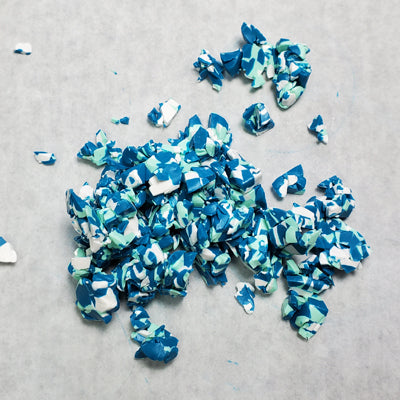
Sheet your clay through the clay conditioning machine (or roll it out with the acrylic roller. I used the Sculpey Nested Circle cutters to give me the ratios of color to show you. I’ve used more of the Teal, about half as much of the Mint and just a little less of the White. (I using roughly 1/4 of a bar of Teal, half of that of Mint and a little more than half of that of White.)
Start chopping sliced off your sheets and chopping them into bits. I like to cut a slice and chop it and then a slice of a different color. I mix the chopped pieces together as I add another color.
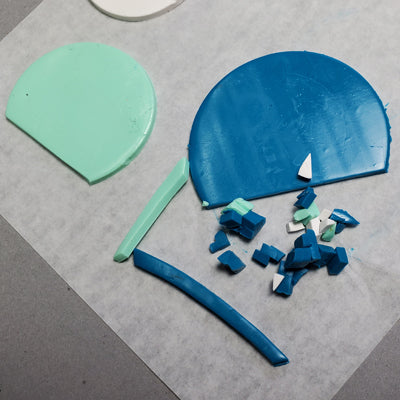
Once all the clays are chopped, press them into a patty and place them on a small sheet of paper.
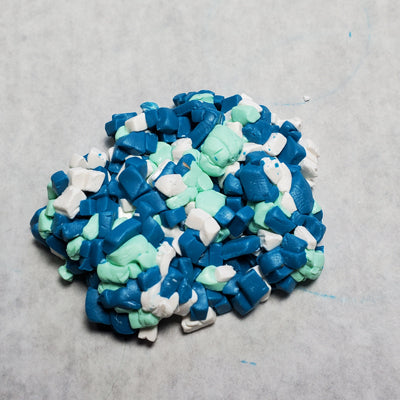
Then I chop it AGAIN to get really fine pieces of color. Press these pieces back into a rough patty.
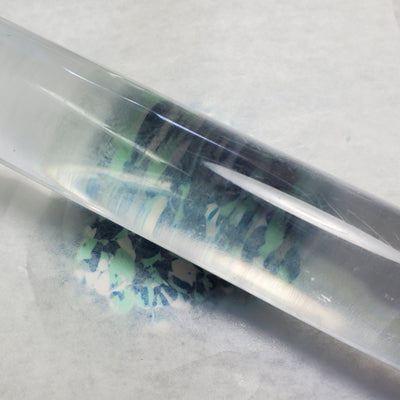
Cover the patty with another sheet of paper and use the acrylic roller to press firmly down on the patty. Do NOT roll it! Just press down, move the roller slightly and press down. Repeat across the patty and then turn it 90 degrees and repeat again. The goal is to make the patty thinner but keep the sharp definition of the chopped pieces.
I have pressed my patty down and now we can see the terrazzo effect the chopped pieces have. But my clay patty is still fairly thick (about 1/4 inch).
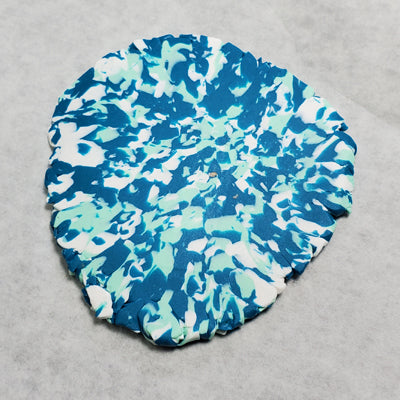
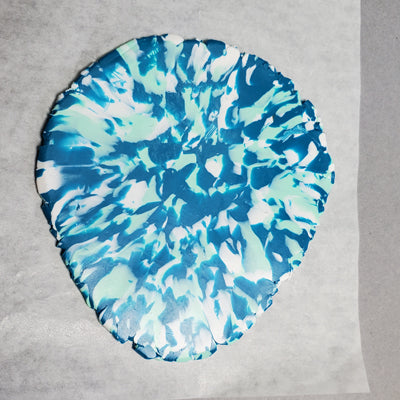
Now I can roll the patty with my acrylic roller to thin it and add some movement to the pieces to create a kind of choppy marbled look. If you are using a Clay Conditioning Machine, you can roll it through there on the wide-open setting, then adjust to a slightly thinner setting and roll again.
Place the sheet of clay on a small smooth tile and press gently onto the tile. Gently place the large teardrop shape in the Jewelry template onto the clay at one edge of the patty.
Use an Exacto blade to cut out the shape.
Repeat for the second shape. NOTE: I find that if I invert the direction of the teardrop, I can easily fit two on this patty!
Use an Exacto blade to cut out the shape.
Repeat for the second shape. NOTE: I find that if I invert the direction of the teardrop, I can easily fit two on this patty!
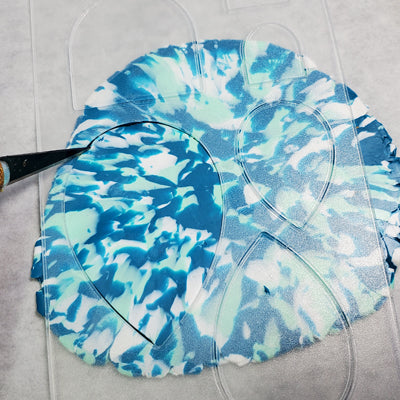
Run your finger gently around the edges of the shapes to smooth them. Then place your metal teardrop detail accents in position on the clay. Use your needle tool from the Clay Tool Starter Set to place holes through the clay at the top of the teardrops. I used the holes in my metal pieces as handy guides for the hole positions!
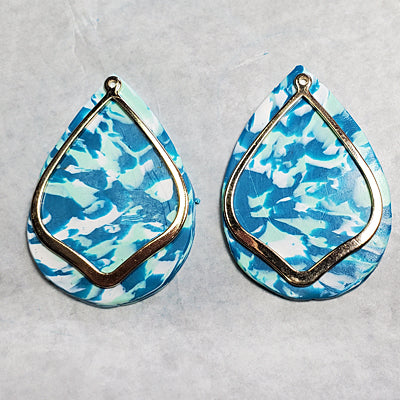
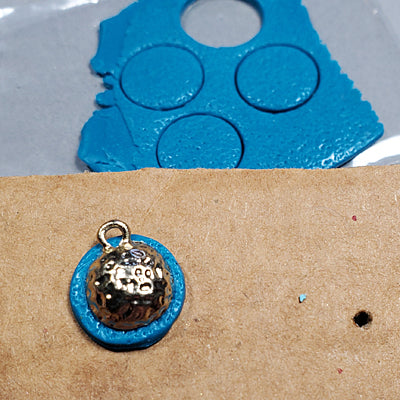
Before I baked the clay, I noticed that I could use a small circle cutter to cut out a circle of clay to mount behind my posts. So I textured the clay with sandpaper, then cut out the circles. I put a hole in the center of them for the post and then baked them along with the teardrops. Having a little color accent like that customizes the look of the store bought posts!
Bake the clay according to the directions in Step 1 above.
Bake the clay according to the directions in Step 1 above.
Once the clay has baked and cooled, I just glued the Teal circles to the back of my gold-toned posts.
I threaded both the metal tear drop and the clay tear drop through my jump ring and attached to my post loop. Done!
I threaded both the metal tear drop and the clay tear drop through my jump ring and attached to my post loop. Done!
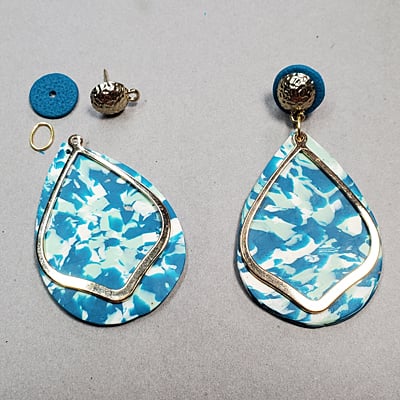
Here is a look at my final earrings.
- Choosing a selection results in a full page refresh.
- Opens in a new window.