Skip to product information
1 of 1

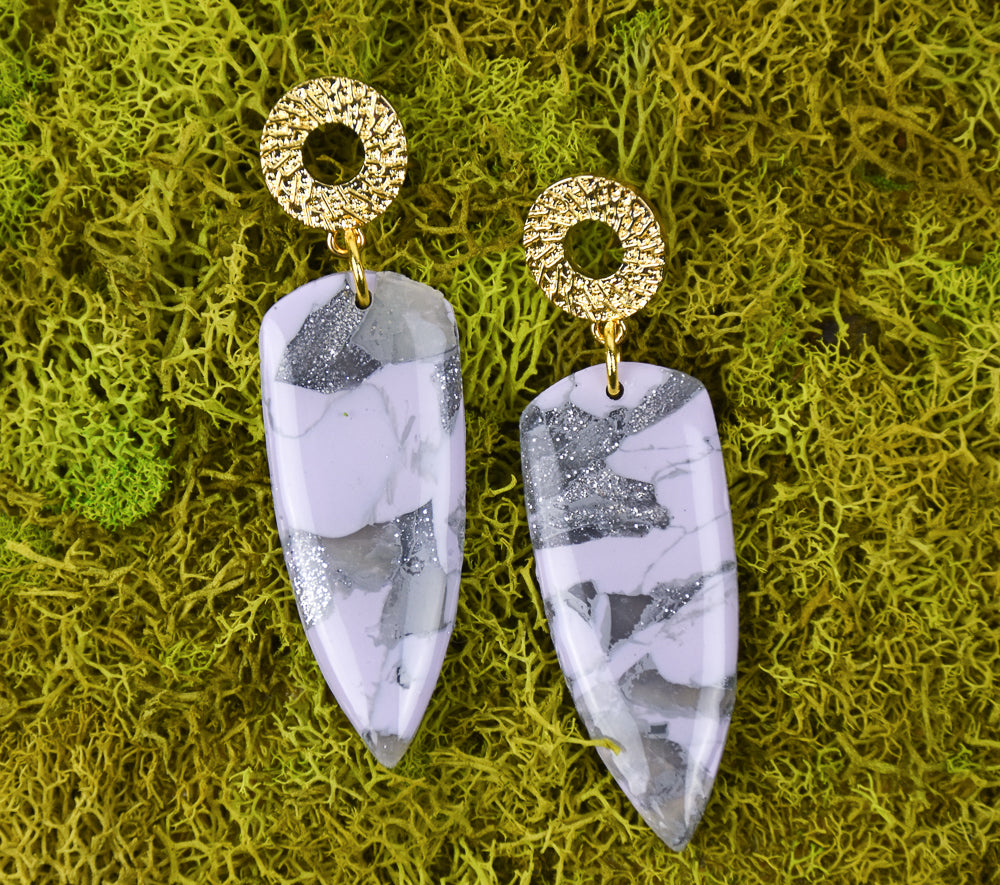
Sculpey Premo™ Smokey Daggers Earrings

Sculpey Premo™ Smokey Daggers Earrings

Read More
Wow! These striking Sculpey Premo™ earrings are not only quick and easy (and fun!) to assemble with a classic faux terrazzo technique, they will be a striking addition to your wardrobe for any time of day. TIME TO COMPLETION: 1 hour to make and bake Designed by Nidhal McMahon
Read Less
ADDITIONAL SUPPLIES
  • Light grey paint
  • Dagger shaped cutter
  • Resin and accessories (optional if not using Gloss Glaze)
  • Paint brush for glaze
  • Fine sand paper (optional)
  • Hand drill and small drill bit (or use a needle tool before baking)
  • Jump rings (2) Silver or Gold – your choice!
  • Fancy posts (2) Silver or Gold – your choice!
View full details
Project Instructions

Step 1

Getting Started with Liquid Sculpey®:
Please make sure your work area is covered and you are not working on an unprotected surface. We recommend working on the Sculpey® Oven Safe Work Mat, wax paper, metal baking sheet, or disposable foil. Uncured Liquid Polymer Clay may damage unprotected furniture or finished surfaces. Be sure to cover your crafting area appropriately. - Stir Liquid Sculpey® completely. Thin with Sculpey® Liquid Clay Softener as needed - Wash hands after use (we have found that baby wipes work best)

Baking:

  • It is important to use oven thermometer when you bake the liquids so that you can ensure your oven is at the correct temperature.
  • Do not microwave the liquids. They must be baked in a Preheated oven at 275 ºF (130 ºC) for liquid colors and 300 ºF (149 ºC) for Clear – Do not exceed baking temperatures.
  • If your piece is less than 1/4” bake for 15 minutes. For thicker pieces that are 1/4” or above bake for 30 minutes.
  • If your liquid project has become yellowed or discolored in the oven, when you remake it, tent it by placing either – folding an index card in half and placing your project under it by using aluminum foil over your project.

Here’s a tip for baking perfectly in silicone molds. Dampen a dish towel with water and wring out as much of the water as you can. Fold the damp towel so that the molds can sit level on top of it. The damp towel will slow down the curing process so that the LS will cure evenly throughout and avoid warping.

Step 2

Condition 1 ounce of Sculpey lavender, ½ ounce of Sculpey white translucent and ½ ounce of Sculpey white gold glitter clay individually.

Step 3

Chop your conditioned clay into small pieces using a tissue blade.

Step 4

Combine all the clay colors into a small pile.

Step 5

Apply a very small amount of light grey paint to the clay pieces (just enough to cover all the pieces).

Step 6

Spread the pieces over your workspace and wait for the paint to completely dry. This could take up to one hour depending on climate, how much paint is used and how well you spread the clay out.

Step 7

Once the paint is dry, bring the clay pieces together using your hands to begin to form a cane. If the clay is too dry, you can use a small amount of Translucent Liquid Sculpey to help form the cane.

Step 8

Keep squeezing and forming the clay until you have a rectangle or round cane that can be cut and no pieces are falling off of the cane.

Step 9

Using a clay blade, cut roughly 1/8” even slices until you have cut through the whole cane.

Step 10

Prepare 2 ounces of Premo Translucent clay as the base for your cane pieces to go on. If using a pasta machine, roll the clay through the machine until you reach level 6. If flattening by hand, roll as thin as possible without tearing.

Step 11

Place your cane pieces onto your translucent base.

Step 12

Use an acrylic roller to combine the slices and even out your slab. You can also run the slab through the pasta machine on the thickest setting after rolling by hand.

Step 13

Use your favorite dagger cutter to cut your slab. I opted for oversized daggers and was able to cut three pairs! NOTE: If not using a hand drill to create your assembly hole after baking, use your needle tool now to create the hole.

Step 14

Place your daggers onto your baking tile and bake according to the directions in Step 1 above. Remove, cool, and sand for a beautiful edge. Apply Liquid Sculpey clear glass or opt for a resin topcoat for a dramatic high-gloss effect. Note: if using resin, please take all necessary precautions that are required to work with resin and wear PPE.

Step 15

Drill one hole at the top of each dagger and use two jump rings and two posts of your choice to complete the look!

Step 16

Here are the completed oversized smokey daggers!