
Sculpey III® Cactus Sponge Holder
Sculpey III® Cactus Sponge Holder
Designed by Amy Koranek
Read More
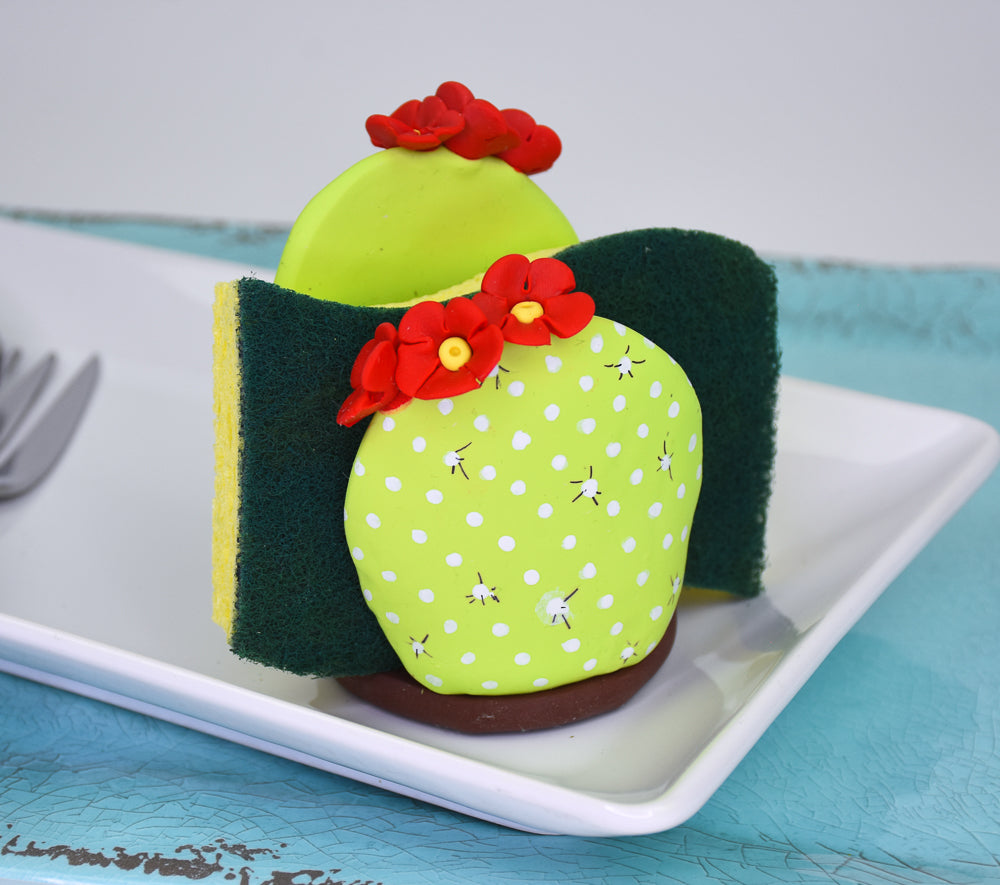
Make a cute little sink side rest for your sponge. Oven bake clays are naturally water resistant, but do wring out your sponge as much as possible before storing it in the cactus.COMPLETION TIME:
60 Minutes to make, bake and decorate - some drying time will be needed for the painted decorations
Read Less
ADDITIONAL SUPPLIES
- Toothpicks (4)
- White paint marker
- Fine line permanent black marker
- Deep soup bowl for baking support
- Paper towel
Project Instructions
- Getting Started:
Start with clean hands, unwrap and knead clay until soft and smooth, or condition by running clay though a Pasta Machine. We recommend using a designated machine for clay purposes only. When working with multiple colors, clean hands with soap and water or baby wipes (we have found that baby wipes work best) before switching colors. Shape clay, pressing pieces firmly together. Wash hands after use.
- Baking (also called Curing):
Condition each bar of Spring Green until soft. Make two large balls. If you want the cacti to be different sizes you can add some clay to one of the balls from the other
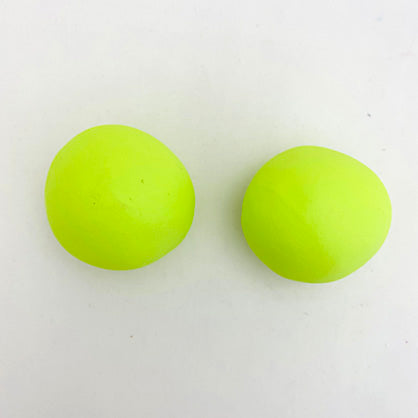
Flatten each ball into a large oval. I made them different shapes so one can be seen from behind the other when they are standing on the base. Flatten them to the work surface and smooth the edges so they are slightly thicker in the middle.

For supports you will need four toothpicks.

Hold your palm on top of one of the cactus holding it flat to the work surface and carefully slide a toothpick up into the body of the cactus leaving only 1/4” of the toothpick exposed.
Put a second toothpick in.
Repeat by sliding two toothpicks into the second cactus likewise.
Put a second toothpick in.
Repeat by sliding two toothpicks into the second cactus likewise.

Use 3/4 of the bar of Chocolate Sculpey III to form a domed base.

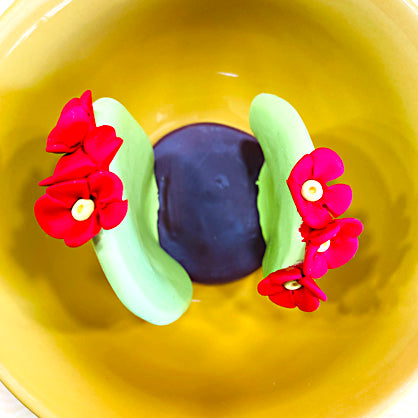
Position the cacti. Flat sides facing toward the middle, with the toothpicks going into the brown base. This is the view from the top.
Gently curve the cacti to take the shape of the base.
Gently curve the cacti to take the shape of the base.

Here’s the view from the side.

Flatten little bits of Red Hot Red into circles about the size of a dime.

Use a Needle Tool to push scallops in around the edges to create flower shapes.

Use the Ball Tool to push the flowers into connection along the top edge of the cacti making the petals bend at the same time.

Once all the flowers are positioned, add little bits of Lemonade to the centers and poke a hole in the middle of each with the Blunt Point.

Carefully set the sculpture into the bottom of a deep soup bowl. You can support the sides of the cacti with soft wads of paper towel.
Bake in the bowl following the baking instructions for Sculpey III.
Allow to cool completely before removing from the bowl.
Bake in the bowl following the baking instructions for Sculpey III.
Allow to cool completely before removing from the bowl.
Add white paint marker spots to the cacti. I have balanced my cacti on a soft pad to support it while I add the dots.

Allow the paint to dry and then add fine prickly lines with fine line black permanent marker.
