
Hello there, my name is Melissa Piddington and I’m here to talk all things clay slabs! One of my favourite things to do with polymer clay because the possibilities are endless and there really is no right or wrong way to do it, so as long as you have a little bit of imagination and some polymer clay at your disposal your always in for a good time making a slab.
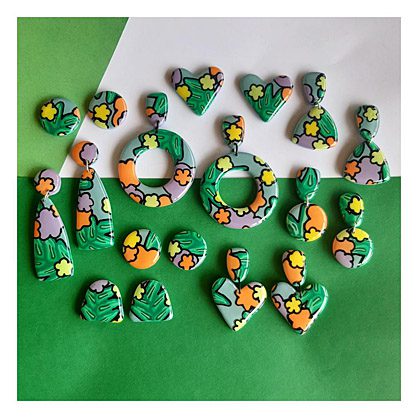
So, let’s get started, polymer clay slabs have about 101 uses, literally, you can make earrings, necklaces, mug covers, pen covers, trinket bowls, photo frames and the list goes on, so many wonderful things can be made with a slab of thought out and decorated clay.
Once you have decided you want to make something out of a polymer clay slab the next step is usually designing it, I mean there are plenty of people out there with a natural talent for design and they just wing it and it ALWAYS seems to turn out amazing. I however am not one of these people and if you aren’t too there are several drawing and painting apps that you can get on your phone or tablet device and draw up some designs and play with colour schemes before you get into making to avoid disasters because it is very hard to remove a colour or take off an element once you have actually placed it down on a slab.
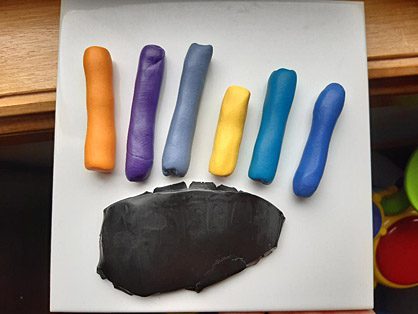
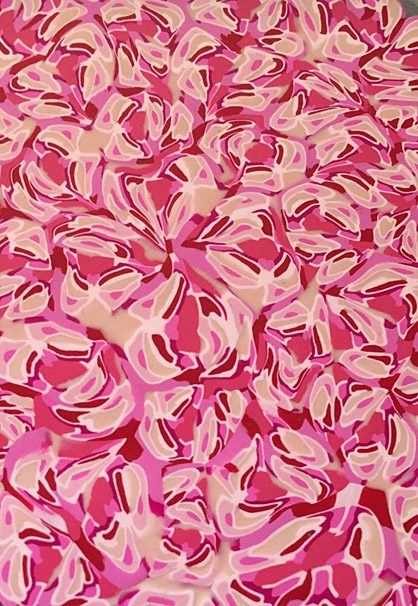
When I am planning out a slab the first thing, I do is pick out my colours, anywhere from 2 to 20 colours, something about having the colour palette laid out in front of me helps me decide what sort of pattern or design I want to create. Then when it comes to designing the possibilities are again endless, you can go all flowy and smooth lines, clear cut shapes, floral, abstract, you could pick a theme like under the sea or floral. Slab creating is one of the best creative outlets because you aren’t tied into any restraints, pretty much anything is possible.

Now no matter how amazing your slab looks it will end up imperfect if you do not condition your base correctly. It’s a relatively simple thing to do, roll, fold and repeat a few times and then pass it through either a pasta machine or a clay machine around 15 to 20 times to get that perfectly blended base air bubble free. We most certainly do not want any air bubbles making their way to the surface while you have your work baking in the oven and then end up with holes in it. When it comes to the base colour you have a few options, you can use just one plain colour that you like, you can mix a new colour, you can do a marbled effect with the clay as you mix it and roll it our before it becomes a new colour, you can also cut parts of a cane and mesh them together and roll out for a slab base. Now I personally have never mixed brands of polymer clay when making a base, but I have mixed all of the Sculpey varieties with one another except for Sculpey III, and they have all turned out strong and sturdy.
A few tips and tricks when rolling out your final base for the slab!
- Invest in some depth guides, they are sold by a few different online retailers and they are like two thick rulers, use these on each side of your clay under your roller to get a consistent thickness the whole way through your work. Then continue to use the depth guides to roll over the layers of patterns that you put on top of your slab.
- If you are using your slab for a project that doesn’t need your clay to be thick, like if you are wrapping a mug or a pen you can also just use the pasta or clay machine and roll out the clay evenly on one setting that you are happy with the thickness of, however using this method I would be very cautious of rolling it through a machine after you have put some layers on top of the slab, depending on which way you put your slab through the machine your patterns may end up distorted and not the way in which you intended them to look.
- I also highly recommend rolling out your final slab on some brown baking paper, it is easier to work with than the normal white baking paper and it ensures none of your hard work will get stuck on the surface you are working on.
- Get some cotton tips and rubbing alcohol to easily rub away any little bits of lint or unwanted specs of dust from your slab before you continue on with your design, because you never know what is going to pop out at the end while your sanding your final piece.
- And lastly, I prefer to chop off any of the edge parts of the clay that are not quite right so I don’t accidentally put the pattern there and then try to use it for my final pieces only to have them crumble or break.

Now remember there is no right or wrong way to go about layering your slab with your design to get the final artwork, its just about being colour and shape smart. For example it would be unwise to want your final pattern to have bold triangles as a primitive feature and then go and put your triangles down first them put other shapes on top of them, because by the end you may not even be able to tell that there is triangles under there. Its like imagining your design and then pulling it apart layer by layer, you have a background scene to set then depending how many elements you want you could have another 2 to 10 layers on top of that back ground and you just need to think carefully about the effects of the clay squishing and spreading as you flatten it out between each layer.

I have fallen victim one too many times to wanting nice crisp lines through my slab design and putting too many elements on top of them that they became big fat crinkled lines, so just be aware of how clay layers and moves. All of this comes with practise, so another suggestion would be to only make some small slabs in the beginning, like only 5cmx5cm slabs and try putting on a bunch of elements and try different thicknesses of the elements etc. and see how you go? I would love to see some of these so feel free to tag #HowDoYouSculpey and show some of them off and what you have learnt through the process.
Once you have created your masterpiece slab, I would get out the cotton tips and rubbing alcohol again and just go over any lint and dust that will have no doubt made its way back onto the slab because its everywhere. By doing this step you are eliminating a lot of the after-bake job of having to sand off imperfections, and it is definitely a lot easier to fix this way then sanding afterwards. Depending on what you are making the slab for will determine the next steps you follow with the slab, I personally have only done the jewellery side of things and a few trinket dishes. So I shall offer up my advice and what I have learnt from a few different techniques with these.


When it comes to cutting shapes out of a slab for earrings, the metal cutters are very efficient and easy to use, they do all leave a slight dimple on one side but it is super easy to smooth out, there is also quite a large range of small business’s that custom design and 3D print shape cutters out there now and they are all pretty great to use as well. If you cover your slab with cling wrap evenly and then cut the slab you end up with this very nice dome edged shape that is quite appealing rather than a flat edge, but all of that comes down to preference and the look you are wanting to portray. When using slab work to create tube necklaces or beads, it is best to work with a thinner slab and put a filler clay (aka the brown blob you made trying to mix a cool new colour) in the middle of the beads or tube, that way your not loosing any of your pattern you have worked hard on and then the pattern is less likely to be stretched and mashed the wrong way.
I hope this little snippet into making a slab of polymer clay has been helpful and should you have any questions on anything I have mentioned feel free to shoot me a message on Instagram at @Lalalissy and I will do my best to help you out. Lastly, I hope you all have heaps of fun slab making and tag away #HowDoYouSculpey so that I can see!!
See you later, Melissa Piddington
