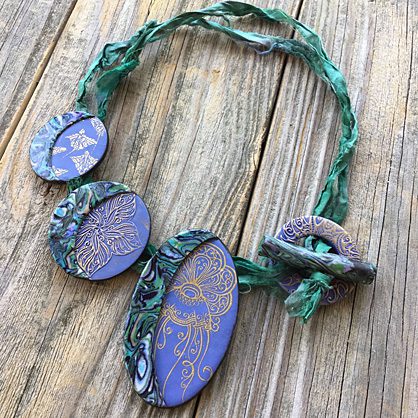
Back when I first began working with clay, I had no idea about the true possibilities it had. When I began to discover them, it was honestly overwhelming. Start where you are comfortable – with a simple project, and let your creative muse free to spread their wings and fly. Experiment. Don’t be afraid of mistakes. We all make what we perceive as mistakes and grow from them. And, honestly, there really are no mistakes in art… at least not in my book.
There are many wonderful resources out there for working with polymer clay. A quick internet search will bring you tons of free tutorial videos, blogs, and websites, full of free advice and ideas. Facebook brings you even more groups and pages to find inspiration, ask for advice, and share your own projects, and meet like-minded friends all over the world.
A little advice I would share –
Start with good quality clay. I made the mistake of trying off brand clays trying to save money. Thinking that I could buy so many more colors if I bought the less expensive option! Could it really matter? The answer is YES. A loud and assertive YES. I made jewelry – I was so excited! It broke easily and my heart broke along with it. My chosen brands now are Sculpey Premo™ and Sculpey® Soufflé. They are just my preference and are readily available here in the US. They give me great results every time, and the quality of the clay is consistent. There are other professional level brands out there too that many clayers prefer of course. But my advice would be to avoid the super “inexpensive” options you can order in sets online, or find in some craft stores. On the other hand, those less expensive options may be a good place for some to begin experimenting. There’s no real “wrong” option – but my tip is buy quality clay. You won’t be sorry.
Don’t feel like you need EVERY color right at the start! It’s so tempting. Especially for a supply “collector” (ahem… hoarder) like me. I want it ALL. And I want it NOW. But you don’t need it ALL. Begin with black, white, translucent/white translucent, and some basic colors that catch your eye. You can blend clays to make new colors, or use endless mediums to add color to the surface of your clay.
Want to use acrylic paints with your clay? Same basic advice – buy quality. Less colors that you can blend to make more colors, are better than bottles and bottles of acrylics with higher water contents. They just don’t silkscreen as well, don’t give you great coverage, etc.
Texture is your friend. Adding texture can bring your work to a whole other “level” quite literally. There are lots of incredible texture sheets and plates available in the creative market.

But, you can also find materials to add texture almost anywhere… items from nature, things around the house, soles of shoes, things in your kitchen. Think outside the box.
Silkscreens are a wonderful way to add pattern to your clay. But you can also hand paint a pattern, use rubber stamps (which are also great for texturing!), or use image transfers.

Cutters are fantastic. Some prefer metal cutters for always sharp cuts. Some prefer 3-d printed cutters for the vast variety now available. If you go with the second option, I recommend purchasing a single cutter or set first to see if your manufacturer has sharp edged printed cutters as not all do. Splurging on tons of sets only to discover they are awkward to use is a huge disappointment. There are also lots of templates out there for cutting shapes in your clay – they are also a great option if you have limited storage space!

Molds can be useful, especially for use with liquid clays, but my advice would be to stick with basic shapes, or shapes you can use and adapt in many ways. While that unique octopus wearing eyeglasses mold you just found might be nifty, do you really think you’ll make projects using that same octopus over and over?

Sculpting tools are a great addition to your tool kit. Start with some basic tools that will do multiple things.

Always credit the original artist. Learning new techniques and creating your own designs using those techniques is wonderful, of course! Have a favorite artist who made a specific project you just had to recreate for yourself? Great! But taking credit for discovering that technique, or the design you “copied,” is not okay.
Always bake your clay according to the manufacturer instructions. Invest in an oven thermometer to ensure your oven is running at an accurate temp. I bake everything tented with foil.
There are many options for finishing your pieces. Polymer clay be sanded and buffed and the results are breathtaking. However, I am honestly a failure at that procedure. I defer to a layer of clear Sculpey® Liquid Clay to add gloss, or polymer safe finishes you can brush or spray on in matte, satin or gloss finishes. Resin is another great option. If you search the internet, you’ll find information on which finishes are recommended and which are NOT. If you are new to polymer clay, ALWAYS search before you apply ANY finish to your clay. I learned that one the hard way too… and ended up with finish that remains tacky to this day. NEVER be afraid to share your art. I have always told my students at every workshop I have ever taught – there is no WRONG in art. There are only ways to do things differently. Your art is worthy of sharing. Want advice on ways to change it? Ask! People will be happy to share their advice. Share your art on social media and don’t forget to tag #HowDoYouSculpey

