Jewelry has a long history going back. Archeologists have discovered jewelry from ancient times that gives a glimpse into people’s daily life and their beliefs. When I look at my wedding ring, I wonder what would happen if someone discovered my ring in the future. What does it tell me about my lifestyle or beliefs?
When I teach in my classroom, I try to incorporate my passion for jewelry to my students. I not only talk about my clay jewelry business, but I try to incorporate the learning into lessons in unique, novel ways through jewelry making.
One specific lesson I use is my Latin Agnomen (nickname) lesson. My fifth-grade gifted and talented students study Latin and life in ancient Rome. From researching about Ancient Rome, I learned about how Romans would receive their nicknames, also known as agnomens. One activity I use to introduce students to the Latin Dictionary is having students create a Latin agnomen (nickname). Students use their accomplishments or hobbies to come up with a new Latin nickname using the Latin Dictionary. After students select their name and locate the root, they create either a bulla or lunula. The bulla or lunula was an amulet that Roman children would receive after they were born and wear throughout their childhood. I like to have students create their own bulla using either Sculpey Premo™ or Sculpey Soufflé if I have access to an oven. If I don’t have access to an oven, I use Sculpey Air-Dry™ Clay to create a pendant.
#1 step is Organize, Organize, Organize
One of my biggest goals is to make my classroom student independent without wasting time. I want my students to be self-directed in their learning. The first step to this is figure out how you want to organize your supplies. Are you going to have this as a station in your room or are you going to have the whole classroom complete the work synchronously?
One way I have found to help organize and save time on cleanup is to have plastic shoeboxes filled with the supplies. My classroom has 6 tables, so I use six plastic shoeboxes to store my supplies. Some of the supplies I include are rollers, shape cutters, tiny paintbrushes, condiment containers with paint, toothpicks, and any other supplies I might have to use.

I work with over 150 scholars weekly from 3 different grade levels from six different schools, so I needed a fool-proof method on how to store projects. I have found the paper plate method to be the most efficient. If I was just using Sculpey Air Dry Clay, I give each one of my students a paper plate and have my students write their name and class on the plate. Their work is then stored on top of my bookshelves. Then when my students come back to their work dried, it makes it easier to pass out because their name is clearly written.
Now this year, I’m working with Sculpey Premo™ or Sculpey Soufflé that needs to be baked, I’m still going to use the paper plate method to store, but I’m also going to have the students to write their name with a permanent marker on a piece of parchment paper. I will then transport the parchment paper to my cookie pan and bake. Once the pieces have been baked, I will transport back to the paper plate for storing in the classroom to make it easier to pass out.
#2 Give students history
I was always a nerd growing up because I wanted to know who invented a product and its history. Unfortunately, I did not have internet and my Dad would appease my curiosity with “Sir Isaac ____ invented it. This never sit well with me because my quest for knowledge was unwavering. Nowadays, my smart phone answers the burning questions. I always include in some history about whatever I’m teaching. Sharing my curiosity with my students, models life-long learning for students and provides great opportunities for unanswered questions. The Sculpey brand has a great origin story of being of failure at first to then be turned into a beloved brand by crafters around the world through a grassroots effort. (If you want to learn more about Sculpey’s history, check out this page).
#3 Step Condition that Clay
Conditioning clay is a critical step in preparing it for sculpting or molding. I share this guide with my students.
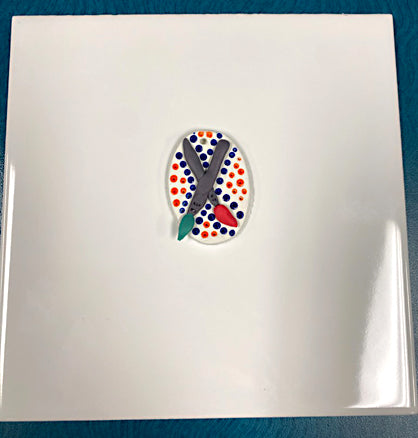
- Prepare your work area by making sure your surface is clean and non-porous surface. I like to have a class set of ceramic tiles that students can work on.
- Cut a manageable piece from the larger clay block. Knead it in your hands to warm it up slightly.
- Roll the clay using a roller to flatten the clay into a thick slab. Fold and roll it again to begin the conditioning process. This repeated process helps homogenize the clay, making it more pliable and removing air bubbles.
- Knead it real good. Fold, press, and knead the clay repeatedly. This helps distributes moisture and ensures uniform consistence. If the clay is too dry, it might crumble, so you can add a bit of clay softeners to adjust its moisture content.
- Check for consistence: The clay should be smooth, supple, and free of lumps or air bubbles. Continue kneading until it reaches a workable consistency.
#4 Step Model different ways
Most students in your classroom have probably very little experience with clay. Model, model, model how students can use different techniques with clay.
Mixing colors
I like to demonstrate how to mix colors. Mixing clay to create colors is similar to mixing paints, but it involves blending various clay colors together.
To start off I begin with primary colors of clay: red, yellow, and blue. These colors can be mixed together to create secondary colors of orange, green, and purple.
I demonstrate to students how to adjust hues and shades of the clay. To darken a color, add a bit of black or a darker shade of the same color. To lighten a color, add a bit of white clay or a lighter shade of the same color.

Shape the Jewelry Piece
Once students have a color they like, have your students to shape the jewelry. Students can choose if they would like to shape their jewelry piece with their hands or use clay cutters to help shape their piece. I like to start with pendants because it’s one focused piece and it can be various sizes.

Design your Jewelry Piece
One of the best tools in the classroom to use in clay jewelry making is toothpicks. Toothpicks are cheap and have multi-use. Instruct the students to use the pointed tip of the toothpick to refine details or make patterns on the clay. You can create different textures by pressing or dragging the toothpick across the clay.
Rolling clay to create designs can be done in several ways depending on the type of design you want to achieve. Textured rollers are special are specialized rollers with patterns on them. By rolling them over the clay, you can create intricate designs and textures. The classroom is full of different items that create intricate textures. Using leaves, fabric, or even building brings creates interesting patterns and designs.
Hand rolling method involves using your hands to create coils or ropes of clay and then pressing them onto a surface to form designs or shapes. This can be great for making patterns or adding details to your clay work.
Don’t forget to Poke a Hole
Make sure to Highlight the need to put a whole in their piece prior to baking. Normally, I drill a hole in the polymer clay using a drill and appropriate ventilation. In the classroom, I don’t have the availability of supplies to protect students from dust from drilling so I have the students carefully insert the toothpick into the lay to create the hole. Ensure the toothpick is larger than the desired size of the hole as polymer clay tends to shrink slightly when baked.
Baking
My classroom does not have an oven to bake the clay pieces, but we do have an oven and toaster oven in our teacher’s lounge. I try to bake during my conference time. I follow the manufacturer’s instructions for baking temperature and time based. Generally, polymer clays bake at low temperatures for about 30 minutes per 1/4 inch thickness. Be careful not to overbake because it will cause the clay to darken or become brittle.
#5 Let the Creative Play Time Start
One thing that I make sure to do in my classroom, is allow time for play. After I introduce a new skill, I want my students to have time to explore and be kids. As educators, we know expectations from the state or our district are pouring on to us and school is losing the freedom to allow kids to be kids. I want my students to feel safe to explore ideas and play in novel activities. I usually only give about 10 minutes of play before the work needs to get done.
#6 Set a plan and Get it done
One motto in my gifted classroom is “you may be here all day, but you don’t have all day.” I always have students draw out their ideas before getting started on their final product. Having a plan in place, helps students focus on what they want to achieve. I set a time for planning time and then I set a timer for students to work on their jewelry piece.

How can you extend this experience for students?
Clay jewelry offers numerous benefits for students across all ages and subjects.
Clay engages multiple senses, which helps students engage. Clay encourages creativity and imagination. It allows students to explore and express themselves artistically. Clay helps with fine motor skill development. Kneading, pinching, rolling, and sculpting help improve dexterity and strengthen hand muscles. Working with clay requires planning and making decisions. Students use visualization in clay work and helps them problem solve when issues arise. Clay helps cognitive development by promoting spatial awareness and art elements. Clay is therapeutic, allowing students to express emotions non-verbally. Clay can be used in all subjects. For instance, it can be used history to replicate artifacts and in math class to compare volumes and surface areas of different 3-D shapes. Clay requires patience and perseverance. The clay process takes time and is not an instant gratification. Students learn that creating something from clay takes time and effort. Group projects involving clay can promote teamwork and collaboration. Students work together, share ideas, and contribute to a collective art structure.
As educators we are creating memories for our students. Allowing students to explore novel activities like clay jewelry making will build a lasting memory of school. Happy creating!
Blog written by Alyssa Dunnahoo