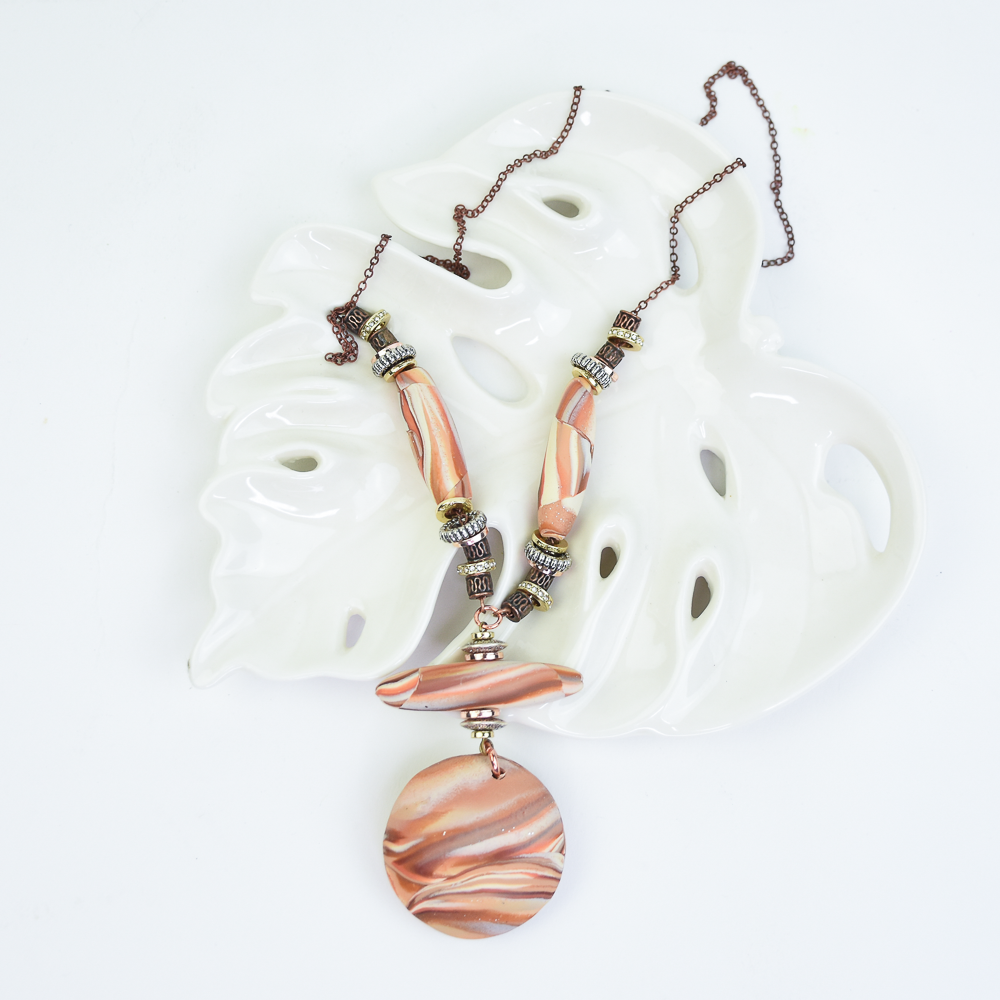
Sculpey Premo™ & Sculpey Soufflé™ - Hollow & Tube Bead Necklace
Sculpey Premo™ & Sculpey Soufflé™ - Hollow & Tube Bead Necklace
Read More
Take your clay marbling technique to another level with this gorgeous project that combines colors and shapes.
COMPLETION TIME:
105 Minutes to make, bake (twice), and assemble
Created by Amy Koranek
Read Less
ADDITIONAL SUPPLIES
- 26” Rose Gold tone very fine chain - the chain should be thin enough to string the various beads directly onto it
- Wire cutters
- 1” or 2” Eye pin
- Flat round donut spacer beads in mixed metal colors in various sizes (12)
- Lentil shaped spacer beads in mixed metal colors (2)
- 4 mm Jump rings (2)
- 6 mm Jump rings (2)
- Metal barrel shaped beads (8)
- Round flat textured spacer beads in mixed metal colors (4)
- Round flat crystal edged spacer beads in metal colors (4)
- Round nose pliers
- Flat nose pliers
- Dremel drill or pin drill or spring drill

Project Instructions
Step 1
Step 2

Step 3

Step 4

Step 5

Step 6

Step 7

Step 8

Step 9

Step 10

Step 11

Step 12

Step 13

Step 14

Step 15

Step 16

Step 17

Step 18

Step 19

Step 20

Step 21

Step 22

Step 23

Step 24

Step 25

Step 26

Step 27

Step 28

Step 29

Step 30

Step 31

Step 32

Step 33
