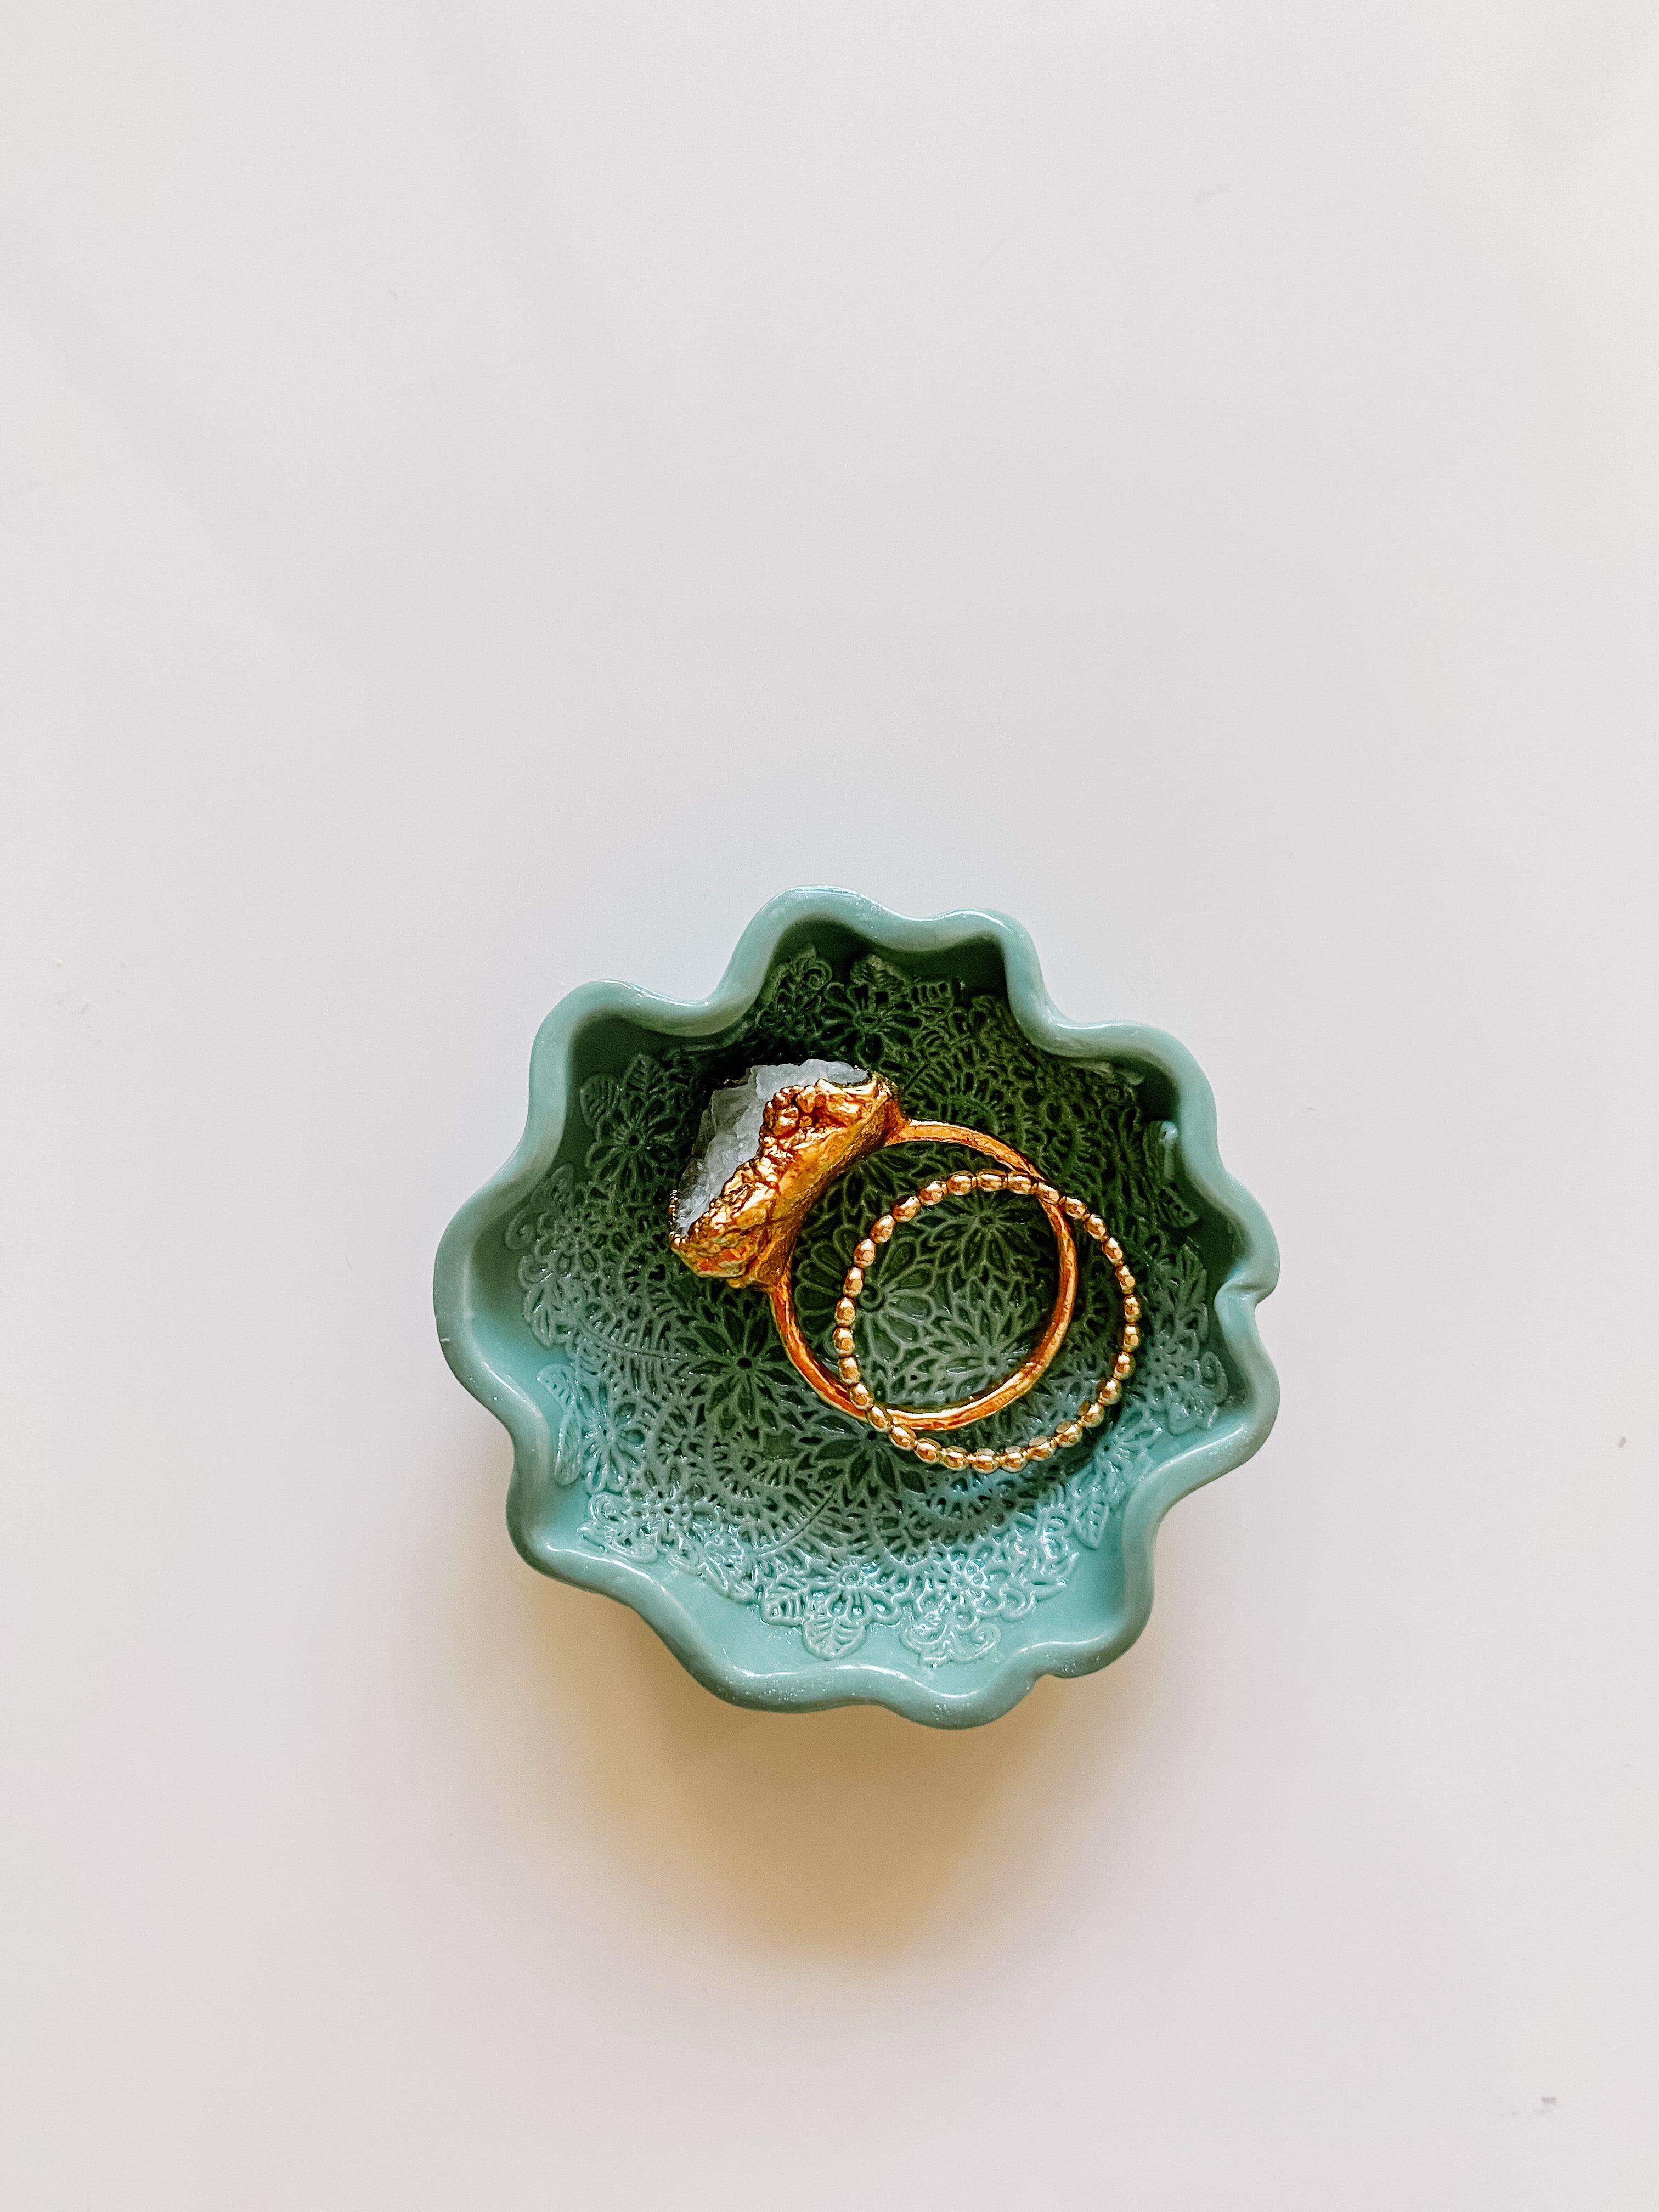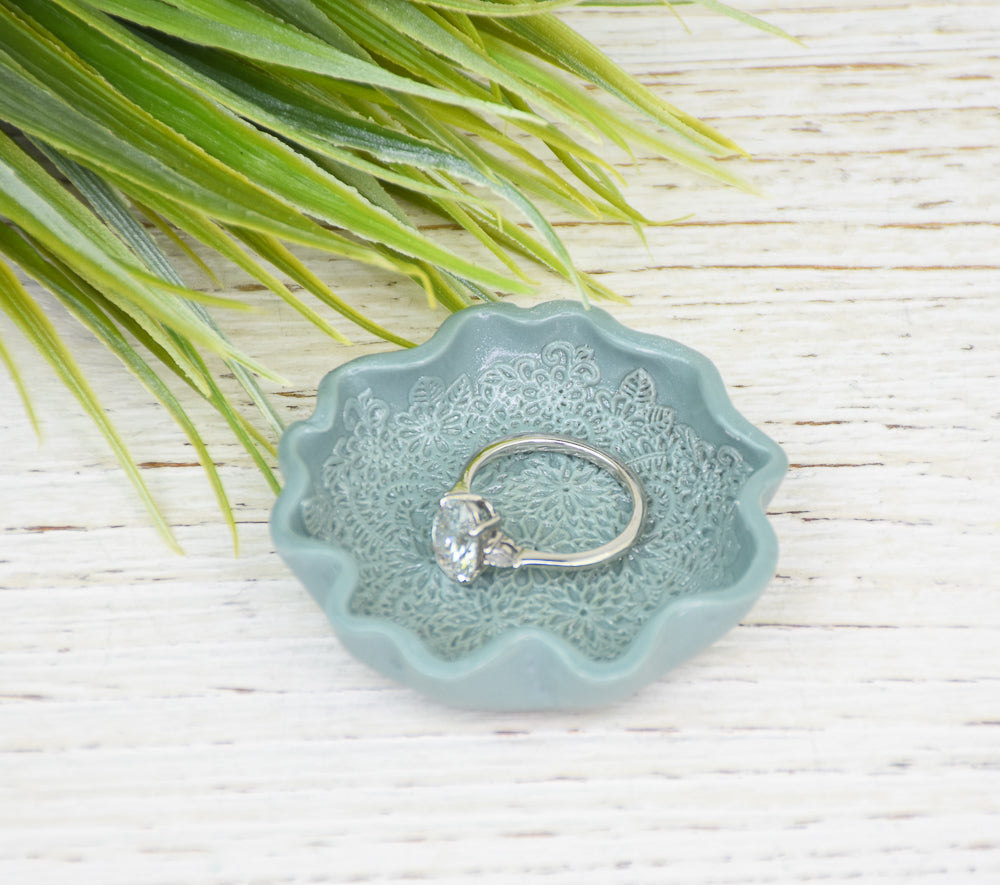
Sculpey Premo™ Coastal Pearl Trinket Dish
Sculpey Premo™ Coastal Pearl Trinket Dish
Read More
Create this beautiful and useful dish to hold your favorite rings using the lovely, calming Premo Coastal Pearl. These make excellent gifts as well!
TIME TO COMPLETION:
30 minutes to make, 30 minutes to bake
Designed by
Read Less
ADDITIONAL SUPPLIES
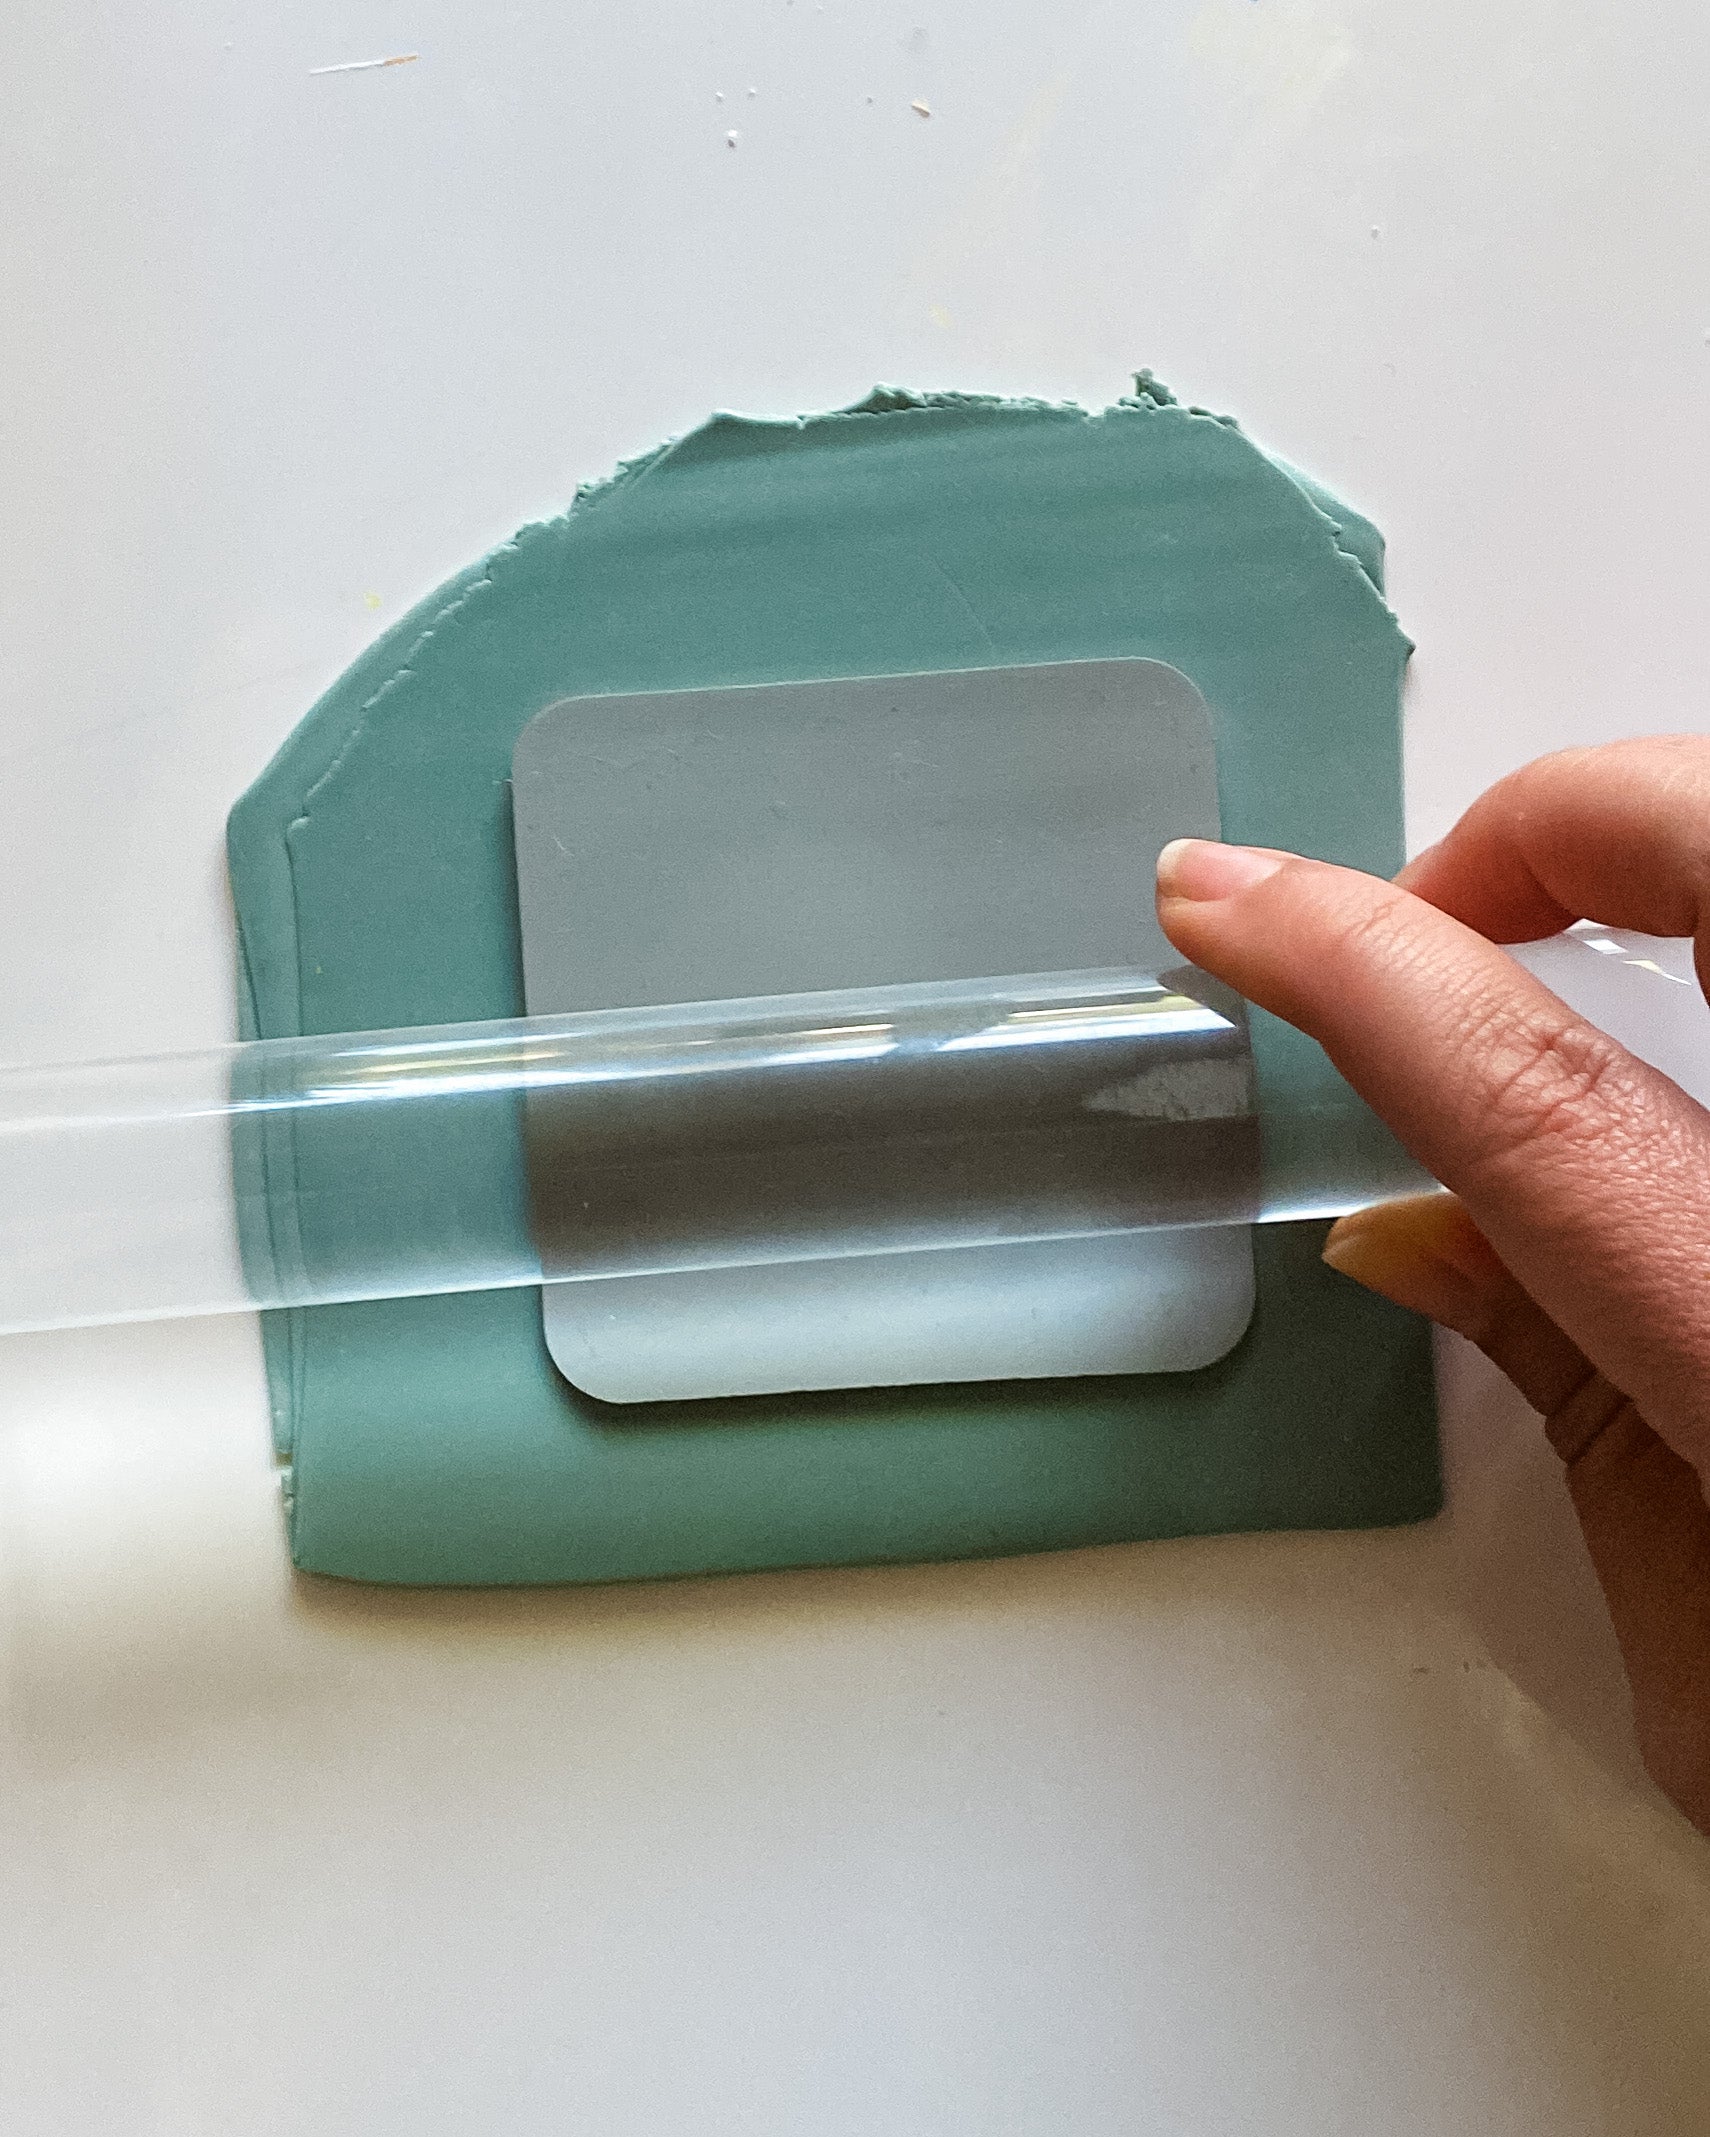
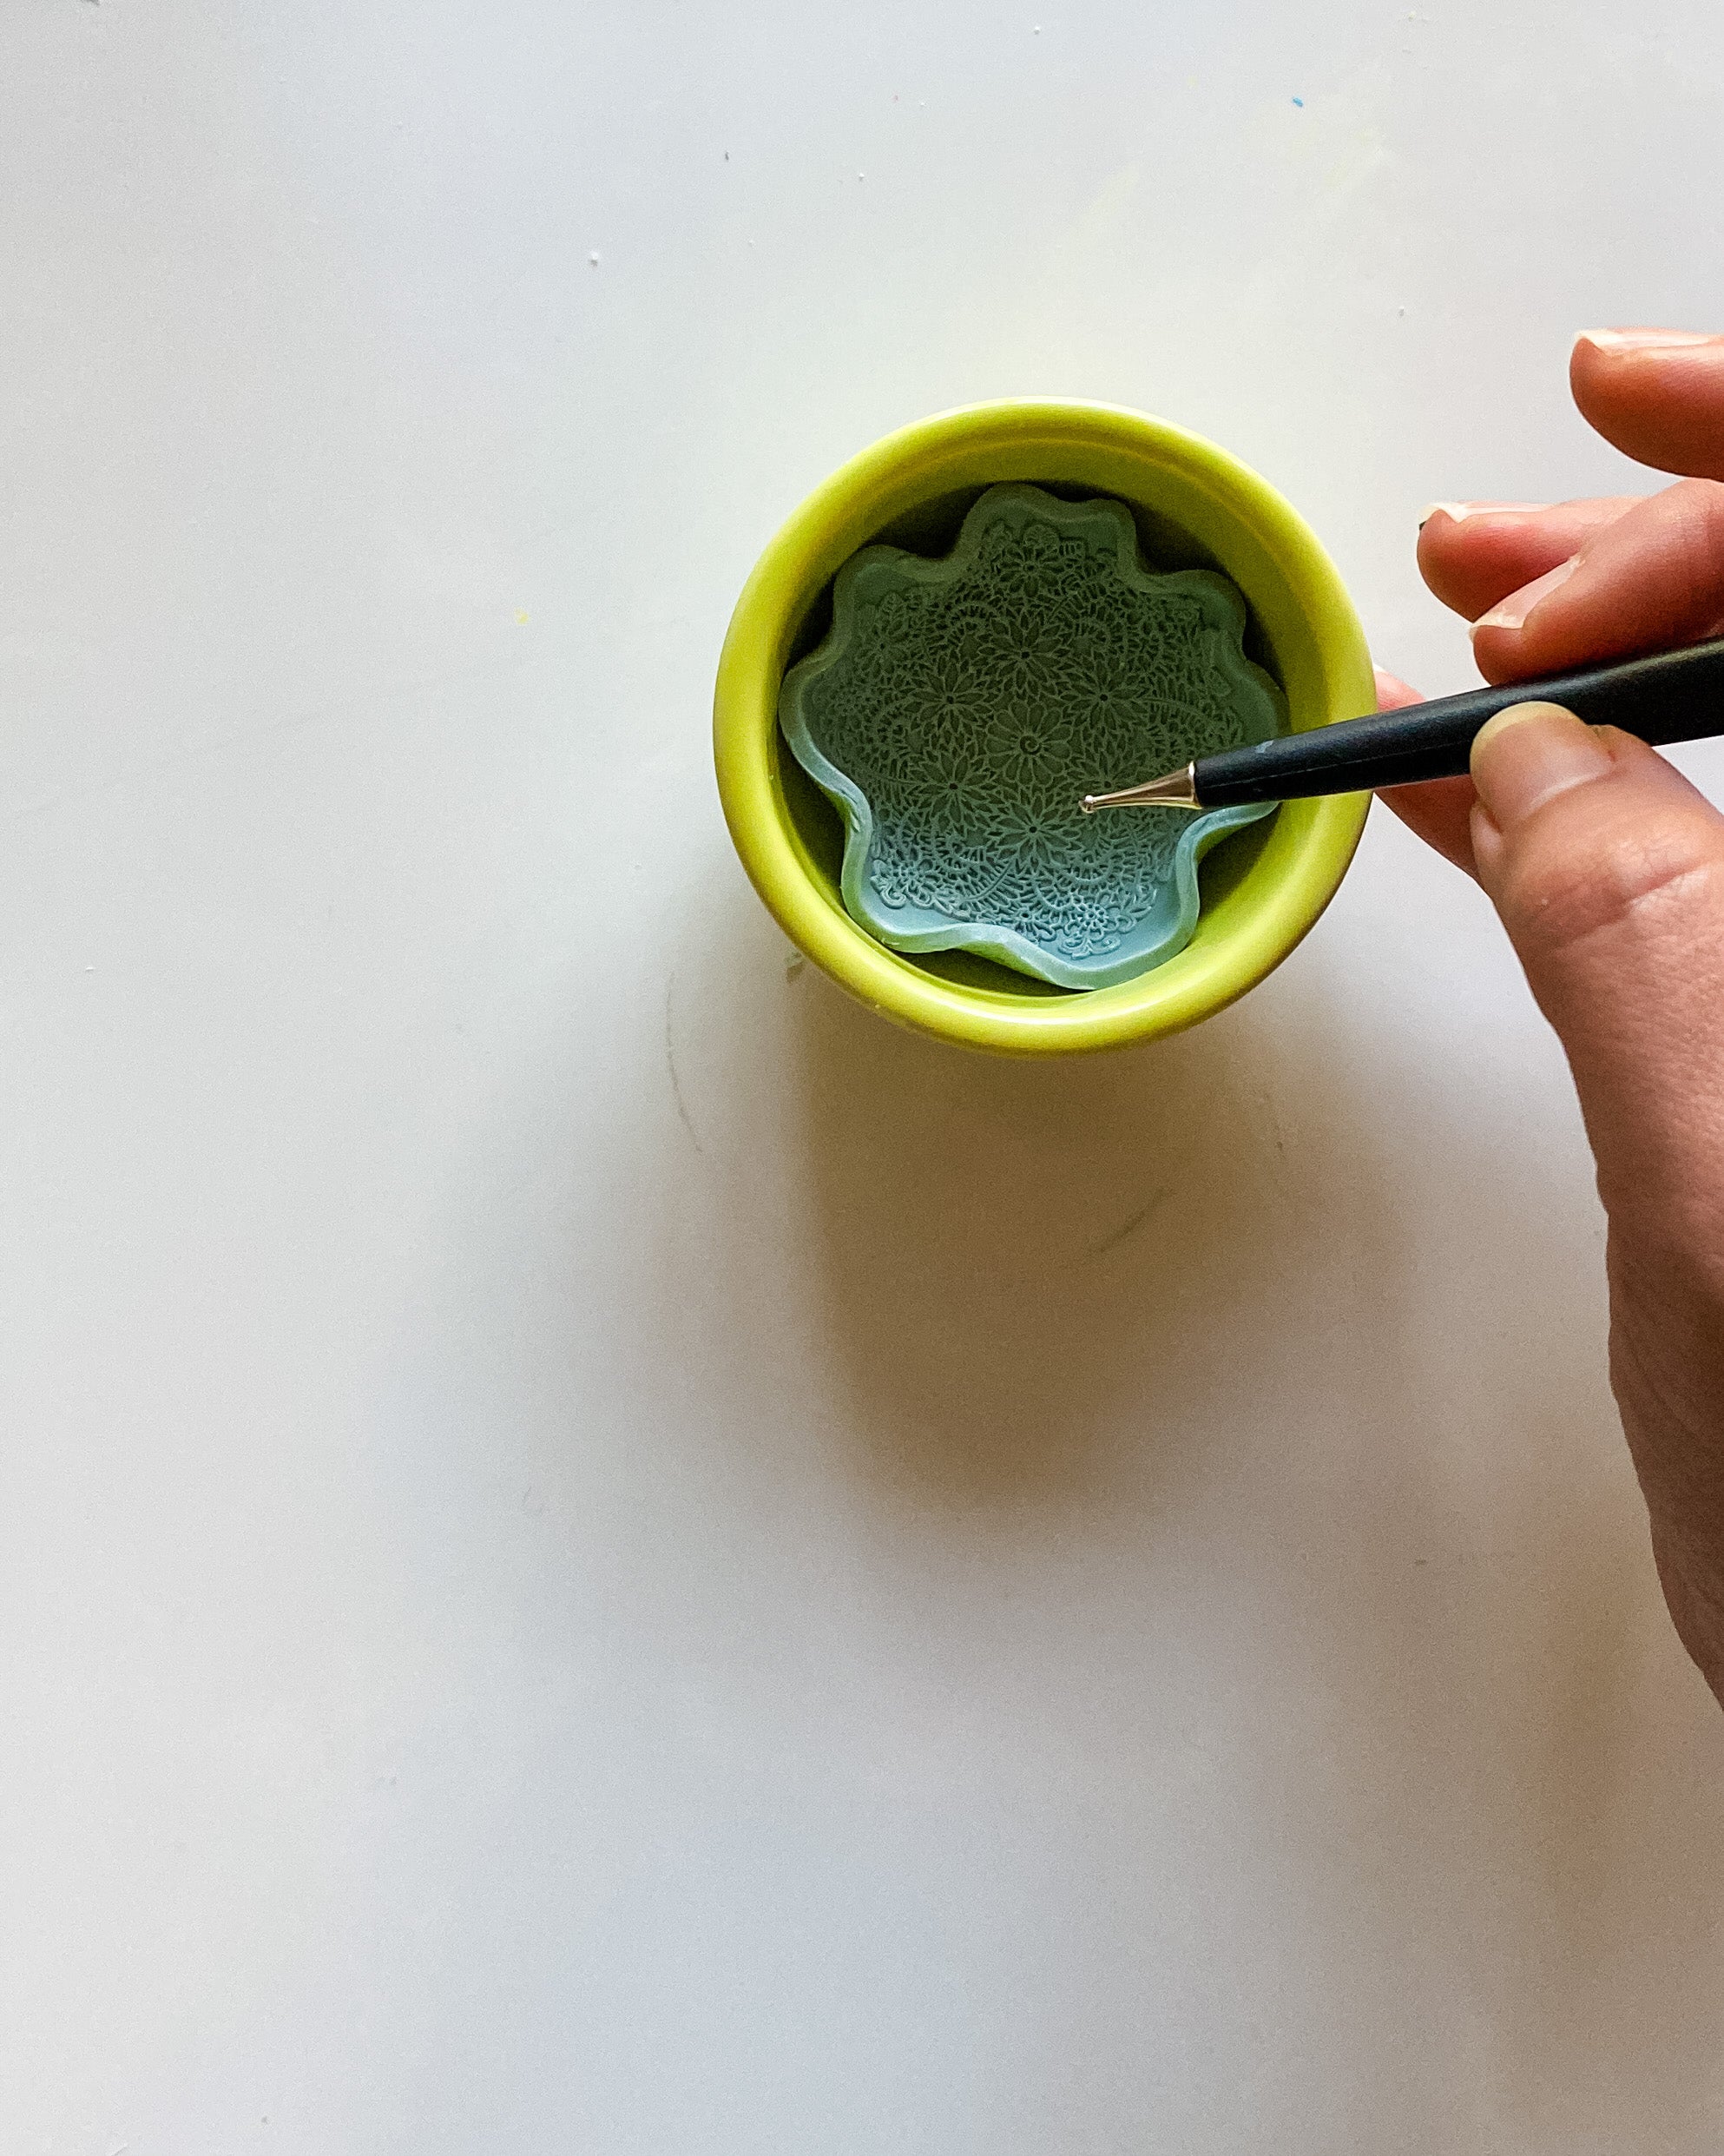
- Exacto knife or circle cutter
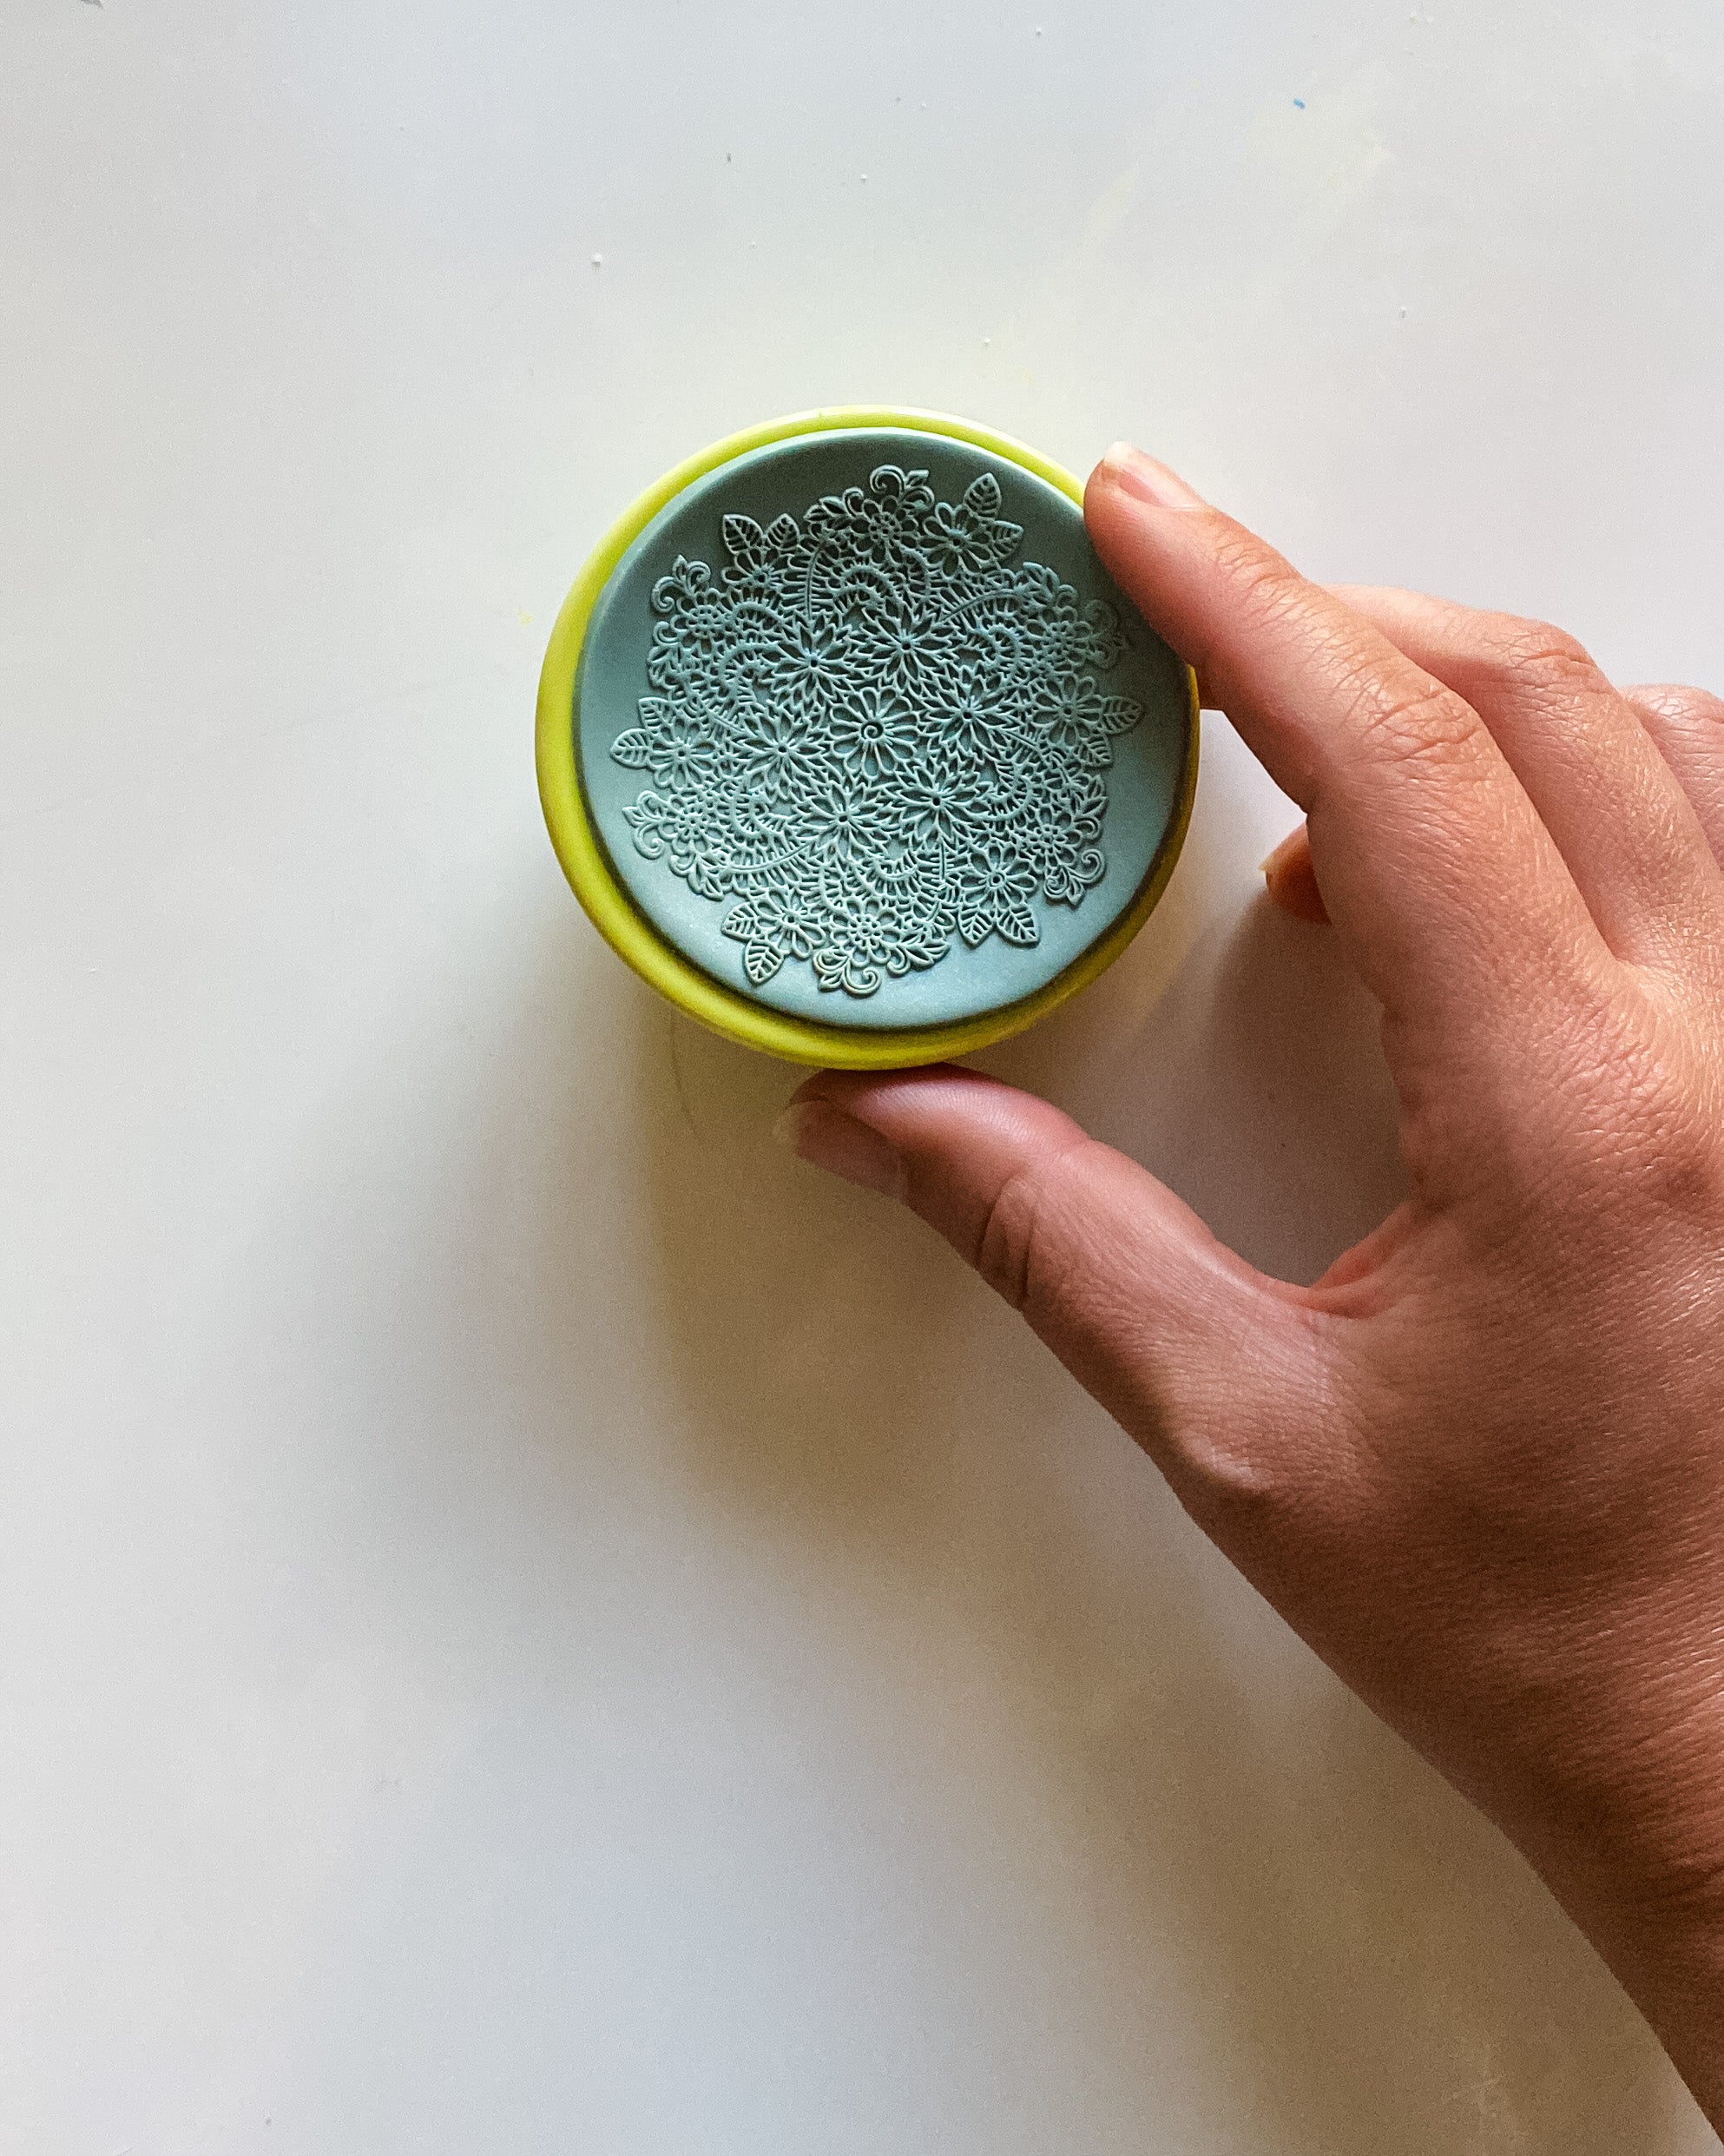
- Large texture stamp
- Small oven bakeable bowl to use as form

Project Instructions
Step 1
Step 2

Step 3
Step 4
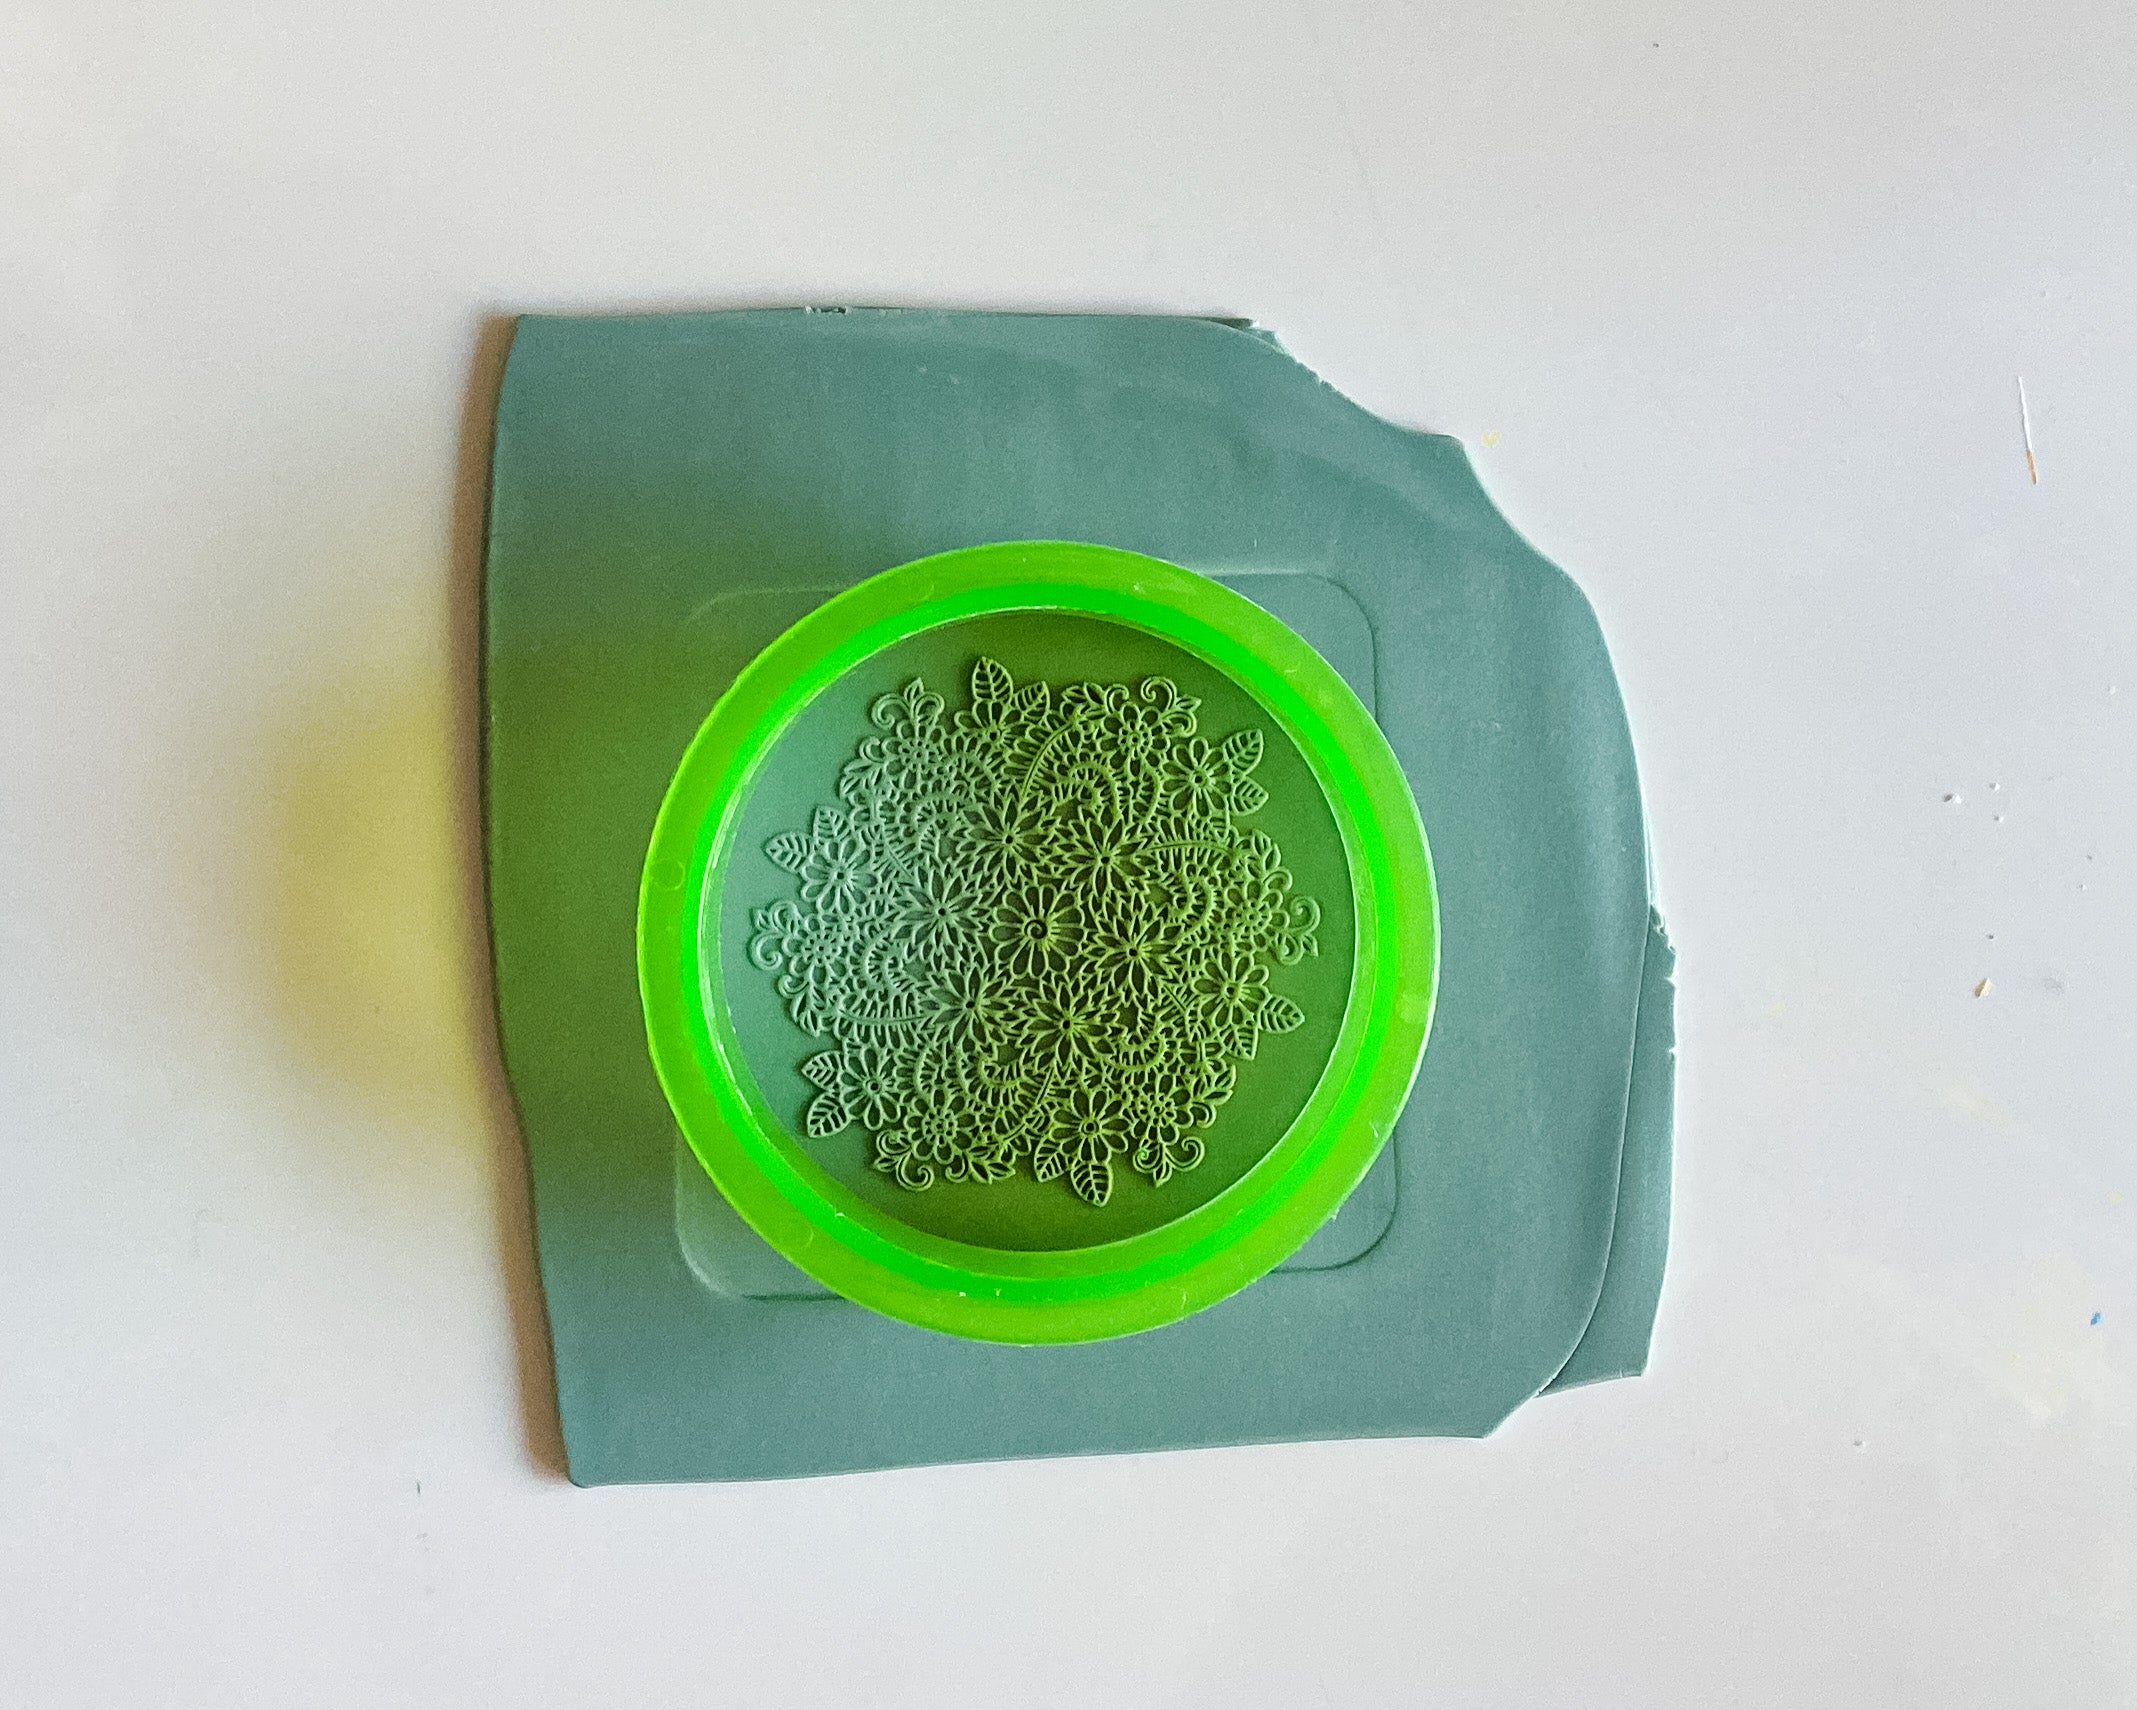
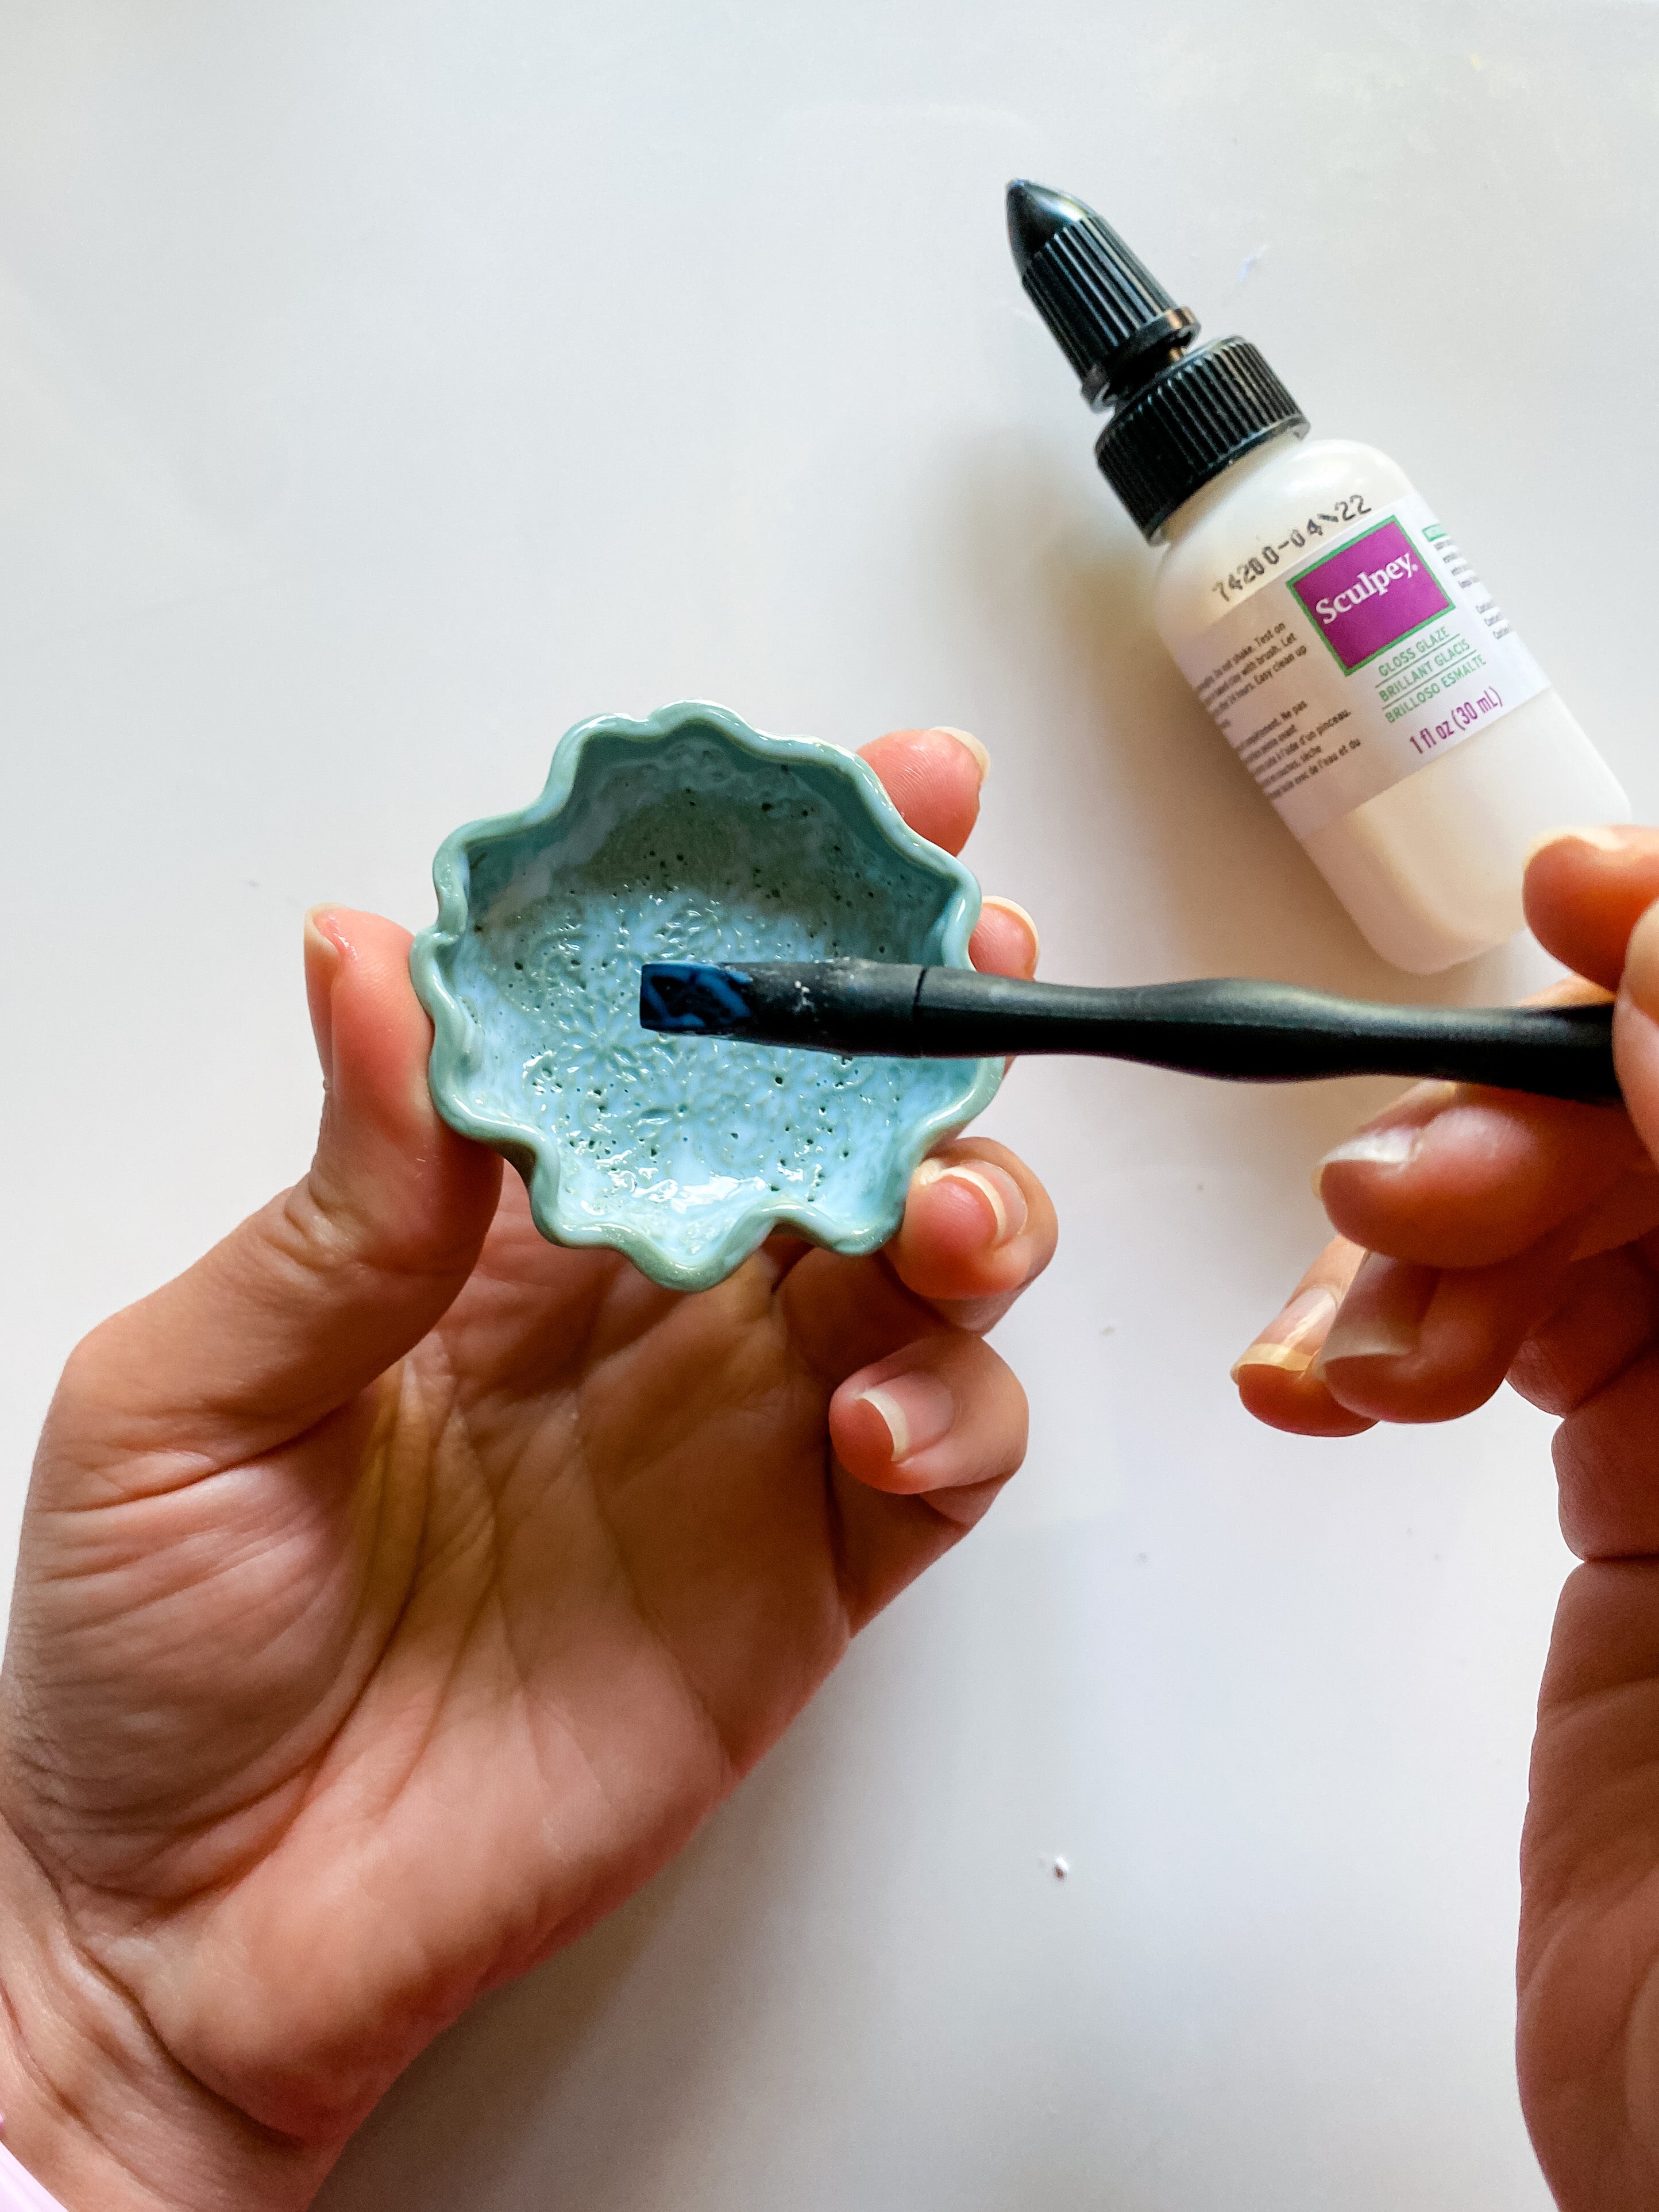
Step 5
Step 6
Step 7
Step 8