
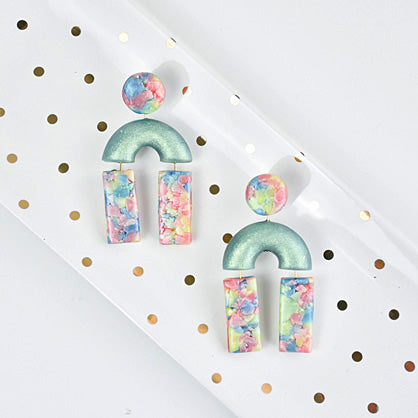
Sculpey Premo™ Iridescent Crumble Earrings
Sculpey Premo™ Iridescent Crumble Earrings
Designed by Amy Koranek
Read More
Read Less
This simple technique can also be used for making faux terrazzo. The Iridescent Premo looks so cool because the little crumbles tumble through the design catching the light and color shifting through lots of different angles.
COMPLETION TIME:1 Hour & 45 Minutes to make, bake twice, and assemble
ADDITIONAL SUPPLIES
- Pearl mica powder
- Paintbrush
- Deli sheet or wax paper
- 1” Gold tone head pins (6)
- Gold tone ear posts (2)
- Gold tone ear nuts (2)
- Round nose pliers
- Silicone glue
Project Instructions
- Getting Started:
Start with clean hands, unwrap and knead clay until soft and smooth, or condition by running clay though a Pasta Machine. We recommend using a designated machine for clay purposes only. When working with multiple colors, clean hands with soap and water or baby wipes (we have found that baby wipes work best) before switching colors. Shape clay, pressing pieces firmly together. Wash hands after use.
- Baking:
Use 1/4 bar of each of the Iridescent Blue, Pink, and Yellow. Chop the colors up with your Super Slicer into random chunks. If you chop on top of a piece of deli paper or wax paper, it will be easier to keep all the little bits together in one place.
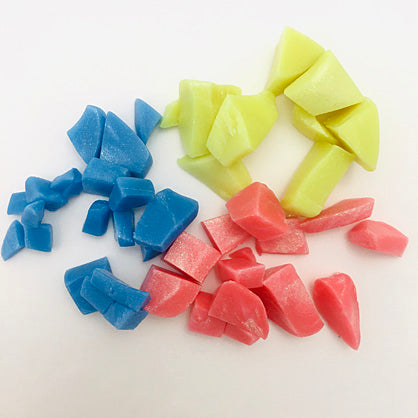
Brush the chunks lightly with pearl mica powder.

Keep chopping the colors smaller and smaller with the Super Slicer.

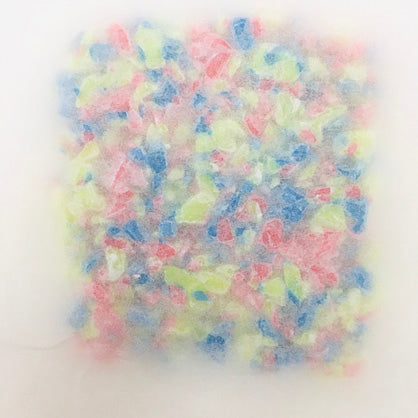
When you have chopped the colors into lots of little crumbles, corral them into a square shape using the side of your blade to push them, keeping them on top of the deli paper.

Place another piece of deli paper or wax paper (something sort of see through) over the top of the crumbles. Use the Acrylic Clay Roller to gently hand roll the crumbles helping them to form a thick sheet. Flip the whole thing over and hand roll it from the back as well. It’s okay if the thick sheet is not completely smooth. Little cavities in the design will add appeal. But you do need to make sure that the pieces are sticking together. This sheet will be used in a double layer to create the design parts so make sure it’s not too thick.
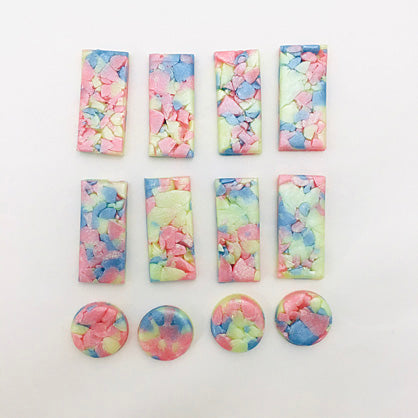
Remove the top layer of deli paper. Cut eight little rectangles, approximately .5” x 1.25” each. Cut out four .5” circles.
Blend the remainder of the chips completely to make this cool neutral color. Form it into a thick circular patty about the same diameter as the Donut shaped Cabochon cavity. If you have too much clay, divide it and set some aside for later projects.
Designer’s Note: This Iridescent Premo clay is so cool the way it color shifts and mica shifts. But please note that if you blend it completely into a neutral, the neutral shade will really vary based on whether or not your blend has equal proportions or if it has more of one color than the others. You might want to bake a test to make sure you like it. The baked color will shift to a different shade from the unbaked color in this neutral mix. My mixed clay appears really gray in it’s uncured state but turns more green after baking.
Designer’s Note: This Iridescent Premo clay is so cool the way it color shifts and mica shifts. But please note that if you blend it completely into a neutral, the neutral shade will really vary based on whether or not your blend has equal proportions or if it has more of one color than the others. You might want to bake a test to make sure you like it. The baked color will shift to a different shade from the unbaked color in this neutral mix. My mixed clay appears really gray in it’s uncured state but turns more green after baking.

Use the 12 mm Ball Tool to force a hole into the center of the thick patty making a donut. Push the Ball Tool in from the top, then flip it over, and push it in from the back. Keep alternating pushing back and forth until you have a donut with a nice neat hole. This is the process I use when I want to make a donut in the Donut Cabochon shape without a seam

Push the donut of clay into the Donut Cabochon mold. If there is extra clay you can pile it up over the post in the center of the mold.

Use the Super Slicer to shave off excess clay level across the back of the Donut.

Carefully flex the mold to release the clay shape. Slice the clay donut in half using the Super Slicer.

Poke a head pin up through the center of the arch coming out the top of the half round. Make sure the head of the pin is seated well in the clay.
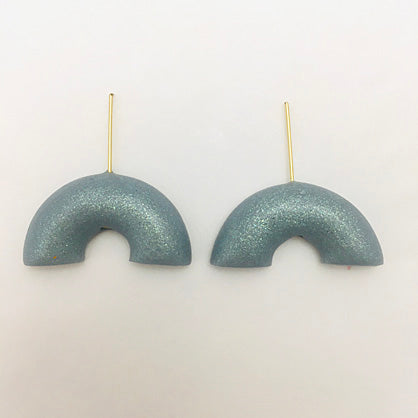
Carefully flip the half rounds over. Impress the heads of two more head pins gently into the clay as shown. Take a little more of the neutral colored clay and cover up all the head pins sandwiching them into place between the layers of clay.

Turn the half round pieces back over right side up. Bake the half round pieces following the baking instructions for Premo. When they are completely cool, curl hooks in the tail of each of the head pins with round nose pliers. This is so that when they are embedded into the clay elements, they aren’t easily pulled out.
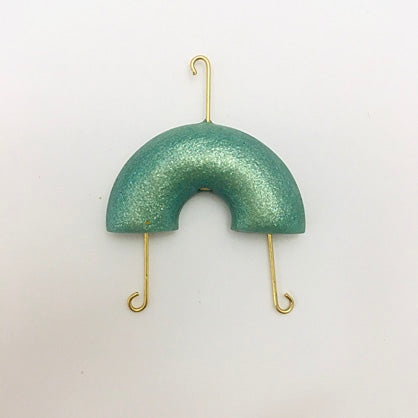
Sandwich each of the top curled pins with the round crumbled shapes. Sandwich the bottom curled pins with the rectangle crumbled shapes. Press all the pieces together to really secure them to each other front and back. Leave as much gap as you would like between the clay elements.

Bake again following the baking instructions for Premo.

When they are completely cool, glue posts to the backs of the circle pieces and allow to dry completely.
