Sculpey Medium Blend: How to Sculpt a Fantasy Gatherer Squirrel
Sculpey Medium Blend: How to Sculpt a Fantasy Gatherer Squirrel
Read More
Designed by: Emily Coleman, www.emilysculpts.com
Have you been wanting to try you had at sculpting with polymer clay? In this tutorial, I will demonstrate how to use Sculpey Medium Blend to produce your very own sculpture of a fantasy-style gatherer squirrel.
Read Less
ADDITIONAL SUPPLIES
'- A Variety of Sculpting Tools (metal, wood, plastic, etc)
- 14g Aluminum Armature Wire
- 2-Part Epoxy Clay (Apoxie Sculpt)
- Wood Base
- Wire Clippers/Pliers
- Sandpaper
- Rubbing Alcohol
- Acrylic Paints|- A Variety of Sculpting Tools (metal, wood, plastic, etc)
- 14g Aluminum Armature Wire
- 2-Part Epoxy Clay (Apoxie Sculpt)
- Wood Base
- Wire Clippers/Pliers
- Sandpaper
- Rubbing Alcohol
- Acrylic Paints

Project Instructions
Getting Started Polymer clay may stain. CLAY MAY DAMAGE UNPROTECTED FURNITURE OR FINISHED SURFACES. DO NOT USE polymer clay on unprotected surfaces. We recommend working on the Sculpey clay mat, wax paper, metal baking sheet, or disposable foil. Start with clean hands and work surface area. Knead clay until soft and smooth. For best results, clean your hands in between colors. Shape clay, pressing pieces together firmly. Bake on oven-proof glass or metal surface at 275°F (130 °C) for 15 minutes per ¼" (6 mm) thickness. For best baking results, use an oven thermometer. DO NOT USE MICROWAVE OVEN. DO NOT EXCEED THE ABOVE TEMPERATURE OR RECOMMENDED BAKING TIME. Wash hands after use. Baking should be completed by an adult. Begin by preheating oven to 275 °F (130 °C). Test temperature with oven thermometer for perfectly cured clay. For best results, condition all clay by running it through the Clay Conditioning Machine for several passes on the widest setting. Fold the clay in half after each pass and insert the fold side into the rollers first.
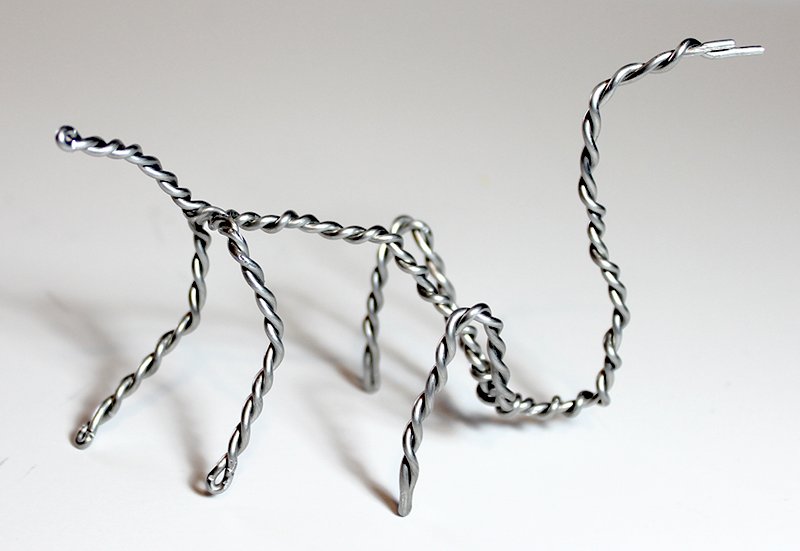
Armature: The main purpose of an armature is to provide structure and support for a sculpture. Additionally, it establishes proportion for the entire piece. Take your time when building the armature, making sure everything is correct before moving onto clay.Start with a length of armature wire that measures around three and a half feet long and fold it in half. Pinch at the fold with one hand. With your other hand, pinch a few further down the folded wire. While continuing to grip, twist the wire in opposite directions. Pliers can help when twisting wire, if needed. Stop twisting after you have a length long enough for the neck. Split the wire off to either side. Each wire will be used for a separate arm.Fold each arm wire in on itself, creating appropriate lengths for the arms. Twist each arm towards the torso. Repeat this twisting process to create the torso and legs. The excess wire can be twisted together to make the tail. The armature can now be posed as desired.

Once I am happy with the armature, I use Apoxie Sculpt for reinforcement. This helps keep the wire from bending out of shape when applying Sculpey. I leave joints free of Apoxie so that I can still pose the figure a bit as I work. I take care to not apply too much Apoxie as I still need to apply clay overtop. I allow the Apoxie to cure for 24 hours before moving on.
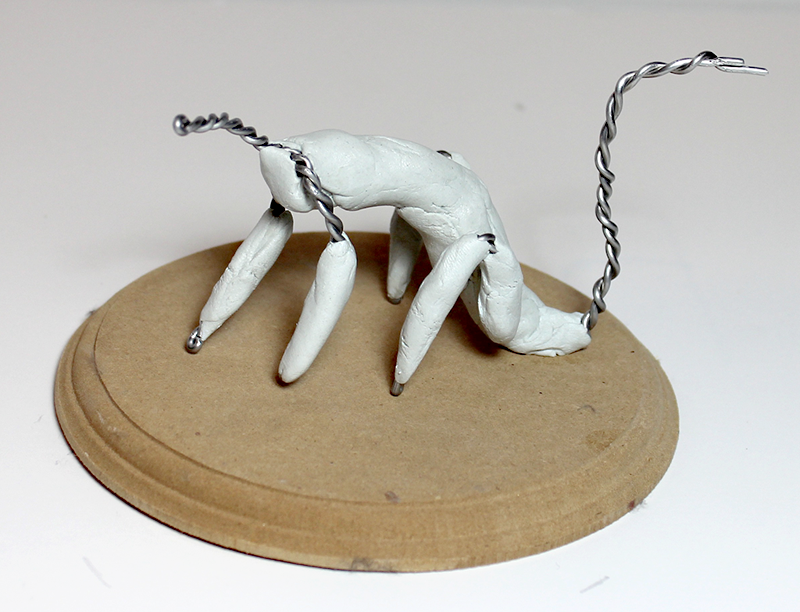
Sculpting the Squirrel: I begin by applying pieces of clay to the torso, forming the body. I blend the clay pieces together as I go along, to make sure I am getting the proper shape and proportions. The shape for the torso is still pretty rough but I will be cleaning that up after I add the rest of the forms. There’s no point in smoothing out clay that I may need to reshape soon!

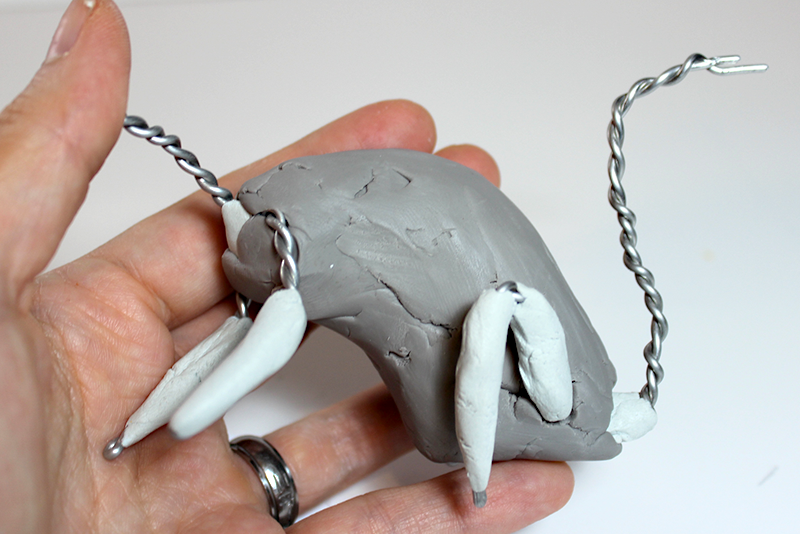
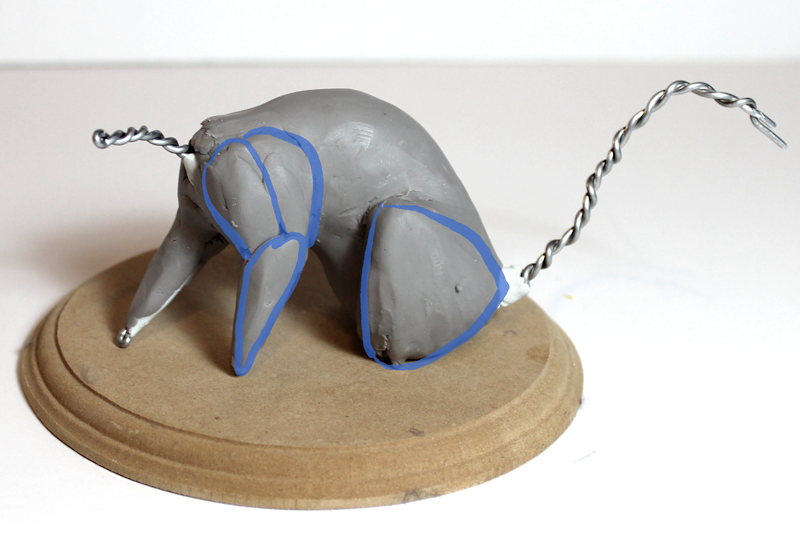
I next move on to the limbs, creating them with shaped pieces of clay that match up with the part of the body. Notice how I have highlighted in blue the shapes that create the limbs. The leg is a thick flat wedge shape that is pressed onto the armature. The forearm is a tapered cone-like shape. The shoulder is another flat wedge.
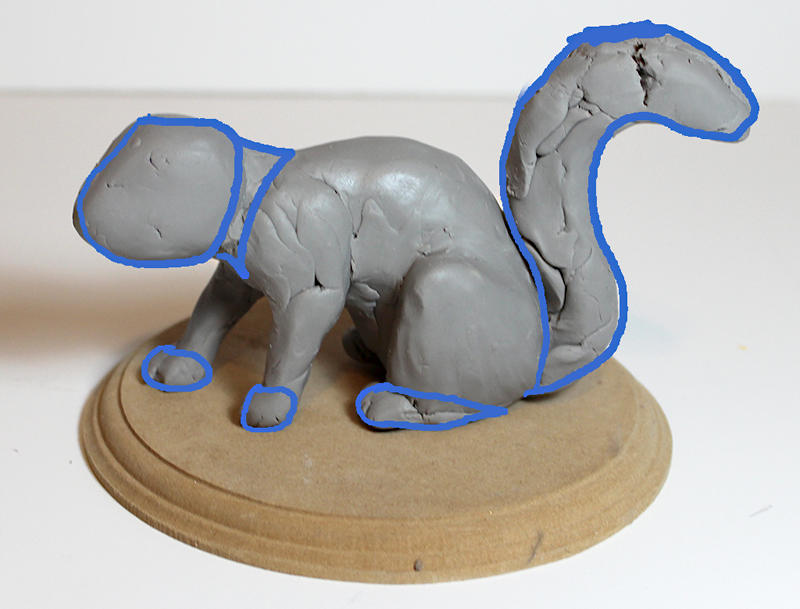
I use more simple shapes to create the head and neck, feet, and tail. At this point, I am just getting the overall shape in place. Facial features, fingers and toes come later!
Shapes can be refined with a metal loop tool. These tools can be used to slowly scrape away clay to reveal the exact form that you need.

Once I am happy with all the forms, I smooth everything out using my hands. It doesn’t need to be perfectly smooth, but removing all the large lumps and cracks is essential at this point.

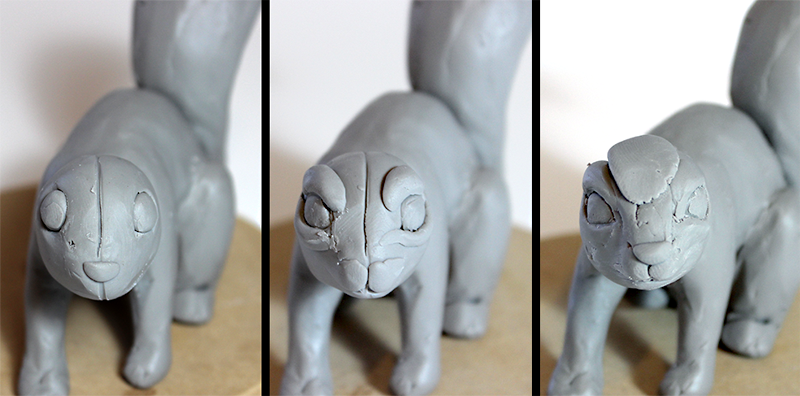
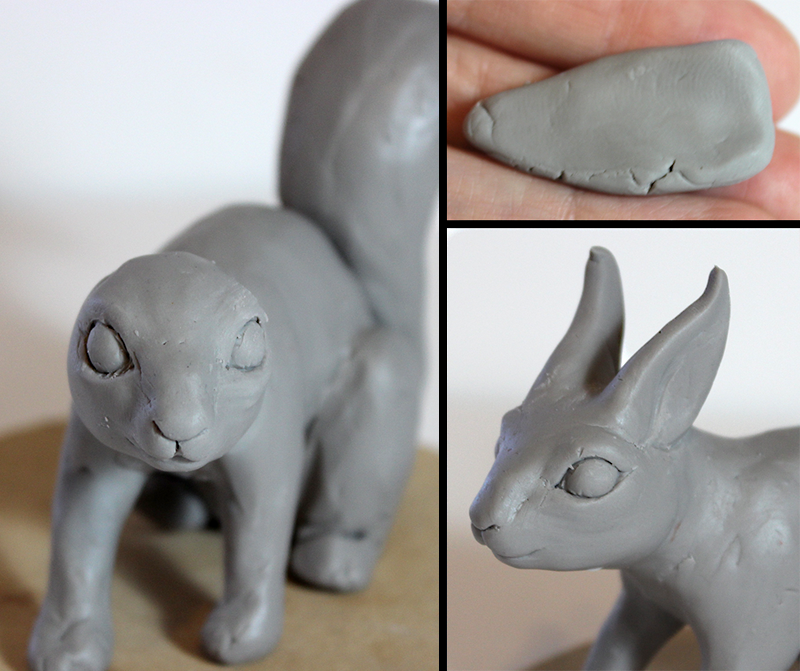
Detailing the Face: Eye sockets are pressed in using a round tool. Make sure they are deep enough to hold two clay eyeballs. You can also use wood beads for eyes.

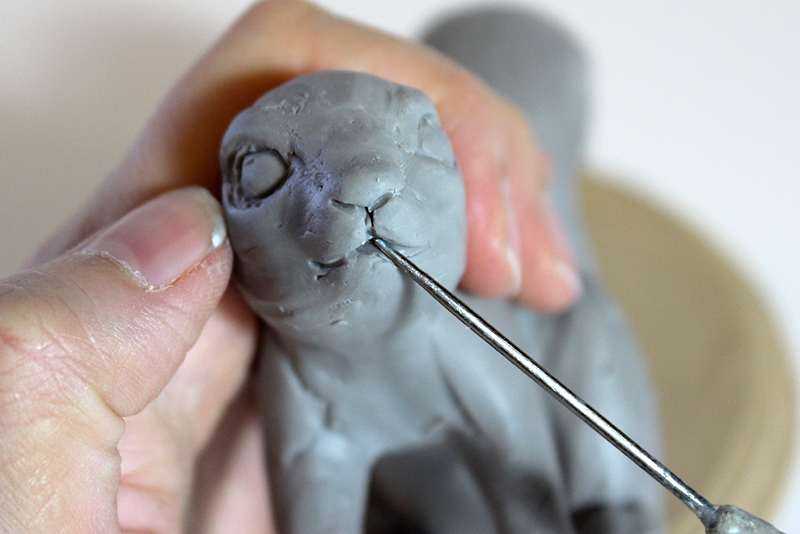
A center line is drawn to help keep the details of the face symmetrical. The eyes are then placed into the sockets, and a temporary nose is put into place. I work the shape of the head a bit at this point to make sure it looks even. I then remove the nose and use small strips of clay to build up the eyebrows, cheeks, and muzzle. These shapes are smoothed in and refined with a metal loop tool. I then move on to building up the bridge of the nose and the forehead in a similar manner.I use this metal needle tool to help define the mouth, nostrils, and lines around the eyes. These are areas where you want to see nice dark lines.
Once the face is all cleaned up, the ears are created with flat triangles. They are pressed into place on the back of the head and smoothed in.
Detailing: Toes are added using small logs of clay, pinched at the ends to form claws. They are placed onto the hand and smoothed together with the palm. I add in small bends along the way to create knuckles. This takes a little practice!

I use my thin metal loop tool to define the thicker or longer areas of hair. Here, that is along the rump, the backs of the arms, the tail, and the ears.


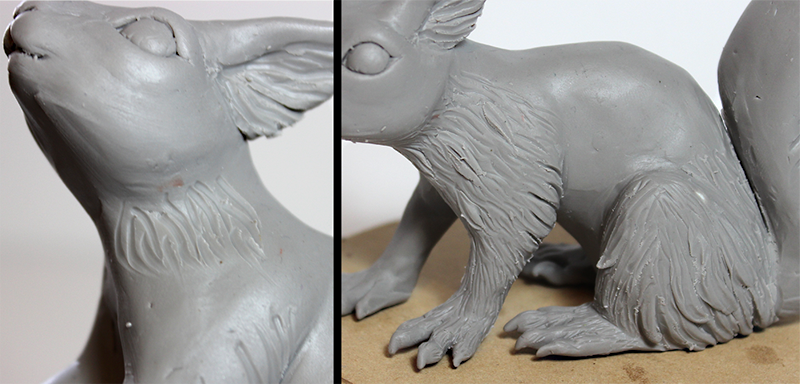
Small strips of clay can be used to further define long or thick areas of fur. I lay strips over the fur lines I just created. I then smooth them into the body and use hatching lines to create fine fur texture over top. This is a great way to break up an otherwise monotonous texture like this. Notice that the hair is shorter along the toes. When texturing the body, I like to first map out the hairs and then go back with some small strips of clay over top. I then smooth the strips in and hatch some fur lines overtop. This creates a nice break in the texture for a more natural look.

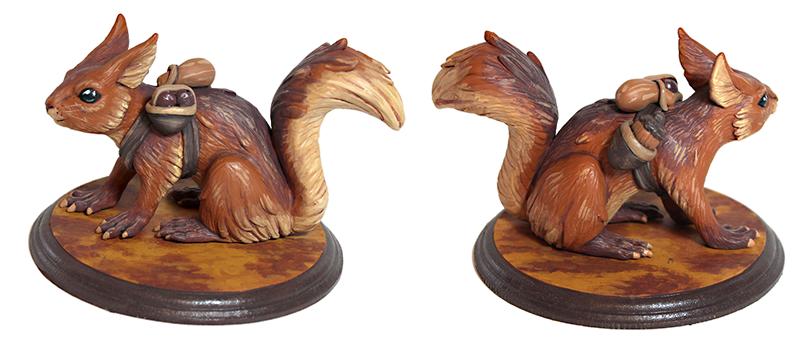
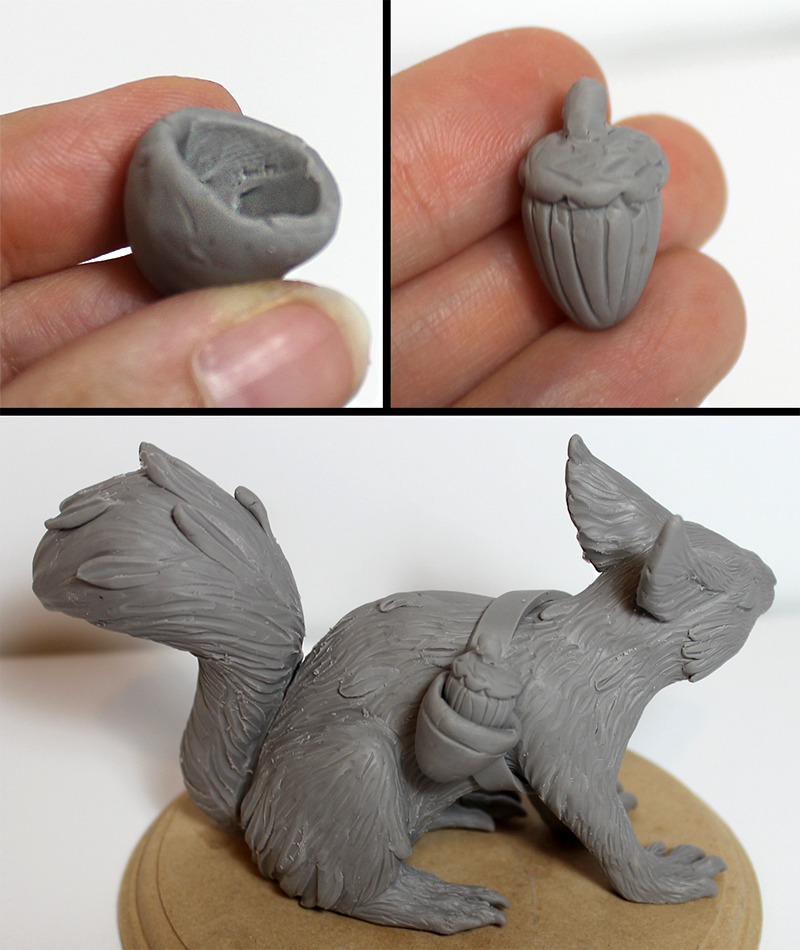
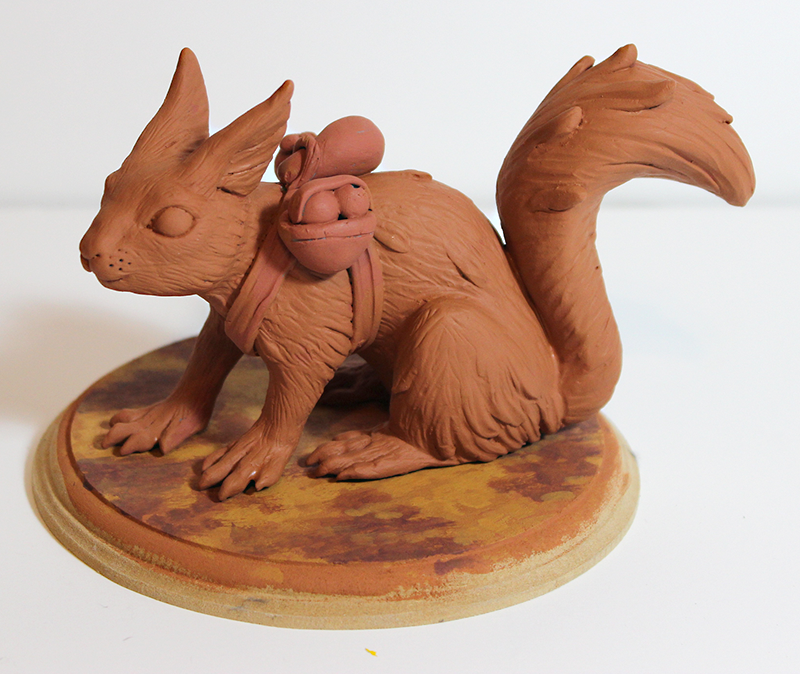
Adding Accessories: I want to add a little whimsy to this squirrel by adding in a harness that he uses to help him collect food for the winter. I start with the main strap, created with a thin, even strip of clay. I wrap the strip around the torso and press it lightly into place.

Next up, I create a pouch by wrapping some clay around my finger tip. I then make a little acorn to place inside the pouch. I press the pouch into place on the squirrel, hiding the seam for the clay strap. Finally, I place the acorn in the pouch.I add another strap that travels along the chest and create another pouch. This one is holding a few berries, and another small strap is added along top. Finally, I add a tiny gourd on his back, tied in place to the strap. Little details like this will help tell a story about your character.

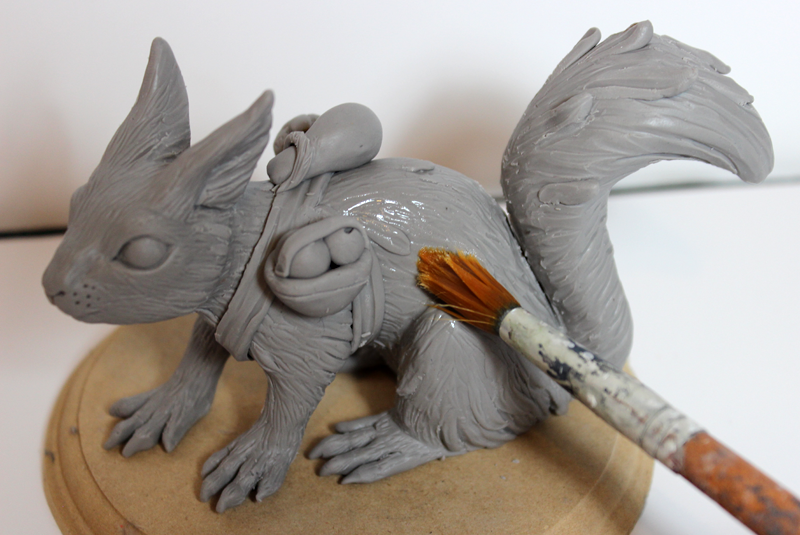
Finishing and Painting: Everything is brushed with rubbing alcohol before baking. The whole thing is lightly sanded before painting is begun.
I start by painting the base with some autumnal colors, making it appear like a ground covered in fallen leaves. I used loose dabs with a large brush, using four different colors and blending them while still wet. I keep it simple as I don’t want to take too much attention away from our character!

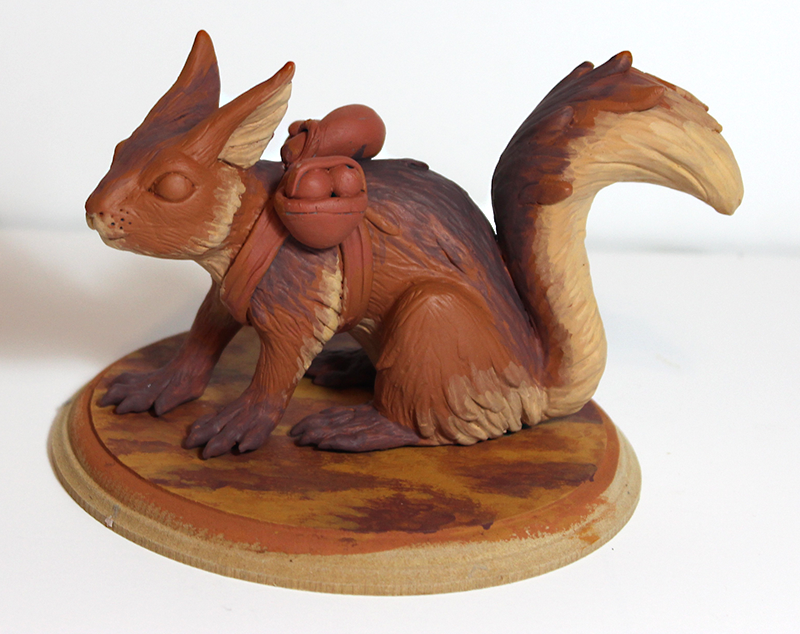
I start with a flat ruddy orange for the base coat. I build this up in several thin layers in order to preserve the surface of the sculpture.
A creamy yellow orange is applied to the underside and to the ears, nose, and cheeks. A red-violet is applied to the back and feet. The colors are slowly blended in with the base color, using water to blend in each layer.
I added color to the accessories and detailed the eyes, nose, and claws. For a touch of realism, I used a bit of fishing line for the whiskers
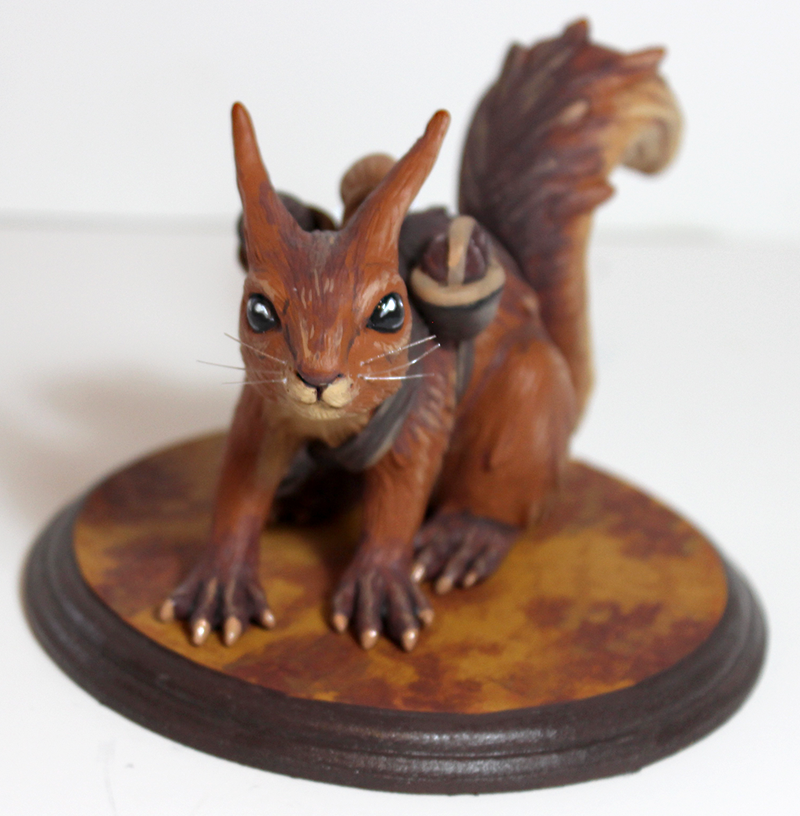
Finally, I added gloss to the eyes, nose, claws, berries, and the rim of the base. It’s amazing how the little details really bring a piece to life.
Feel free to change this up a bit and create your own original character! Want to learn more? Check out my book, Fantasy Creatures in Clay.