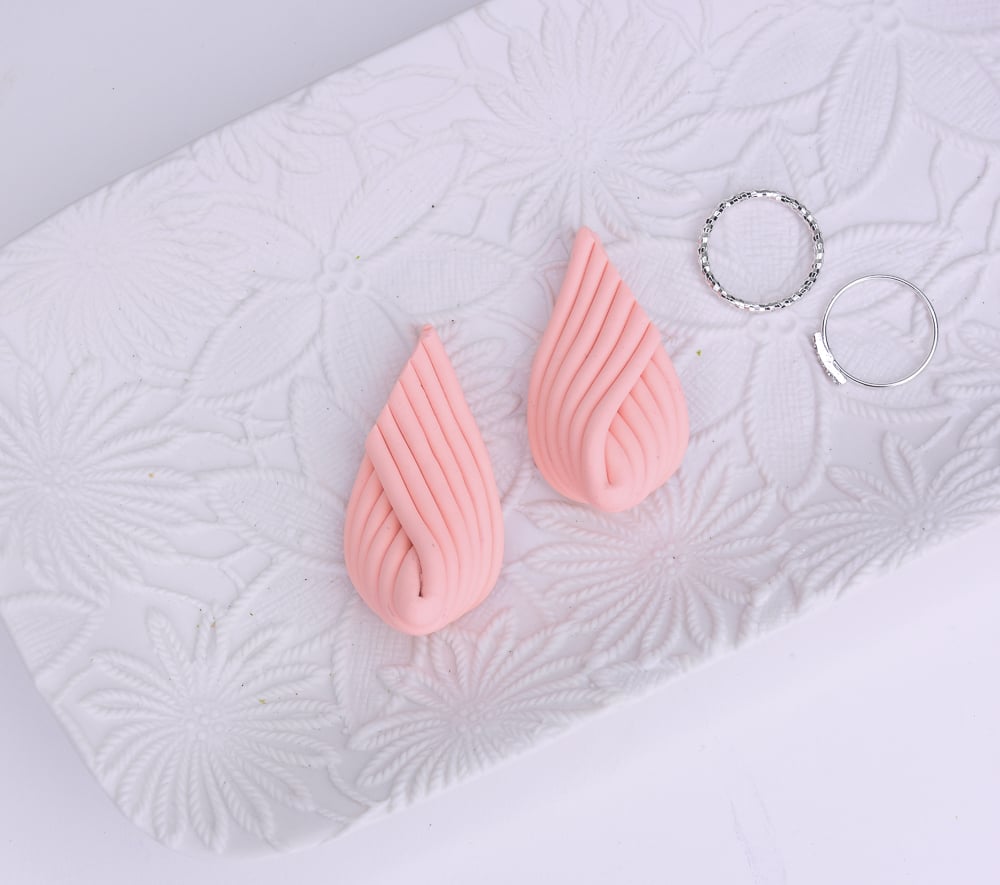
Sculpey III® Peach Thin Line Graphic Earrings
Sculpey III® Peach Thin Line Graphic Earrings
Designed by Amy Koranek
Read More
This clever graphic design, featuring Sculpey III® Peach clay, will be a sure hit in your Spring and Summer wardrobe. The design can be easily adapted to wire earrings instead of posts as well. Plus, can't you just imagine this design in other colors? Even mixed colors? Yes please!!
COMPLETION TIME:
60 Minutes to make, bake, and assemble; some drying time required for glue
Read Less
ADDITIONAL SUPPLIES
- Posts and backs (2)
- Silicone glue

Project Instructions
- Getting Started:
Start with clean hands, unwrap and knead clay until soft and smooth, or condition by running clay though a Pasta Machine. We recommend using a designated machine for clay purposes only. When working with multiple colors, clean hands with soap and water or baby wipes (we have found that baby wipes work best) before switching colors. Shape clay, pressing pieces firmly together. Wash hands after use.
- Baking (also called Curing):
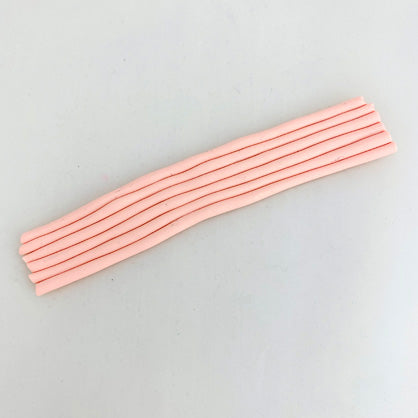
Roll thin ropes of Peach Sculpey III® to 4.5” long. You will need 6 ropes for each earring and the ropes should be about 1/8” thick each. Lay 6 ropes together with sides touching for each earring. Make sure the ropes are connected to each other with no gaps using fingertip pressure.
Carefully bend the ropes in half as shown.

Cross the ends of the ropes over each other as shown. Use gentle fingertip pressure to connect the top layer to the bottom.

Flip the piece over and trim the bottom piece at an angle matching the front piece with the Clay Blade.

Flip the piece back right side up and trim the top piece to the layer above using the Clay Blade as well.
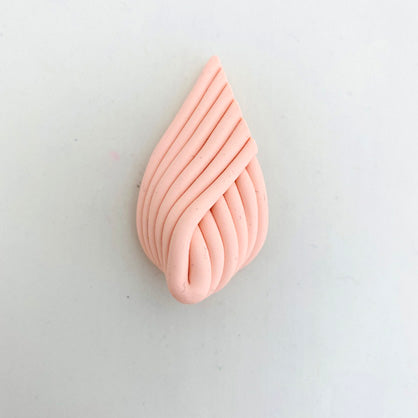
Repeat Steps 3-6 to make the second piece with the overlap in the opposite direction as the first piece. Bake the pieces following the baking instructions for Sculpey III®.

Allow the pieces to cool completely before handling.
Here is the layout for the earring construction.

Glue the posts to the top back of each clay piece. Allow the glue to dry completely before handling.

- Choosing a selection results in a full page refresh.
- Opens in a new window.