
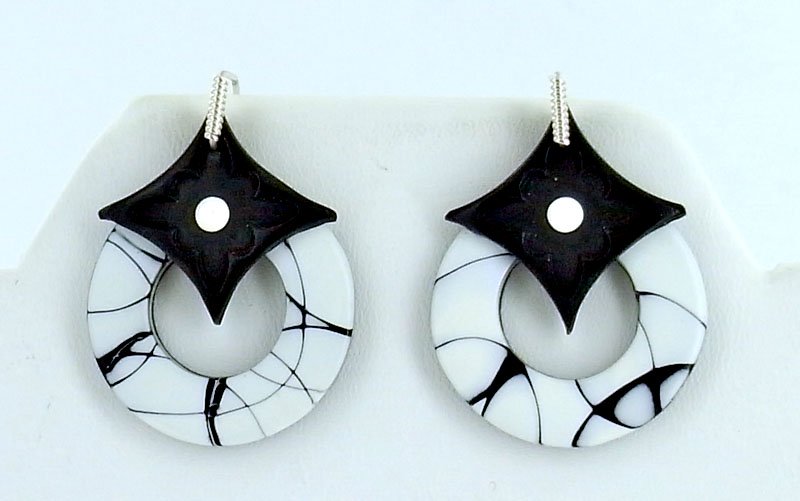
premo! Black-N-White Texture Circle Earrings
premo! Black-N-White Texture Circle Earrings
Read More
Julie Picarello
Playing off the elegant simplicity of Black and White, these earrings are enhanced with the addition of a design accent from a texture sheet.
Read Less
ADDITIONAL SUPPLIES
2 eye pins, 2 ear wires, soft cotton cloth|2 eye pins, 2 ear wires, soft cotton cloth
Project Instructions
Getting StartedPolymer clay may stain. CLAY MAY DAMAGE UNPROTECTED FURNITURE OR FINISHED SURFACES. DO NOT USE polymer clay on unprotected surfaces. We recommend working on the Sculpey clay mat, wax paper, metal baking sheet, or disposable foil. Start with clean hands and work surface area. Knead clay until soft and smooth. For best results, clean your hands in between colors. Shape clay, pressing pieces together firmly. Bake on oven-proof glass or metal surface at 275°F (130 °C) for 30 minutes per ¼" (6 mm) thickness. For best baking results, use an oven thermometer. DO NOT USE MICROWAVE OVEN. DO NOT EXCEED THE ABOVE TEMPERATURE OR RECOMMENDED BAKING TIME. Wash hands after use. Baking should be completed by an adult.Begin by preheating oven to 275 °F (130 °C). Test temperature with oven thermometer for perfectly cured clay. For best results, condition all clay by running it through the Clay Conditioning Machine for several passes on the widest setting. Fold the clay in half after each pass and insert the fold side into the rollers first.
Building a Color Stack: Condition the Black clay, run it through on the thickest setting, and cut a single strip that matches the size of the White clay. Set it on top of the White stacked clay and roll over it with the acrylic roller to stick it to the work surface.

Imprinting a PatternAfter spritzing the clay with water to act as a release, push the ½”, ¾” and 1” inch circle cutters into the clay in a random pattern.

Slice the Stack Horizontally Using the super slicer in both hands parallel to the work surface position the cutting edge just below the top of the stack. Begin slicing from back to front of the stack, maintaining the parallel orientation of the blade to the clay. As each slice is removed, the Black on White circle design is revealed.

Build the Beads Roll out a piece of Black clay on a #3 setting on the clay conditioning machine. Overlay one or two patterned slices it on the Black clay, gently roll with acrylic roller to adhere and set aside.
Roll out conditioned Black clay on the #1 setting. Set it flat against the city map pattern of the Edgy Texture Sheet and run both through the clay conditioning machine on the thickest setting. Flip the clay over so the textured size is facedown, place the patterned clay on top and lightly roll over with acrylic roller.
- Choosing a selection results in a full page refresh.
- Opens in a new window.