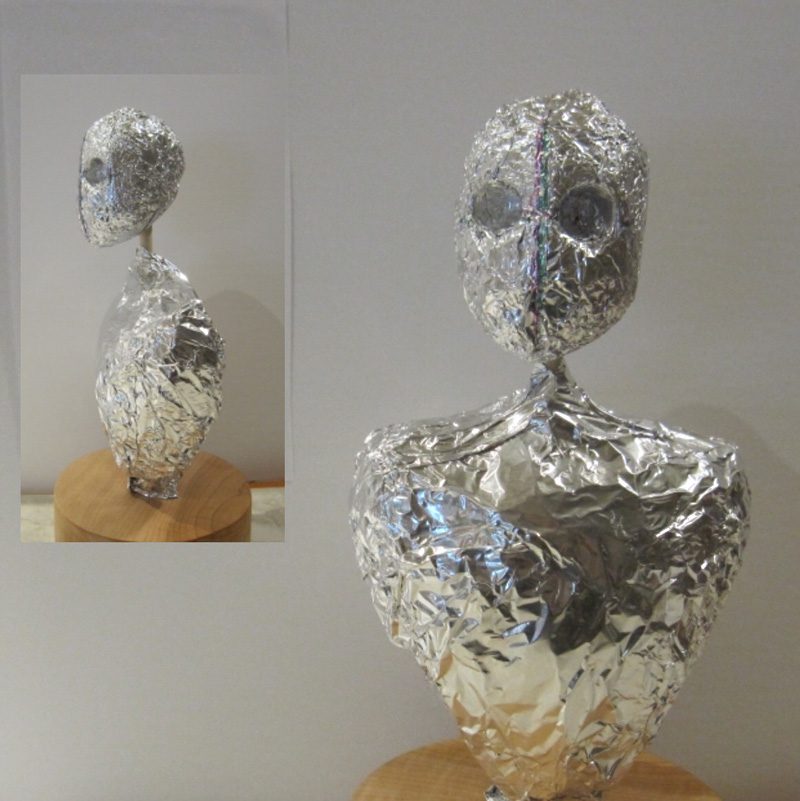
In my last blog I gave you a method for creating a simple body armature for an art Doll. Today I want to talk about the armature that supports your sculpt. Let’s start with the obvious. Aluminum foil is without a doubt, indispensable as an armature for any polymer clay artist. It has an expansion rate of less than 2% which means it won’t expand enough to crack your sculpt. You can use it as a core armature for figures, jewelry or anything else you are working on that has depth. By using foil to create the shape of your project, then covering that shape with clay, you are ensuring the thickness of the clay is more uniform and it cures evenly when baked. The only warning I give is to make sure you don’t trap air bubbles between the foil and the layer of clay. Air bubbles heat up and expand and will probably crack or puff in the oven. Either way it’s a project buster. I like to lay my clay over the center of the foil and slowly work towards the back, pushing air out as I go along. Here is a photo of the armature I’ve prepared for a portrait bust, ready to accept clay.
Foil is great, but it’s not the only thing you can use. There are some things you should consider before experimenting with other base armatures. Metal, glass and ceramic are great choices because they don’t hold moisture and can withstand the heat from the oven without expanding. But stone surfaces like granite, or any wood surfaces do contain moisture and there is a risk that the moisture will expand enough to crack your sculpt when you bake. How I deal with this is to cure the surface I plan to use for several hours before I use it. Just place them in the oven at 150-200 degrees for a couple of hours or even overnight if you have larger surfaces.

In the photo on the right, I’ve done a relief of a west coast style fish on a piece of granite I found that had a straight edge cut on the bottom and a rough edge along the top. Granite is porous, and since this piece was almost 2” thick, I cured it overnight at 150 degrees before I created the fish relief.
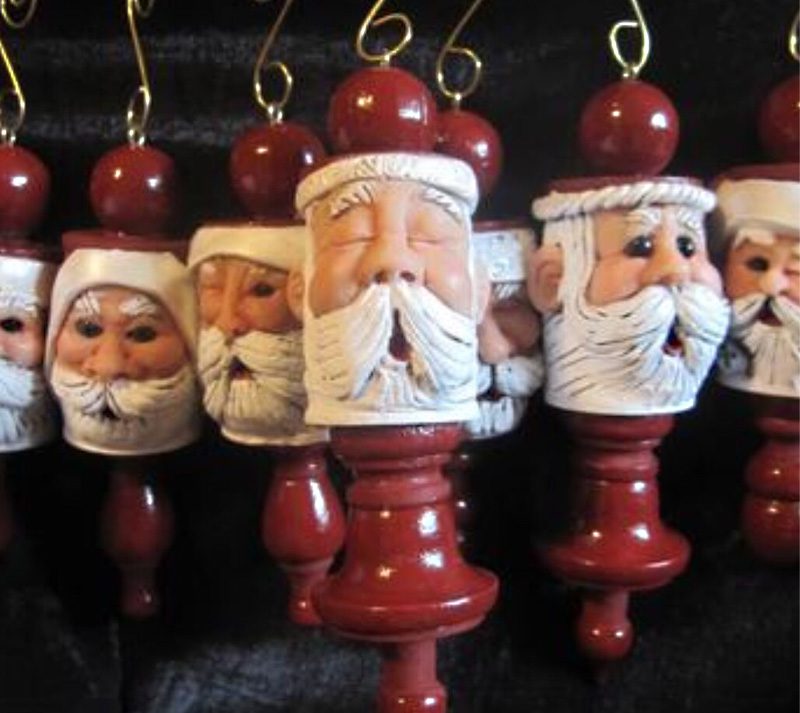
In the photo below, I bought a bag of vintage wooden spools to make Santa ornaments. As a natural surface, wood not only contains moisture but it can warp, crack or distort when heated. I baked these spools for about 2 hours at 200 degrees before sculpting on them. The bigger spools stayed in the oven an extra hour. Overall, great results. Hope you enjoyed my insights on this topic. Happy sculpting! – Maria Saracino