
Souffle and Premo Miniature House
Souffle and Premo Miniature House
Read More
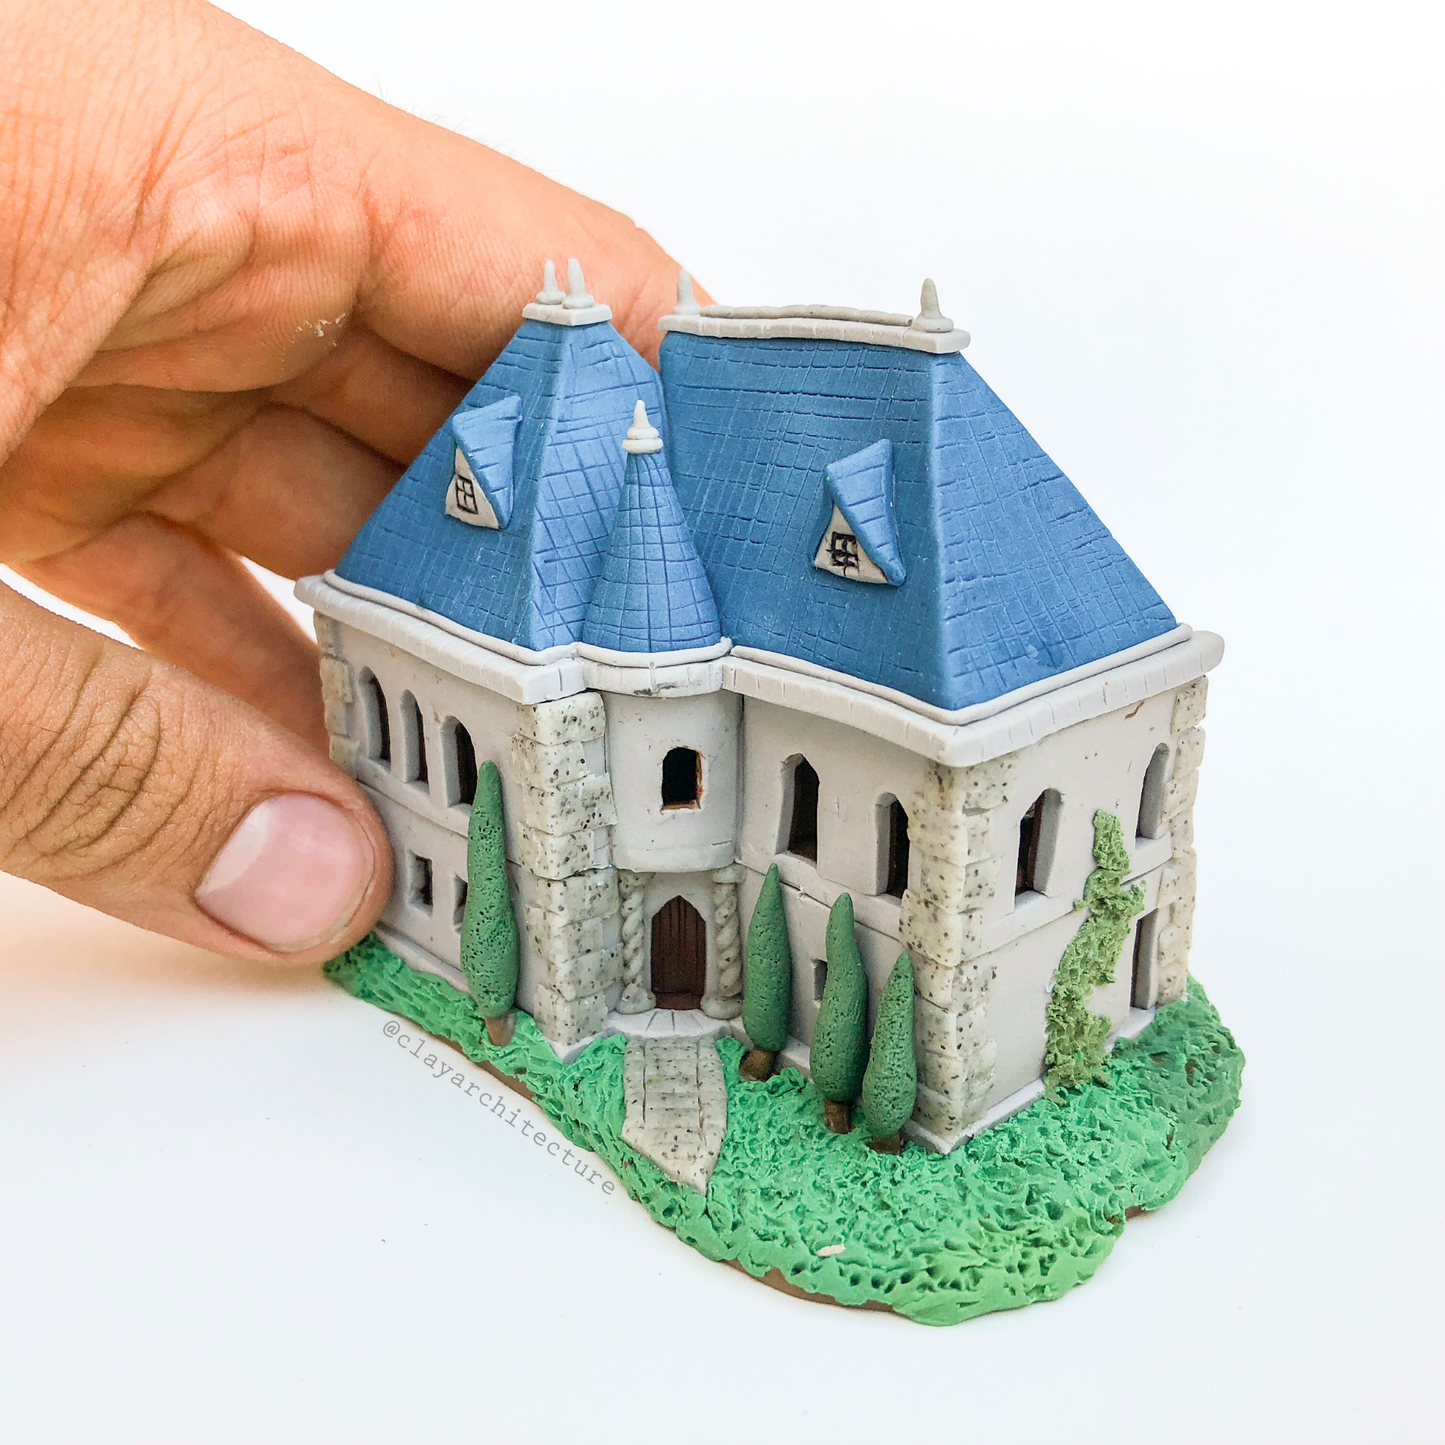
This miniature can be used as a decoration for people who love architecture or miniatures. I came up with this design after looking at french architecture. It’s good to plan out the rooms and sketch a quick design before beginning. Always keep in mind the scale of the house, if you want it to be perfect a scale ruler will help with this.
Designed by: Oliver Penilla
Read Less
ADDITIONAL SUPPLIES
Aluminum foil, toothpick, exacto knife or box cutter knife, note card or ruler.
Project Instructions
- Getting Started:
Start with clean hands, unwrap and knead clay until soft and smooth, or condition by running clay though a Pasta Machine. We recommend using a designated machine for clay purposes only. When working with multiple colors, clean hands with soap and water or baby wipes (we have found that baby wipes work best) before switching colors. Shape clay, pressing pieces firmly together. Wash hands after use.
- Baking:
Floors2A:The clay conditioning machine will be used to roll out walls, floor, furniture etc. Begin by rolling out a slab of clay on the #1 setting of the Clay conditioning machine. I used Souffle Cowboy for this, you can use any color for this as it will eventually be covered. Draw the approximate floor plan using your knife and decide where each room be

2B: For the floor, roll out Premo burnt umber on the number 8 setting. Place on top of the previous slab and cut out your floor plan. I made it up as I went along. Repeat with the white clay, this part will be for the kitchen. Using your knife create tile and wooden floorboard texture.
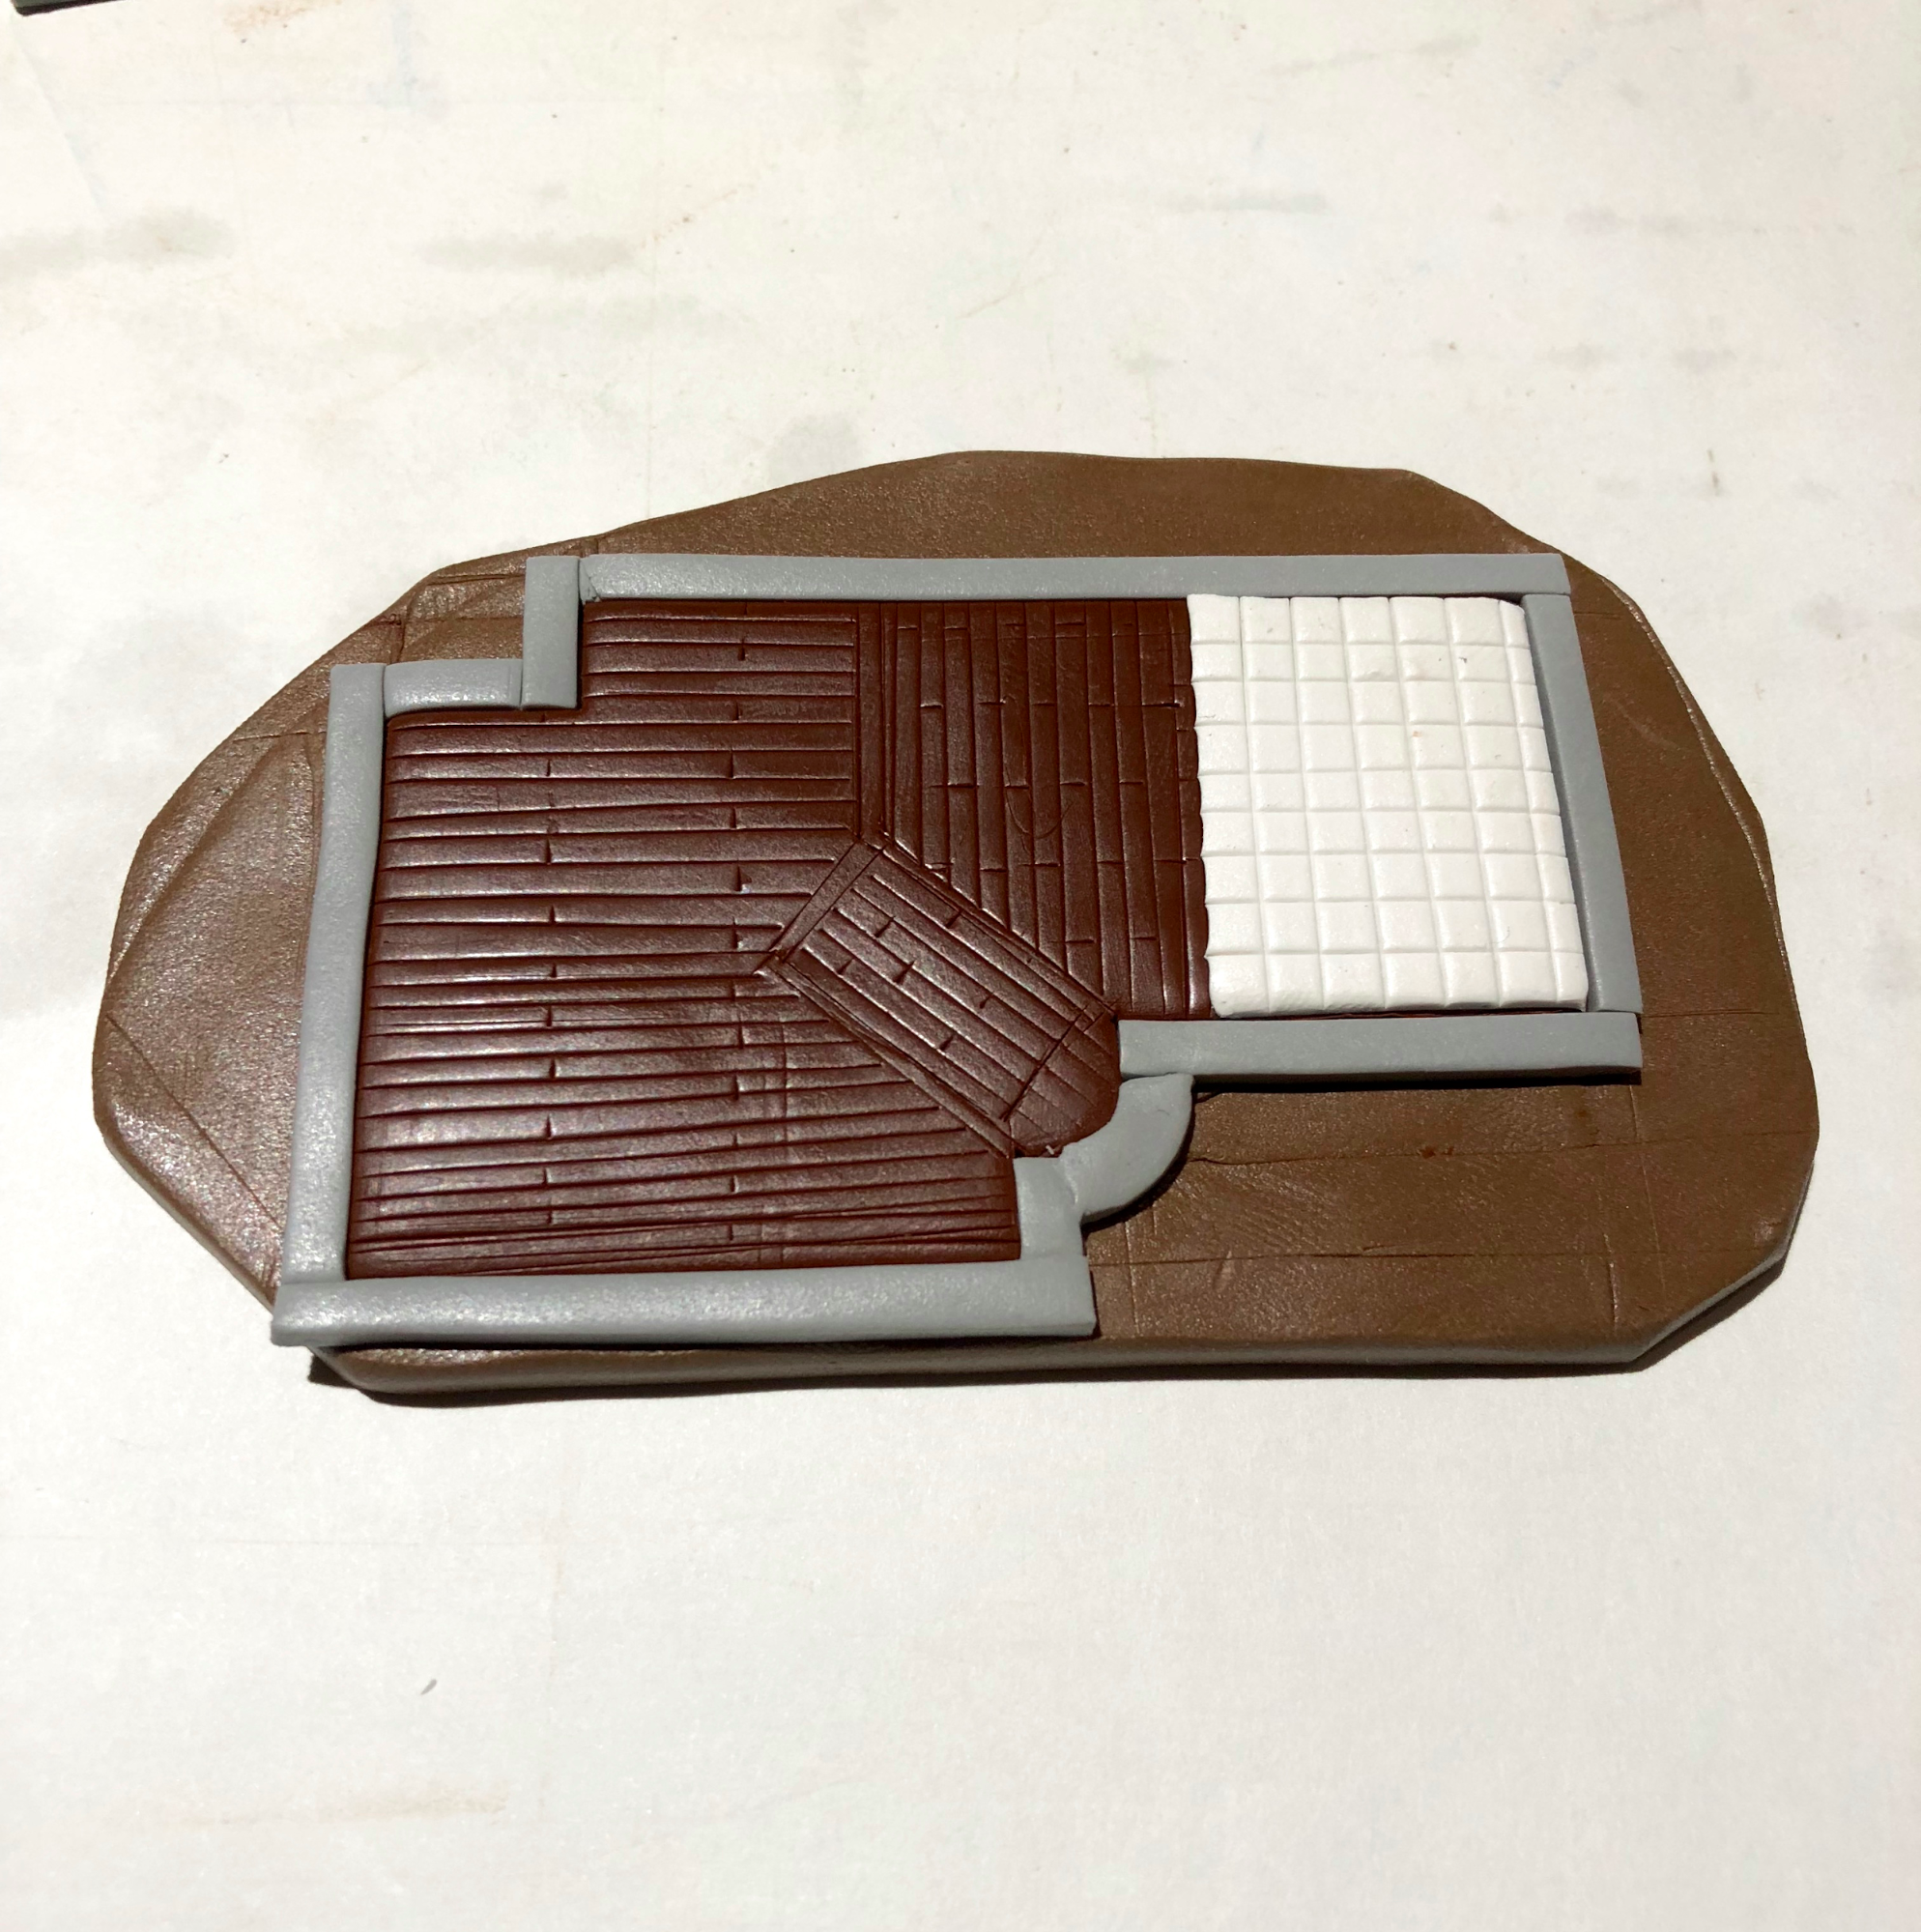
2C:For the second floor you will need the to have a copy of the first floor so it can sit on top. Do this by rolling a slab of burnt umber on the #1 setting. Place this on top of the original floor plan to get an imprint of it, then cut it out. Also do this with a slab of blue, this will be for the roof. You will end up with 3 copies of the floor plan that should match up when stacked on top of eachother.

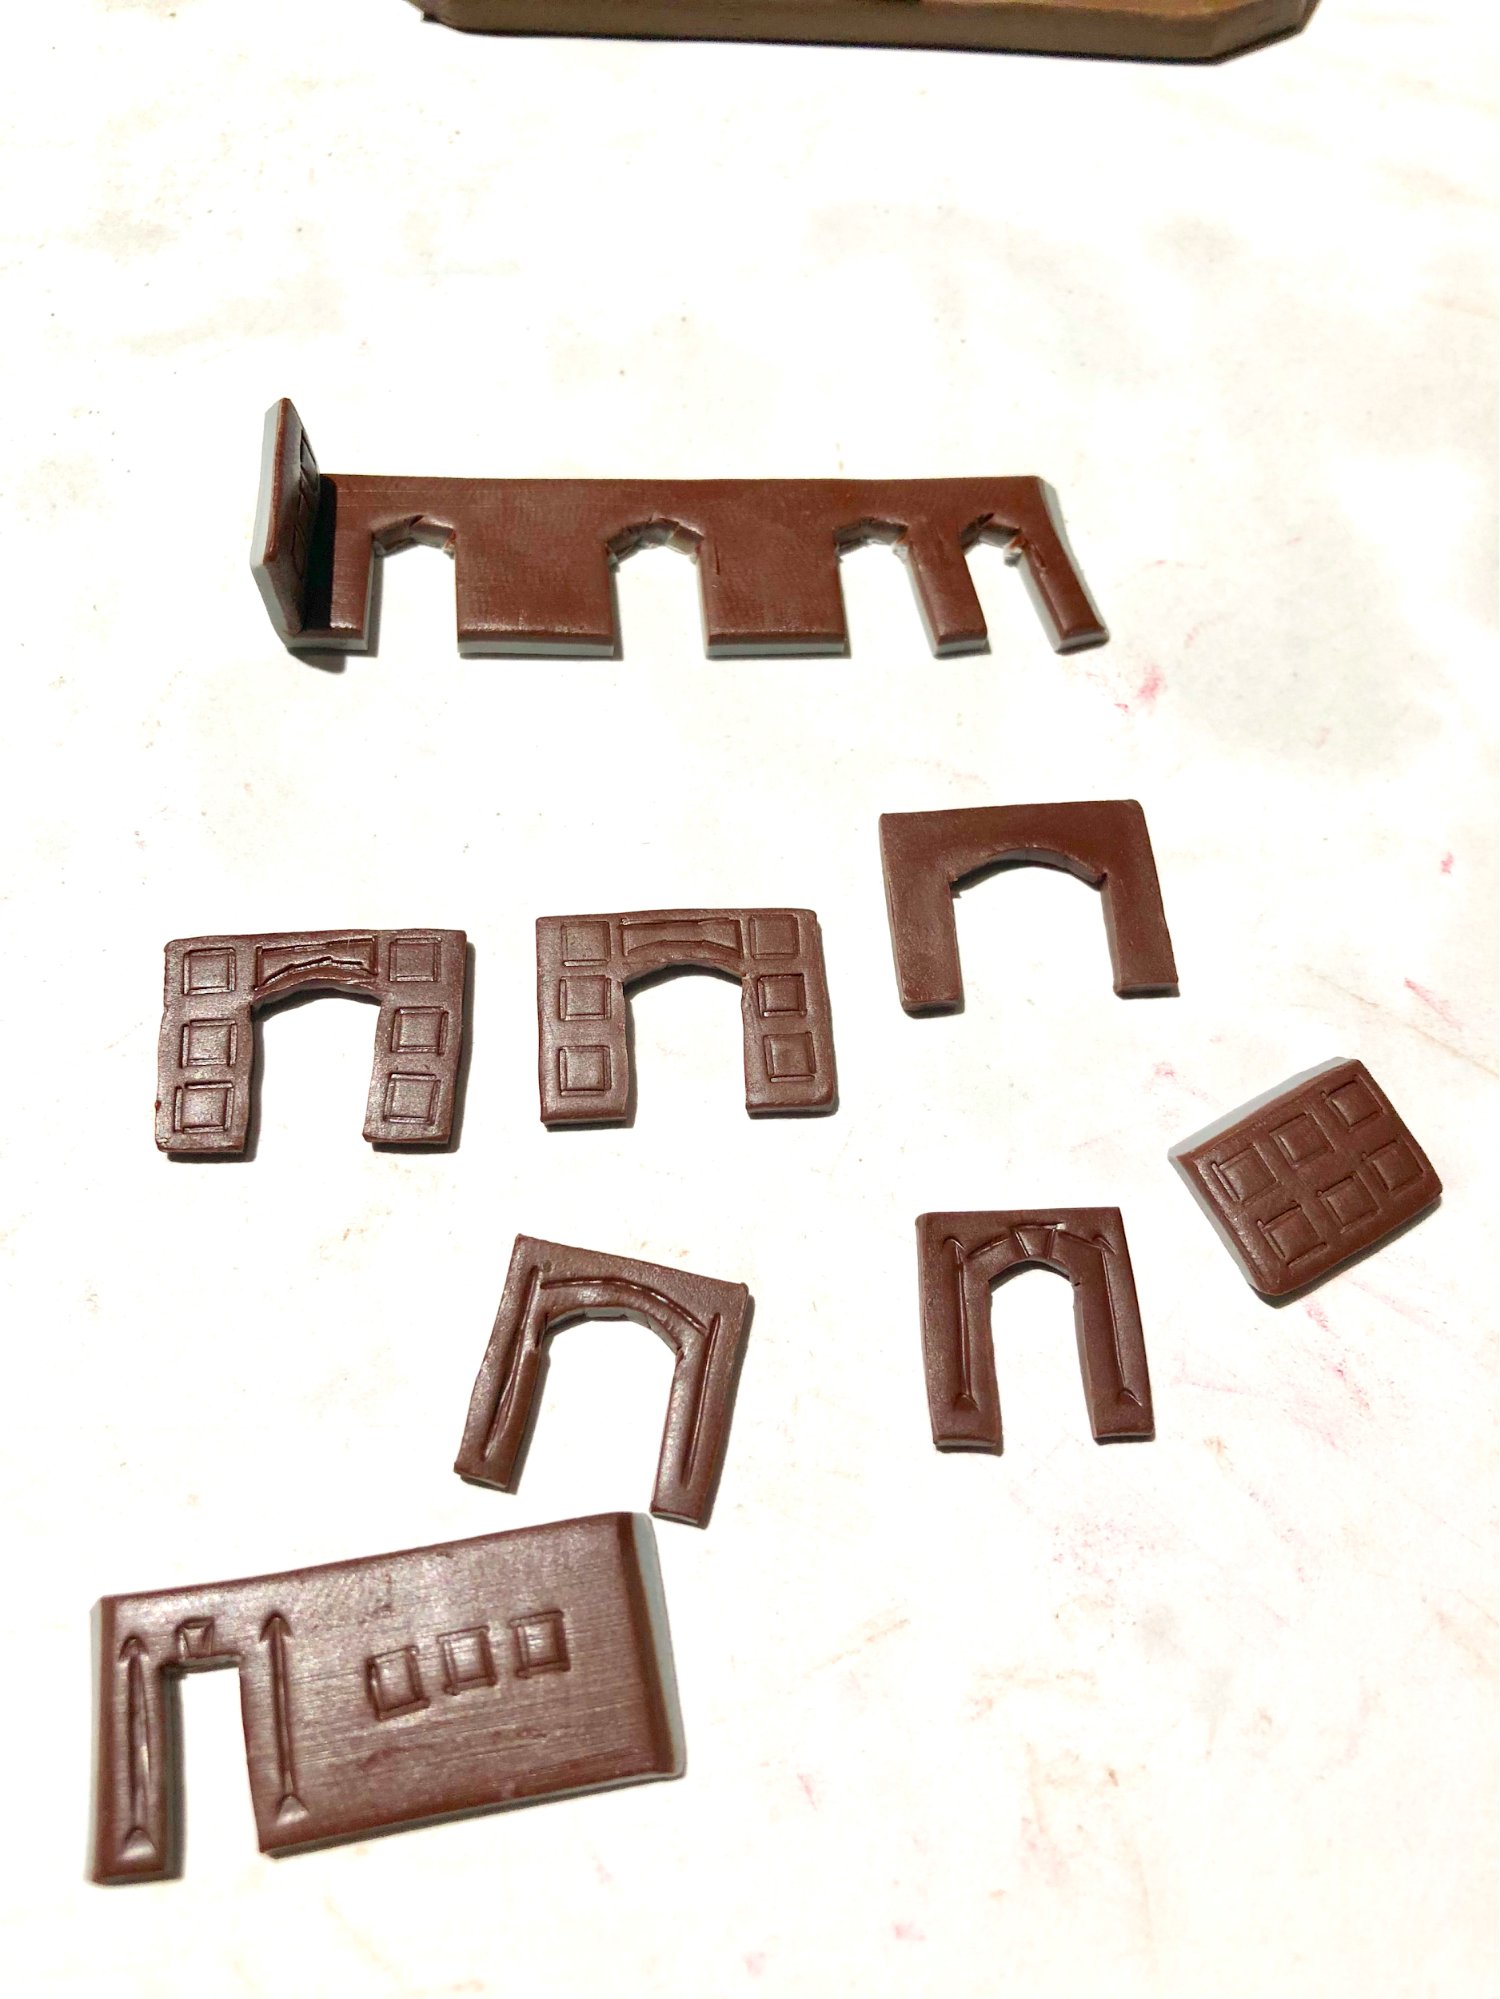
Walls:3A: Making wallsStart by rolling large slabs on the #5 setting of burnt umber. For the outside walls roll a slab of concrete clay also on the #5. Stick the burnt umber with concrete and roll again through the number 1 setting. Cut out a piece of a notecard making sure it’s the same length throughout. Use this as a stencil to cut out your walls, use the clay slicer to get cut out a long even wall. You can also use a ruler and make markings in the clay to cut the walls the same height. I also used white for some interior walls to change it up a bit from the burnt umber.

3B: Cutting to sizePlace the walls next to floor plan and mark where they will end. Using you exacto knife cut at a 45 degree angle so the corners will adhere to each other and so the interior colors won’t show on the outside. Make a copy of all the first floor walls so the second floor will be the same.

3C: Cut out windowsPlace the walls but do not permanently stick them to the floor yet. Make markings where the windows and interior passageways will be cut out. Remove the walls and cut out the shapes using your exacto knife or box cutter. Then lightly stamp designs you want in the interior walls. Clean up the window cuts using the Sculpey detail tools.

FurnitureTips: This may be the most difficult part. Always keep in mind scale and make sure that your furniture makes sense size wize. You can do this by making a small person, placing it next to your furniture and make sure it looks the correct size. You can also look at furniture around your home as a reference and compare how their sizes relate to each other. For example a sink can be the same height as a bed, so you would make them at the same height. Use these techniques to create many different furniture.
- Choosing a selection results in a full page refresh.
- Opens in a new window.