
Sculpey Soufflé™ Dots and Lines Silkscreened Earrings
Sculpey Soufflé™ Dots and Lines Silkscreened Earrings
Designed by syndee holt
Read More
Read Less
Sculpey Soufflé™ Latte teams up with a graphic silkscreen to create these classic earrings. TIME TO COMPLETION:30 minutes to make
30 minutes to bake then 20 minutes for post set
30 minutes to bake then 20 minutes for post set
ADDITIONAL SUPPLIES
- Graphic Silkscreen (mine is my own design from Creatalong.com)
- Black Acrylic paint
- Paint spreader (I use a silicone brush)
- Gold-toned ring 3/4 inch (2)
- Gold-toned 7 mm jump rings (4)
- Posts and backs (2)
- Brush for glaze (glazing is optional)
- Index card or lined paper
- Needle tool or jewelry hand drill for placing the assembly holes
Project Instructions
Step 1
- Getting Started:
Start with clean hands, unwrap and knead clay until soft and smooth, or condition by running clay though a Pasta Machine. We recommend using a designated machine for clay purposes only. When working with multiple colors, clean hands with soap and water or baby wipes (we have found that baby wipes work best) before switching colors. Shape clay, pressing pieces firmly together. Wash hands after use.
- Baking also called Curing:
Step 2
Sheet about 1 oz of the conditioned Latte clay out on a middle setting.Place the silkscreen with the emulsion side down and lightly rub into place.
I prefer to add the paint to the brush/scraper instead of blobbing it onto the screen. NOTE: I use a silicone brush instead of a scraper for screening.
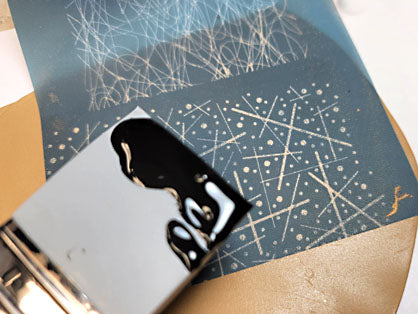
Step 3
Quickly spread the paint over the silkscreen and lightly scrape to remove excess paint.Immediately take the screen to the sink to wash thoroughly.

Step 4
Often when I return to the table after washing/blotting my silkscreen, the paint is already dry and ready for the next steps!
Step 5
I decided to use the 1.5 inch cutter to cut out two circles from my screened clay. Set aside the remaining clay for later play!
Step 6
I often used lined cards or graphing paper to help measure when cutting. Since I had a 3/4 inch ring, I used the 3/4 round cutter to cut out a small portion of the circles. I can now line up with second circle with my lined paper and cut the same place.
Step 7
The ring is a perfect fit from where I cut. I liked the small piece that I cut out that I decided to make that the post portion of the design!Repeat on the second circle of clay that you cut out.

Step 8
Here are both earrings now ready to bake/cure.If you put your assembly holes in before baking, do so now. I drill my clay after baking since Souffle is so easy to drill with a hand drill. Follow the directions in Step 1 above for proper baking/curing. Allow the clay to cool.

Step 9
Once the clay has cooled, I put a small dot of the Sculpey Oven Bake Adhesive on each post piece and slowly pressed the post into the Adhesive, allowing it to flow around the post as shown. Then I rebaked the post pieces for about 15-20 minutes. (I needed to have the paint cure in the first baking before I turned them over and added the post).While the posts were curing, I also added a very light coat of Sculpey Satin glaze to the larger portion of the earrings. The glaze is entirely optional.

Step 10
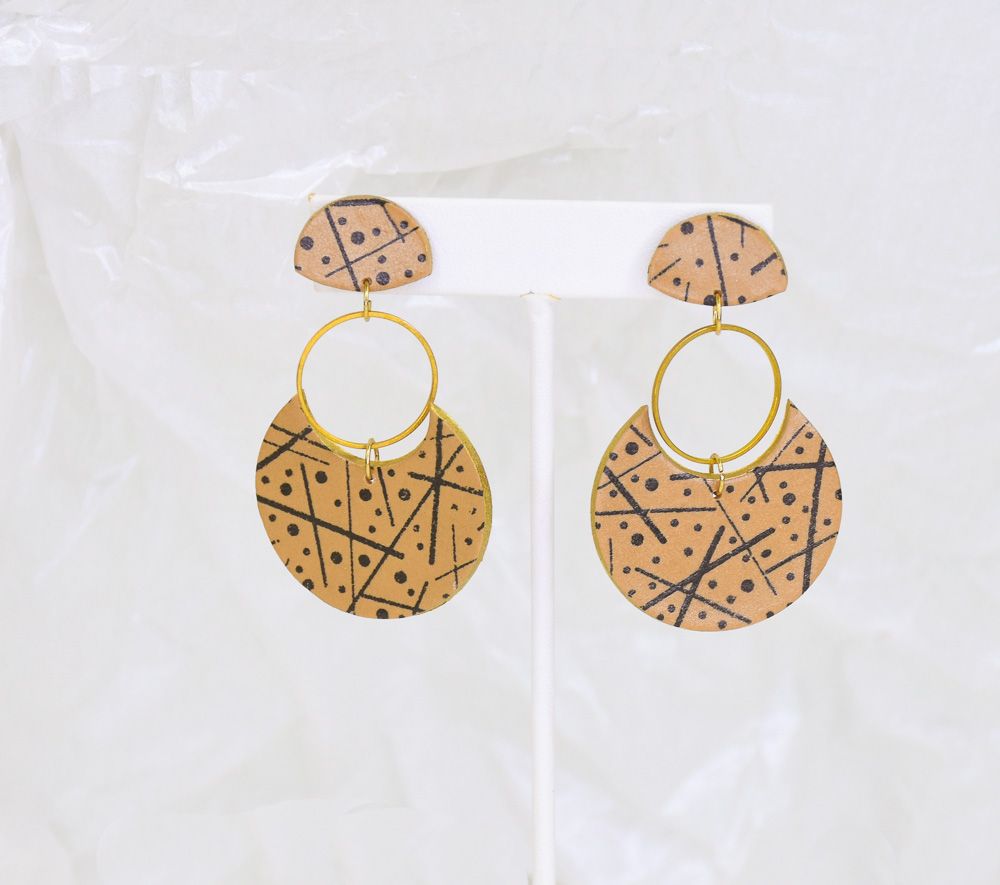
Once the posts were baked and cooled, I added a light coat of Satin Glaze to them and allowed them to dry as well.Here is the layout for my assembly. I used small round jump rings so that the brass piece would sit rather snug with the clay.

Step 11
Here is a look at the final earrings.Curious about the post back? Here is a look at it after baking. My friends tell me that the clay around the post is quite comfortable and actually soft against their ear.
