Sculpey Soufflé™ Citron Heishi Choker
Sculpey Soufflé™ Citron Heishi Choker
Designed by syndee holt
Read More
Read Less
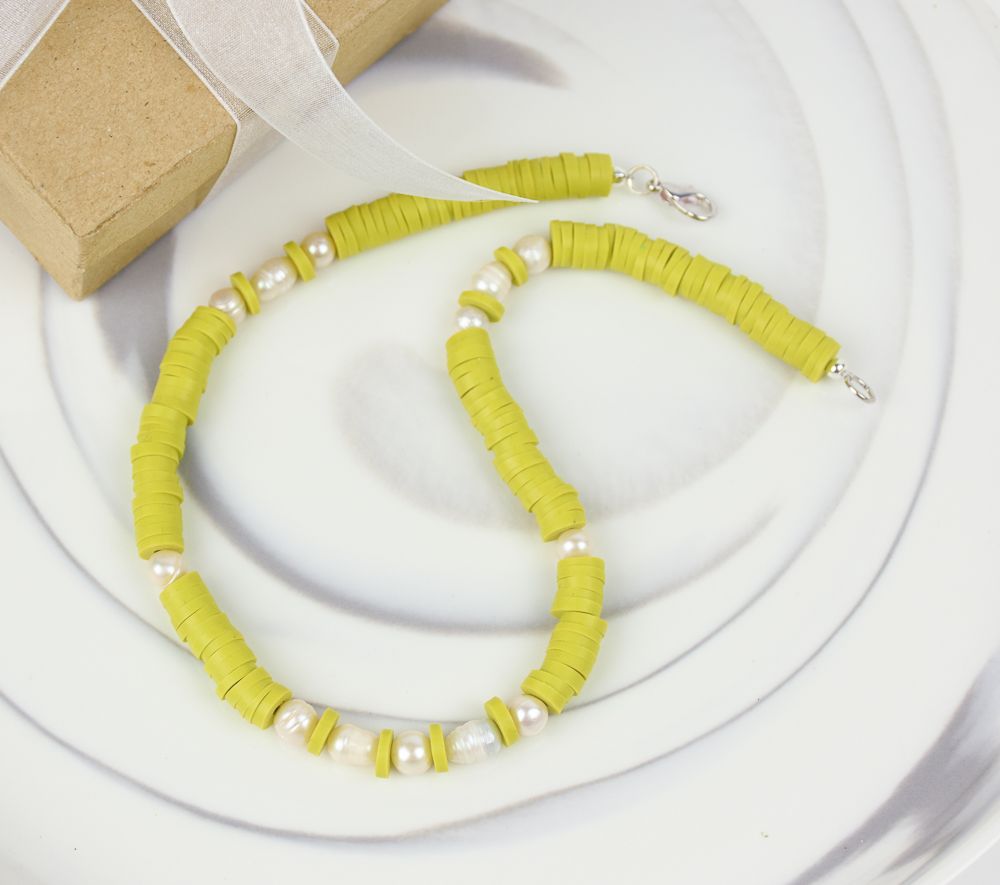
Polymer clay heishi beads are super easy and fun to make and combining them with faux natural pearls just take these Citron heishi to another level!TIME TO COMPLETION: 15 minutes to make/string and 30 minutes to bake.
ADDITIONAL SUPPLIES
- Double pointed knitting needles size 0 (3) OR bamboo skewers
- Faux fresh water pearls
- Beadalon Bead Stringing Wire .018 about 24 inches
- Silver-toned or gold-toned crimp beads (2)
- Silver-toned crimp cover beads (2)
- Silver-toned jump rings (2) and clasp
- Crimping pliers and a pair of regular jewelry pliers
- Small bowl to put the cut heishi in

Project Instructions
Step 1
- Getting Started:
Start with clean hands, unwrap and knead clay until soft and smooth, or condition by running clay though a Pasta Machine. We recommend using a designated machine for clay purposes only. When working with multiple colors, clean hands with soap and water or baby wipes (we have found that baby wipes work best) before switching colors. Shape clay, pressing pieces firmly together. Wash hands after use.
- Baking (also called Curing):
Step 2
Roll a ball of conditioned Citron that is about 3/4-inch diameter, but not larger than one inch. Pierce the ball with a double pointed Size 0 knitting needle OR a bamboo skewer.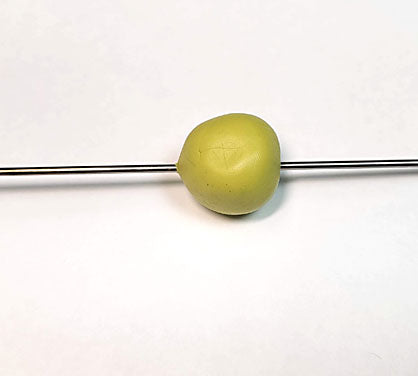
Step 3
Place the clay on a sheet of clay white paper and start to roll back and forth, slowly pulling your fingers apart as shown to stretch the clay along the needle.
Step 4
I like to keep my fingers at a slight angle so that I don’t develop ridges in the clay with the pressure to roll it out. The clay should quickly cover MOST of the needle.When you switch to using two hands, turn your fingers in towards hear other slightly and gently pull your hands apart as you roll the clay on the needle back and forth.

Step 5
You can make your heishi diameter any size you wish! I like to make mine about 1/4-inch in diameter.
Step 6
Repeat to make at least 2-3 skewers of clay and move to your baking tray (yes, I bake on cardboard box flaps!) Bake the clay according to the directions in Step 1 above.
Step 7
Once the clay has baked and cooled about 5 minutes, use your jewelry pliers to gently grasp the needle. Then grasp the clay with your other hand and turn your hands in opposite directions and the clay will POP and then slide easily off the needle.NOTE: When using these metal needles you can also let the clay cool completely and pop it off easily. When using bamboo skewers, wrap the hot clay in a towel and remove it from the skewer with the pliers as soon as possible after baking. The clay will cool and stick to the skewer if left on too long.

Step 8
Place one of the pieces perpendicular to yourself and grasp your blade tool and start cutting off narrow pieces as shown. They do NOT have to be all the same or even cuts! Warm clay is easier to cut, but Souffle is always fairly easy to cut.Place the heishi in a small bowl while you cut up the rest of the pieces.

Step 9
Put a bead clip or a loose knot in one end of your beading wire and start stringing your necklace. I start with about an inch of heishi and then add my pearls and heishi for the center of the necklace.Once you have an estimated length for one side, add a small bead clip or loose knot and repeat your pattern on the other side.

Step 10
I made my overall length about 15-1/2 inches long and now I’m ready to finish the necklace. I’ve got my two jump rings, my clasp, my two crimp beads (mine are gold, but the crimp covers are silver so it doesn’t matter!) and finally the crimp covers.NOTE: I prefer to attach the jump rings to the clasp before I start the assembly.

Step 11
Thread one end of the beading wire through the crimp bead and then loop it through the jump ring on the clasp. Finally thread it back through the crimp bead as shown.
Step 12
Slowly snug the crimp bead up to the last heishi bead and use your crimp pliers to crimp the crimp.
Step 13
Slip the crimp cover over the crimp as shown and use your jewelry pliers to close the crimp cover. Trim the loose end of the beading wire to the cover.
Step 14
Repeat steps 11-13 on the other side, threading the wire through the jump ring that is hooked in the clasp.Your heishi necklace is done!

Step 15
Here's a final look at my heishi and pearl choker!