Skip to product information
1 of 1

Sculpey Premo™ + Sculpey Souffle™ Floral Slab Pendant

Sculpey Premo™ + Sculpey Souffle™ Floral Slab Pendant

Read More
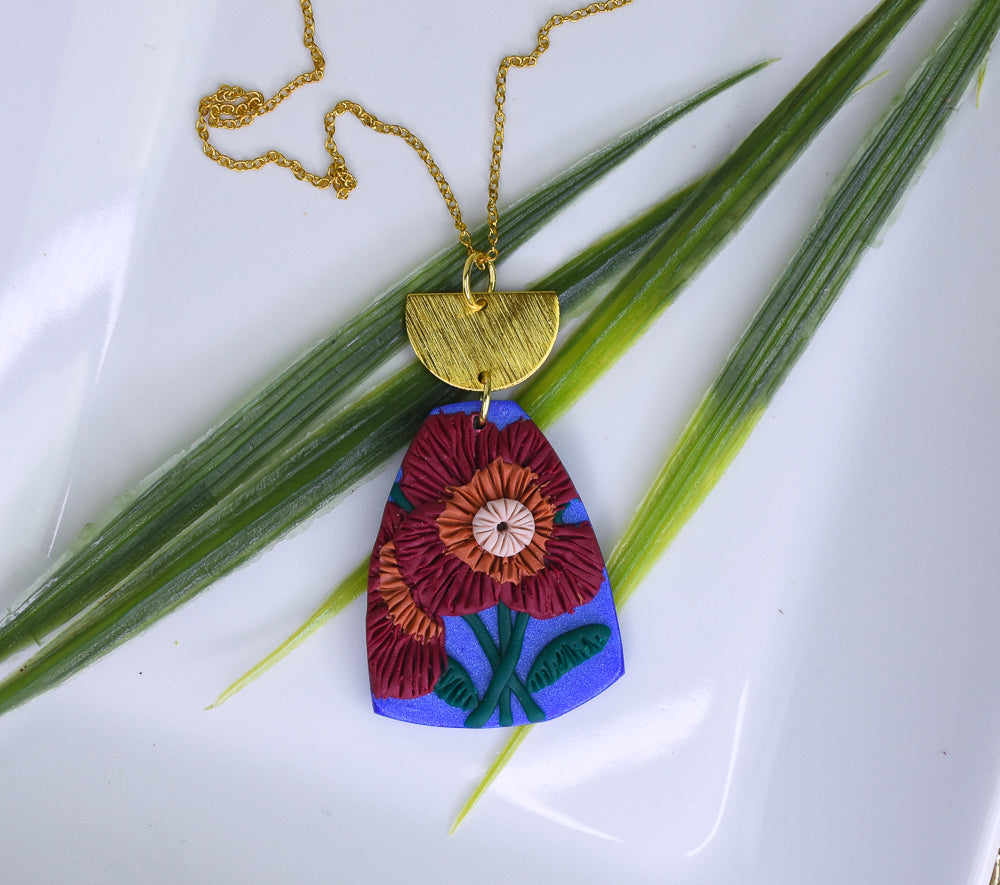
Sculpey Souffle™ Cabernet is a perfect petal color in this palette of rich jewel-toned colored pendant. This is a great project to get started on floral slab creating! COMPLETION TIME: 60 Minutes to make, bake, and assemble Designed by Amy Koranek
Read Less
ADDITIONAL SUPPLIES
  • 6 mm Gold tone jump rings (2)
  • 20” Gold tone chain with clasp
  • Gold tone half circle connector
View full details
Project Instructions

Step 1

Getting Started:
Please make sure your work area is covered and you are not working on an unprotected surface. We recommend working on the Sculpey® Oven Safe Work Mat, wax paper, metal baking sheet, or disposable foil. Uncured clay may damage unprotected furniture or finished surfaces. Be sure to cover your crafting area appropriately.

Start with clean hands, unwrap and knead clay until soft and smooth, or condition by running clay though a Pasta Machine. We recommend using a designated machine for clay purposes only. When working with multiple colors, clean hands with soap and water or baby wipes (we have found that baby wipes work best) before switching colors. Shape clay, pressing pieces firmly together. Wash hands after use.

Baking:
Begin by preheating oven to 275 °F (130 °C). After you are done creating; for best results bake clay on an oven-proof surface such as metal, aluminum foil, an index card or the Sculpey® Oven Safe Work Mat at 275°F (130 °C) for 30 minutes per ¼" (6 mm) of thickness according to package directions. Oven safe glass or ceramic surfaces are also acceptable for baking; however please note that the baking times may take longer as the glass or ceramic surfaces take longer to heat up. For best baking results, use an oven thermometer. DO NOT USE MICROWAVE OVEN. DO NOT EXCEED THE ABOVE TEMPERATURE OR RECOMMENDED BAKING TIME.

Step 2

Sheet 1/4 bar Indigo Pearl to a 1/8” thick sheet.
Roll three tiny stems of Forest Green and place them in a bouquet on the sheet.
Add little leaves at the base.

Step 3

Make organic round shapes that are very flat and press them to the background overlapping each other.

Step 4

Score radiating lines with the Needle Tool through the petals.

Step 5

Add a very flat Terra Cotta center to one of the sets of petals and score radiating lines with the Needle Tool. Score little lines in the leaves also.

Step 6

Add a Beige center. Score radiating lines and a center hole.

Step 8

Layout the pieces for assembly.
Poke a hole in the top of the clay pieces for later assembly.
Bake the pendant following the baking instructions for Sculpey Premo™.
Allow to cool completely before handling.

Step 9

Use flat nose pliers to assemble with the connector and chain.