
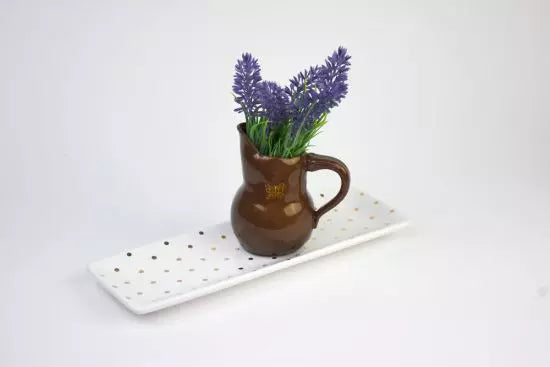
Sculpey Premo™ Mocha Pearl Sculpted Mini Pitcher
Sculpey Premo™ Mocha Pearl Sculpted Mini Pitcher
Designed by Mrs Victoria
Read More
Read Less
Create this gorgeous little vase in about an hour with a unique construction that is ALL clay!TIME TO COMPLETION:30 minutes to make
About an hour to bake (several bakings)
About an hour to bake (several bakings)
ADDITIONAL SUPPLIES
- A small glass or metal jar/vase (glass and metal can go in the oven safely)
- Exacto knife and/or tissue blade
- Small stamp
- Gold paint
- UV resin/sealant
Project Instructions
Step 1
- Getting Started:
Start with clean hands, unwrap and knead clay until soft and smooth, or condition by running clay though a Pasta Machine. We recommend using a designated machine for clay purposes only. When working with multiple colors, clean hands with soap and water or baby wipes (we have found that baby wipes work best) before switching colors. Shape clay, pressing pieces firmly together. Wash hands after use.
- Baking (also called Curing):
Step 2
Roll a 2-mm thick slab of clay. Lay your vase/jar down on slab of clay and trim the top and bottom of the clay to match the height of the vessel.Wrap the clay around the vessel, cut to size and smooth out the connecting edge. You can use any tools you have or your fingers to help smooth out the clay.

Step 3
From the same slab of clay trace the bottom of your vessel and cut out then attach it to the bottom of your vessel and smooth it out.Bake for 15 min per your clay packaging instructions.

Step 4
When you take the vessel out of the oven (use a hot pad to protect your hands while doing this step) cut the vessel in half. Keep them on the vessel until they cool down and then remove both halves.
Step 5
Apply Transparent Liquid Sculpey to edge of one half of the split vessel.Then roll a small coil of the Premo mocha pearl and line the same edge with the coil.
Attach both halves together and use your tools/hands to smooth out the coil. Bake your vessel for 15 min per your clay packaging instructions.

Step 6
While your vessel is baking/cooling down make your spout and handle. Make your spout by rolling a 2-mm thick slab and cutting a 1-1/2 inch circle (you can adjust this size depending on the size of vase/jar you chose).Then using your pointer finger and thumb pinch opposite sides and pull to make a lemon shape then set aside.

Step 7
Make your handle by rolling a 1-inch ball (again you can adjust this size depending on the size of vase/jar you chose) then start applying pressure on one side of the ball as you roll back and forth creating a cone shape.Continue this until you get your desired length.
Use a roller or something flat and press down on your cone shaped coil. Then set this shape aside.

Step 8
Once you take your vessel out of the oven let it cool down completely. Take your lemon shape you made and lay half of it on the lip of it where you want your spout, then trace it with your exacto knife then cut the shape out of the vessel.Chop up small bits of the Mocha Pearl and add Transparent Liquid Sculpey mixing until you get a thick frosting like consistency of the colored clay.
Add the thick mixture to the edge of the spot you cut for your spout and then add your lemon shape to the vessel.
Roll a small coil of the Mocha Pearl clay and add it to where you attached your spout then smooth it out.

Step 9
You will now add your handle by lining it up across from where you placed your spout and mark where you are going to attach each end of the handle.Add your Mocha Pearl thickened mixture you made to each mark and then add the handle with the thickest part at the top and the thinner part at the bottom. If you need to you can trim up the small part at the bottom after you’ve attached it.

Step 10
Adding the stamp. Roll out a 1-mm thick slab and dust slab and stamp with cornstarch to prevent sticking.Cut a circle out of the slab that will fit around the size of stamp you’ve chosen. Stamp the image then add more of the thick colored mixture where you want to attach the stamp. Attach stamped circle to the vessel and smooth out the edges until seamless. Bake as directed in Step 1 above.
Add gold paint to the entire surface (get it into all of the cracks of the design) of the stamped area. Use a cloth to wipe residue off and the gold paint will remain in the impression of the stamp.

Step 11
You can use a small amount of acetone to clean up any residue and blemishes on the surface of the clay.To add a glossy look and to seal the paint add UV resin/sealant over entire surface of the clay. Be sure to put the sealant on the sides first, cure and then seal the bottom. If desired you can apply the sealant to the inside. This vessel is not food safe.
