Sculpey Premo™ Lips & Lipstick Earrings
Sculpey Premo™ Lips & Lipstick Earrings
Designed by Amy Koranek
Read More
Read Less
This is a super fun project to create a pair of earrings that will be SURE to cause comments and requests for more in your friends/coworkers favorite colors! COMPLETION TIME: 60 Minutes to make, bake, and assemble
ADDITIONAL SUPPLIES
- Silver toned ear wires (2)
- 4 mm Silver toned jump ring
- 6 mm Silver toned jump ring
- Flat nose pliers

Project Instructions
Step 1
- Getting Started:
Start with clean hands, unwrap and knead clay until soft and smooth, or condition by running clay though a Pasta Machine. We recommend using a designated machine for clay purposes only. When working with multiple colors, clean hands with soap and water or baby wipes (we have found that baby wipes work best) before switching colors. Shape clay, pressing pieces firmly together. Wash hands after use.
- Baking (also called Curing):
Step 2
Make two little teardrops and a log shape that is tapered on both ends from Premo™ Blush .
Step 3
Push the lobes of the teardrops together to form a top lip.Bend the bottom lip into shape as shown.

Step 4
Push the pieces all together and shape the mouth as you like.
Step 5
Poke a hole in one corner of the lips with the Blunt Point Tool.
Step 6
From Blush Premo™, roll a 3/8” thick rope and cut the tip at an angle like the tip of a lipstick.
Step 7
Mix 2 parts Turquoise to 1-part White to make Light Teal.
Step 8
Slice the end of the lipstick off square.Make a little log from Light Teal that is the same diameter as the lipstick.

Step 9
Push the Light Teal tube onto the bottom of the lipstick.Use the Roller to make a little flat strip of Light Teal that is long enough to go around the tube.

Step 10
Wrap the little strip around the bottom of the tube and trim the end. Smooth the seam with fingertips.Add tiny White dots to the tube as you like.

Step 11
Carefully poke a hole through the tip of the lipstick with the Blunt Point Tool to add the earring hardware after baking.
Step 12
Bake the Lips and the Lipstick following the baking instructions for Sculpey Premo™.Allow to cool completely before handling.
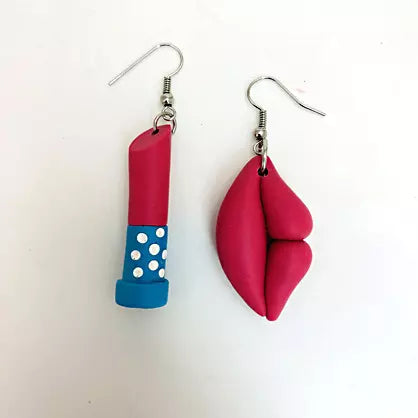
Lay out the earrings for assembly.
I’m using a smaller jump ring for the lipstick and a larger jump ring for the lips because the lips were thicker.

Step 13
Use flat nose pliers to assemble the earrings as shown.