
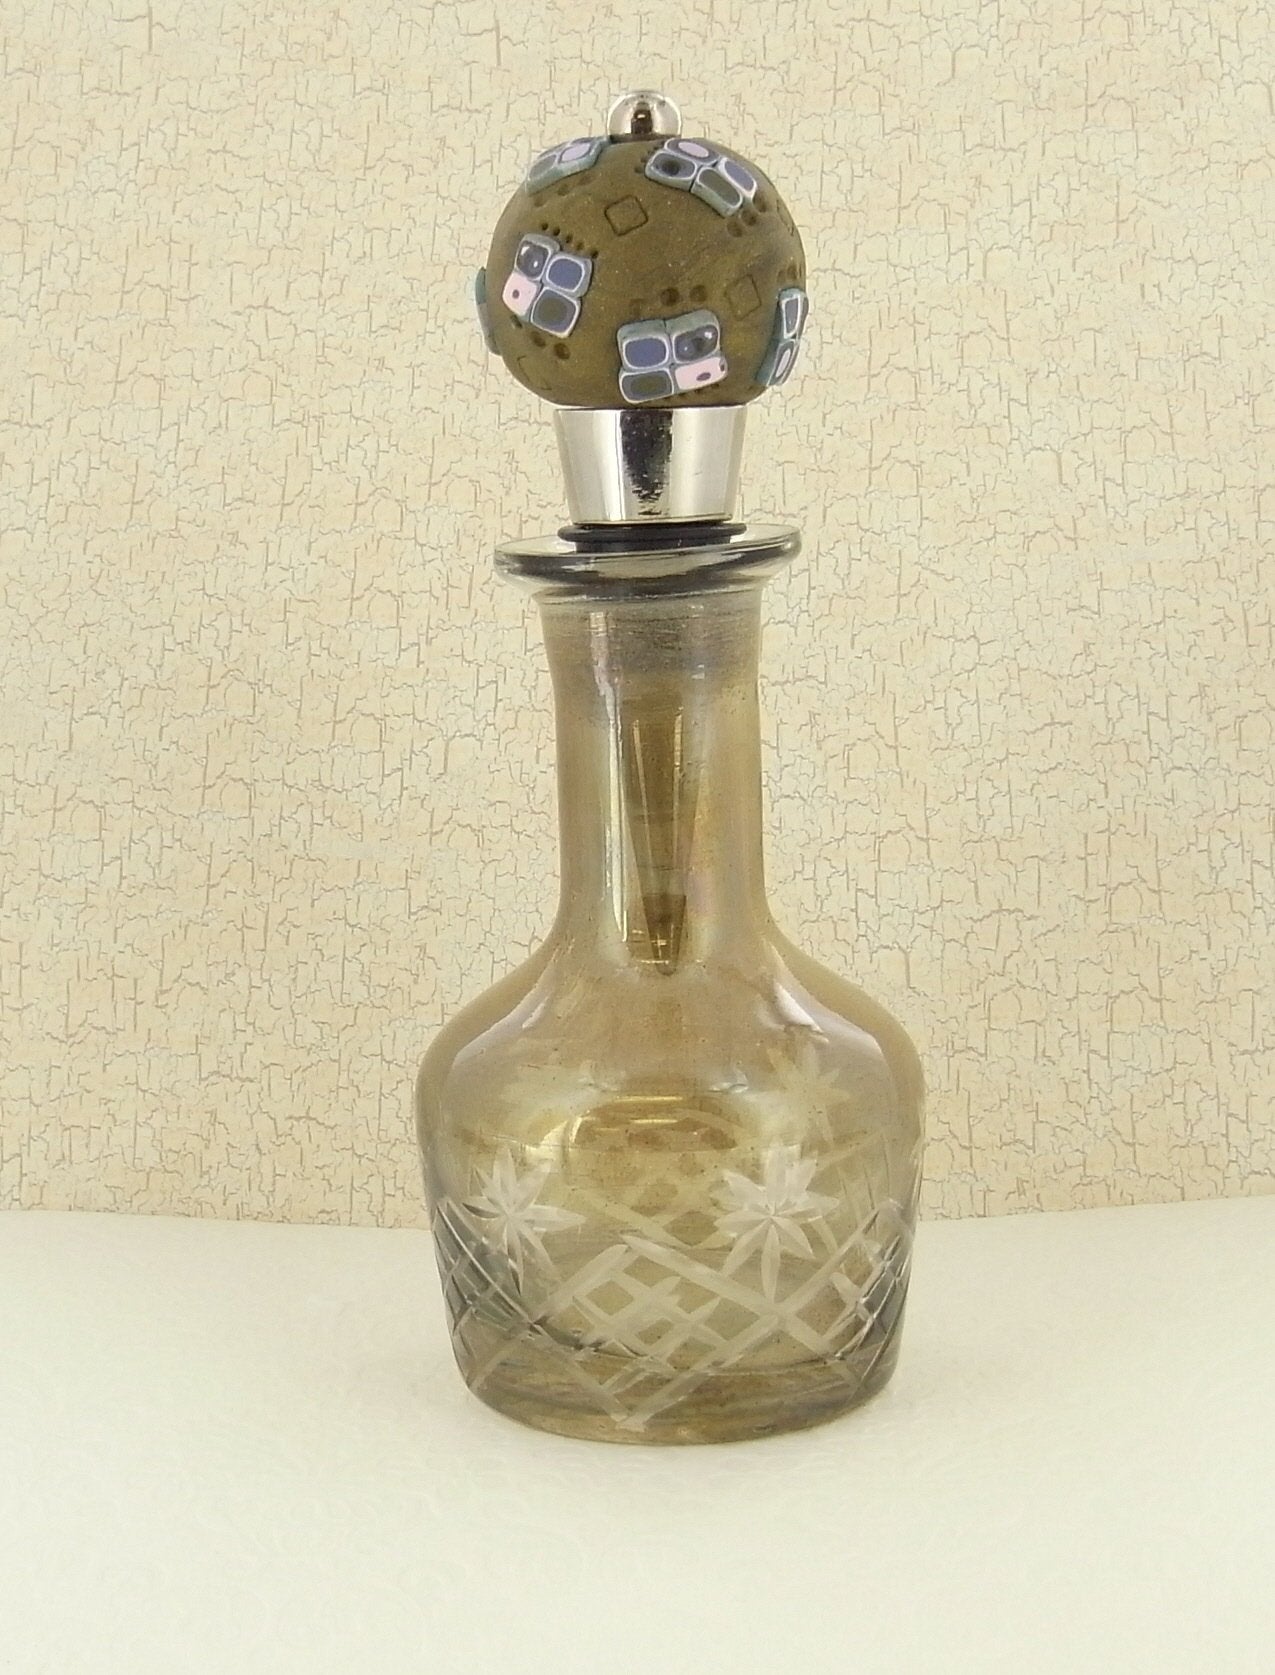
Sculpey® III Wine Stopper
Sculpey® III Wine Stopper
Read More
All things in moderation, so save the freshness of that bottle with this elegant bottle stopper.
Read Less
ADDITIONAL SUPPLIES
Small square cutter for impressions
Post and Screw Style Wine Stopper|Small square cutter for impressions
Post and Screw Style Wine Stopper
Project Instructions
Do not use unbaked clay on unprotected furniture or finished surfaces. Start with clean hands and work surface area. Good work surfaces include wax paper, metal baking sheet, or disposable foil. Knead clay until soft and smooth. For best results, clean your hands in between colors. Shape clay, pressing pieces together firmly. Bake on oven-proof glass or metal surface at 275 °F (130 °C) for 15 minutes per 1/4"(6 mm) thickness. For best baking results, use an oven thermometer. DO NOT USE MICROWAVE OVEN. DO NOT EXCEED THE ABOVE TEMPERATURE OR RECOMMENDED BAKING TIME. Wash hands after use. Baking should be completed by an adult. Begin by preheating oven to 275 °F (130 °C). Test temperature with oven thermometer for perfectly cured clay. For best results, condition all clay by running it through the clay dedicated pasta machine several passes on the widest setting. Fold the clay in half after each pass and insert the fold side into the rollers first.

Form 2 balls about 3/8” diameter from each color. Flatten each ball slightly and stack the colors on top of each other, repeating the sequence of colors twice. Roll this gently into a log and insert it into the clay extruder with the square die in place.

Press in the plunger to extrude all the clay.
The colors extruded create concentric rings of color inside the square. At different positions along the extruded clay, the color pattern will be different. Cut clay into pieces about 1” long and look for interesting combinations to form into a cane of 2 slices by 2 slices.
Form a ball using the Buried Treasure approximately 1 ½ ”round on the top post of the wine stopper.
Use the Super Slicer to cut thin slices of the square cane made in step 3 and apply them around the surface of the top of the stopper.
Texture the surface with the smallest Style & Details Tool in a pattern around the cane slices and add the tiny square impression as well.
Bake as directed above and let cool. Reassemble the wine stopper together.
Do not use unbaked clay on unprotected furniture or finished surfaces. Start with clean hands and work surface area. Good work surfaces include wax paper, metal baking sheet, or disposable foil. Knead clay until soft and smooth. For best results, clean your hands in between colors. Shape clay, pressing pieces together firmly. Bake on oven-proof glass or metal surface at 275 °F (130 °C) for 15 minutes per 1/4"(6 mm) thickness. For best baking results, use an oven thermometer. DO NOT USE MICROWAVE OVEN. DO NOT EXCEED THE ABOVE TEMPERATURE OR RECOMMENDED BAKING TIME. Wash hands after use. Baking should be completed by an adult. Begin by preheating oven to 275 °F (130 °C). Test temperature with oven thermometer for perfectly cured clay. For best results, condition all clay by running it through the clay dedicated pasta machine several passes on the widest setting. Fold the clay in half after each pass and insert the fold side into the rollers first.
Form 2 balls about 3/8” diameter from each color. Flatten each ball slightly and stack the colors on top of each other, repeating the sequence of colors twice. Roll this gently into a log and insert it into the clay extruder with the square die in place.
Press in the plunger to extrude all the clay.
The colors extruded create concentric rings of color inside the square. At different positions along the extruded clay, the color pattern will be different. Cut clay into pieces about 1” long and look for interesting combinations to form into a cane of 2 slices by 2 slices.
Form a ball using the Buried Treasure approximately 1 ½ ”round on the top post of the wine stopper.
Use the Super Slicer to cut thin slices of the square cane made in step 3 and apply them around the surface of the top of the stopper.
Texture the surface with the smallest Style & Details Tool in a pattern around the cane slices and add the tiny square impression as well.
Bake as directed above and let cool. Reassemble the wine stopper together.