
Sculpey III® Checkerboard Frame
Sculpey III® Checkerboard Frame
Designed by Amy Koranek
Read More
Read Less
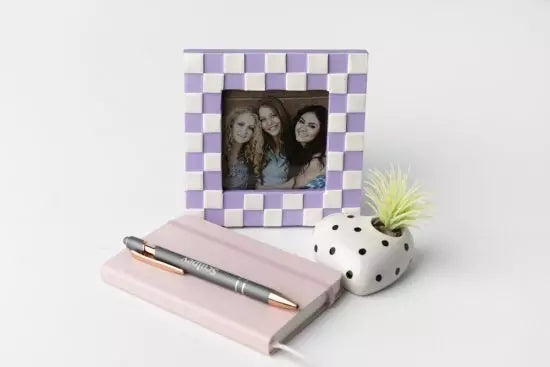
Create a clever checkerboard frame for your favorite photo in just about an hour! The frame also makes a great gift inclusion for a photo you are giving a friend or family! COMPLETION TIME:60 Minutes to make and bake; some extra time needed for frame prep
ADDITIONAL SUPPLIES
- 5.5” x 5.5” Wood frame
- Folk Art Purple Lilac Acrylic paint
- Paintbrush
- Paper towel
- Ruler

Project Instructions
Step 1
- Getting Started:
Start with clean hands, unwrap and knead clay until soft and smooth, or condition by running clay though a Pasta Machine. We recommend using a designated machine for clay purposes only. When working with multiple colors, clean hands with soap and water or baby wipes (we have found that baby wipes work best) before switching colors. Shape clay, pressing pieces firmly together. Wash hands after use.
- Baking (also called Curing):
Step 2
To prepare the frame, paint the edges and the back where areas of the frame will not be covered with clay in a coordinating paint color.
Step 3
Squirt a bead of Sculpey Oven Bake Clay Adhesive on all four sides of the front of the frame.
Step 4
Spread the clay adhesive in a smooth layer with your fingertips. Wipe up excess from fingers and work areas with paper towel.
Step 5
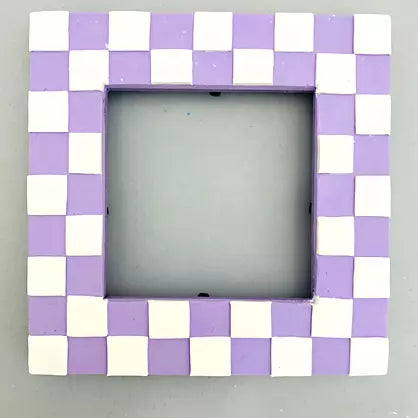
Roll the entire Spring Lilac bar to a sheet 1/8” thick.Cut the sheet into strips as wide as the frame sides.
Carefully place trimmed strips on the sides of the frame making straight seams where the pieces touch in the corner.
Use fingertips to smooth out trapped air bubbles.

Step 6
Cover all four sides with clay strips.Trim the excess with the Clay Blade.

Step 7
Smooth the corner seams with your fingertips.
Step 8
Roll the White clay to a thin sheet 1/16” thick. Cut strips that are 1/2 as wide as the sides of the frame.
Step 9
Cut the strips into squares and arrange them on the clay frame as shown.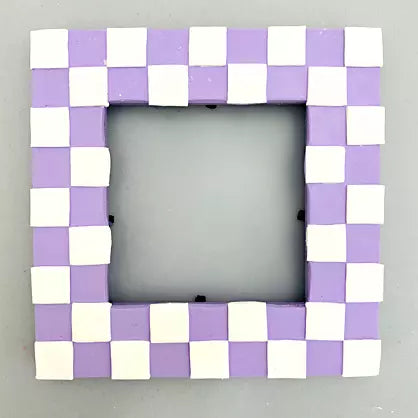
Step 10
Trim the outside and inside edges with the Clay Blade.Bake the entire frame following the baking instructions for Sculpey III.
Allow to cool completely before handling.