
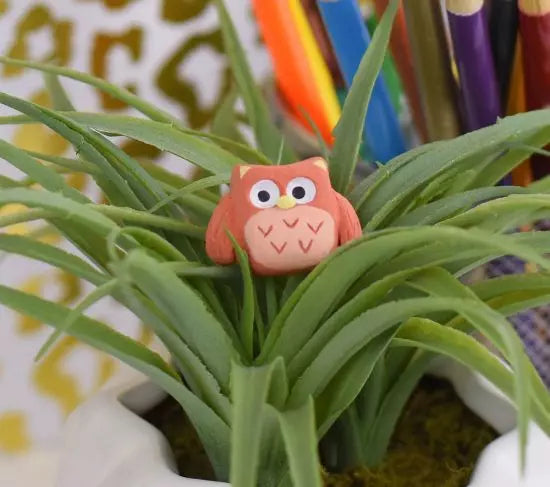
Sculpey Air-Dry™ Owl Figurine
Sculpey Air-Dry™ Owl Figurine
Designed by Precious Nunez
Read More
Read Less
This owl figurine is a fun yet simple project to make at home as a cute gift or piece to have as cozy Fall decor!
Time to complete –
Sculpting time approximately 15 minutes, Painting approximately 20 minutes
Time to complete –
Sculpting time approximately 15 minutes, Painting approximately 20 minutes
ADDITIONAL SUPPLIES
- Toothpick (optional)
- Paint brushes
- Acrylic Paint in three colors
- Damp towel or Ziplock
- Water
- Sculpey Gloss Glaze (optional)
Project Instructions
Step 1
- Getting Started with Sculpey Air-Dry™ :
Start with clean hands, unwrap and knead clay until soft and smooth. Wash hands after use. Wrap any extra clay in then wrapper and then put in an airtight container.
Step 2
Roll out a ball into an oval shape about 1 inch + depending how big you'd like your figurine.Pinch the top of the oval on both ends to make the ears.
Press in the sides to make indents right below the ears to shape the owl’s body.
Feel free to store the snakes/clay you won't be using immediately in a closed ziplock bag or under a damp towel to keep the clay from drying.

Step 3
Make two almond shaped pieces for the wings, stick these on both sides where you made the indents from Step 2.If the clay is too dry to attach the wings, pat the indents and the wings with a little water.

Step 4
Blend the wings onto the owl using your needle tool or toothpick as shown here.
Step 5
Texture the wings on each side with a few different sized lines to create a feather type texture using your needle tool or toothpick.
Step 6
Take your large dotting tool and create two indents where you would like the eyes to be.Take a little piece of clay and add a nose right beneath the middle of both eye indents .

Step 7
Create small “v” shaped indents on the belly area to add more texture to your owl, about 5-6 indents.Place your owl to the side and refer to Step 1 for drying.

Step 8
Once dried, paint the tummy, nose, ears, and eyes to your liking.It is best to paint the eyes with the same ball tool you used to make the eye indents.

Step 9
Here is a look at my finished owl!