
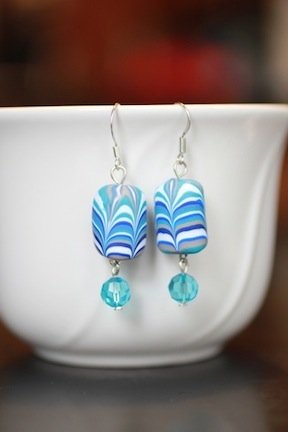
premo! Chevron Earrings
premo! Chevron Earrings
Read More
These gorgeous earrings are super easy to make. Make a dozen to go with your favorite outfits!
Read Less
ADDITIONAL SUPPLIES
Needle Nose Pliers
Wire Cutters
Plastic Wrap
2" Silver Eye Pins- 2
2" Silver Head Pins- 2
Silver Ear Wires- 2
Aqua Bicone Beads 8mm- 2|Needle Nose Pliers
Wire Cutters
Plastic Wrap
2" Silver Eye Pins- 2
2" Silver Head Pins- 2
Silver Ear Wires- 2
Aqua Bicone Beads 8mm- 2
Project Instructions
Do not use unbaked clay on unprotected furniture or finished surfaces. Start with clean hands and work surface area. Good work surfaces include wax paper, metal baking sheet, or disposable foil. Knead clay until soft and smooth. For best results, clean your hands in between colors. Shape clay, pressing pieces together firmly. Bake on oven-proof glass or metal surface at 275 °F (130 °C) for 30 minutes per 1/4” (6 mm) thickness. For best baking results, use an oven thermometer. DO NOT USE MICROWAVE OVEN. DO NOT EXCEED THE ABOVE TEMPERATURE OR RECOMMENDED BAKING TIME. Wash hands after use. Baking should be completed by an adult. Begin by preheating oven to 275 °F (130 °C). Test temperature with oven thermometer for perfectly cured clay. For best results, condition all clay by running it through the clay dedicated pasta machine several passes on the widest setting. Fold the clay in half after each pass and insert the fold side into the rollers first.
Roll out equal 5 colors of clay into equal size sheets (thickness and dimension). Make 2 sheets of each color. Roll out four of the sheets (varying the colors) through the Clay Conditioning Machine on the #3 setting. Then roll out three of the sheets (varying the colors) on the #4 setting and then the last three sheets on the #5 setting.Create a stack, alternating the colors and thicknesses. Create the stack carefully to avoid air bubbles.

Place a sheet of plastic wrap over the stack. Use a firm edged tool, like a metal spatula, to press into the stack (all the way to the bottom). Start 1/8 inch from one end and continue in 1/8 inch increments until you reach the other end. Remove the plastic. Using your hands, press the slices back together.

Holding the Super Slicer horizontally, slice 2 layers off of the stack and run them through the clay-conditioning machine on the #3 setting separately. Set aside as these will be used to cover the beads.

Using scrap clay, roll 2 beads of the same shape and length, about 1/3 of an inch in diameter.
Wrap one slice from step 4 onto one of the beads. Press the edges in on the top and the bottom. Remove excess if needed. Poke a hole through the center of the bead using the pointed end of the smallest Etch n Pearl. Repeat for the other bead.
Bake according to the above directions and allow to cool completely.
Thread the chevron bead onto the eye pin. Open the loop on the eye pin and attach it to the ear wire. Close the loop. Repeat this for other earring.

String the aqua bead onto the head pin. Using the needle nose pliers, form a loop at the end. Use the wire cutters to remove excess wire. Attach it to the headpin by opening the loop and reclosing it. Repeat this for other earring.