
Original Sculpey® Ancient Images Earrings
Original Sculpey® Ancient Images Earrings
- Circle cutter
- Craft knife
- Oil or acrylic paints
- Permanent black marker
- 20-gauge silver wire
- Round nose pliers
- Earring hooks
- Getting Started:
Start with clean hands, unwrap and knead clay until soft and smooth, or condition by running clay though a Pasta Machine. We recommend using a designated machine for clay purposes only. When working with multiple colors, clean hands with soap and water or baby wipes (we have found that baby wipes work best) before switching colors. Shape clay, pressing pieces firmly together. Wash hands after use.
- Baking:
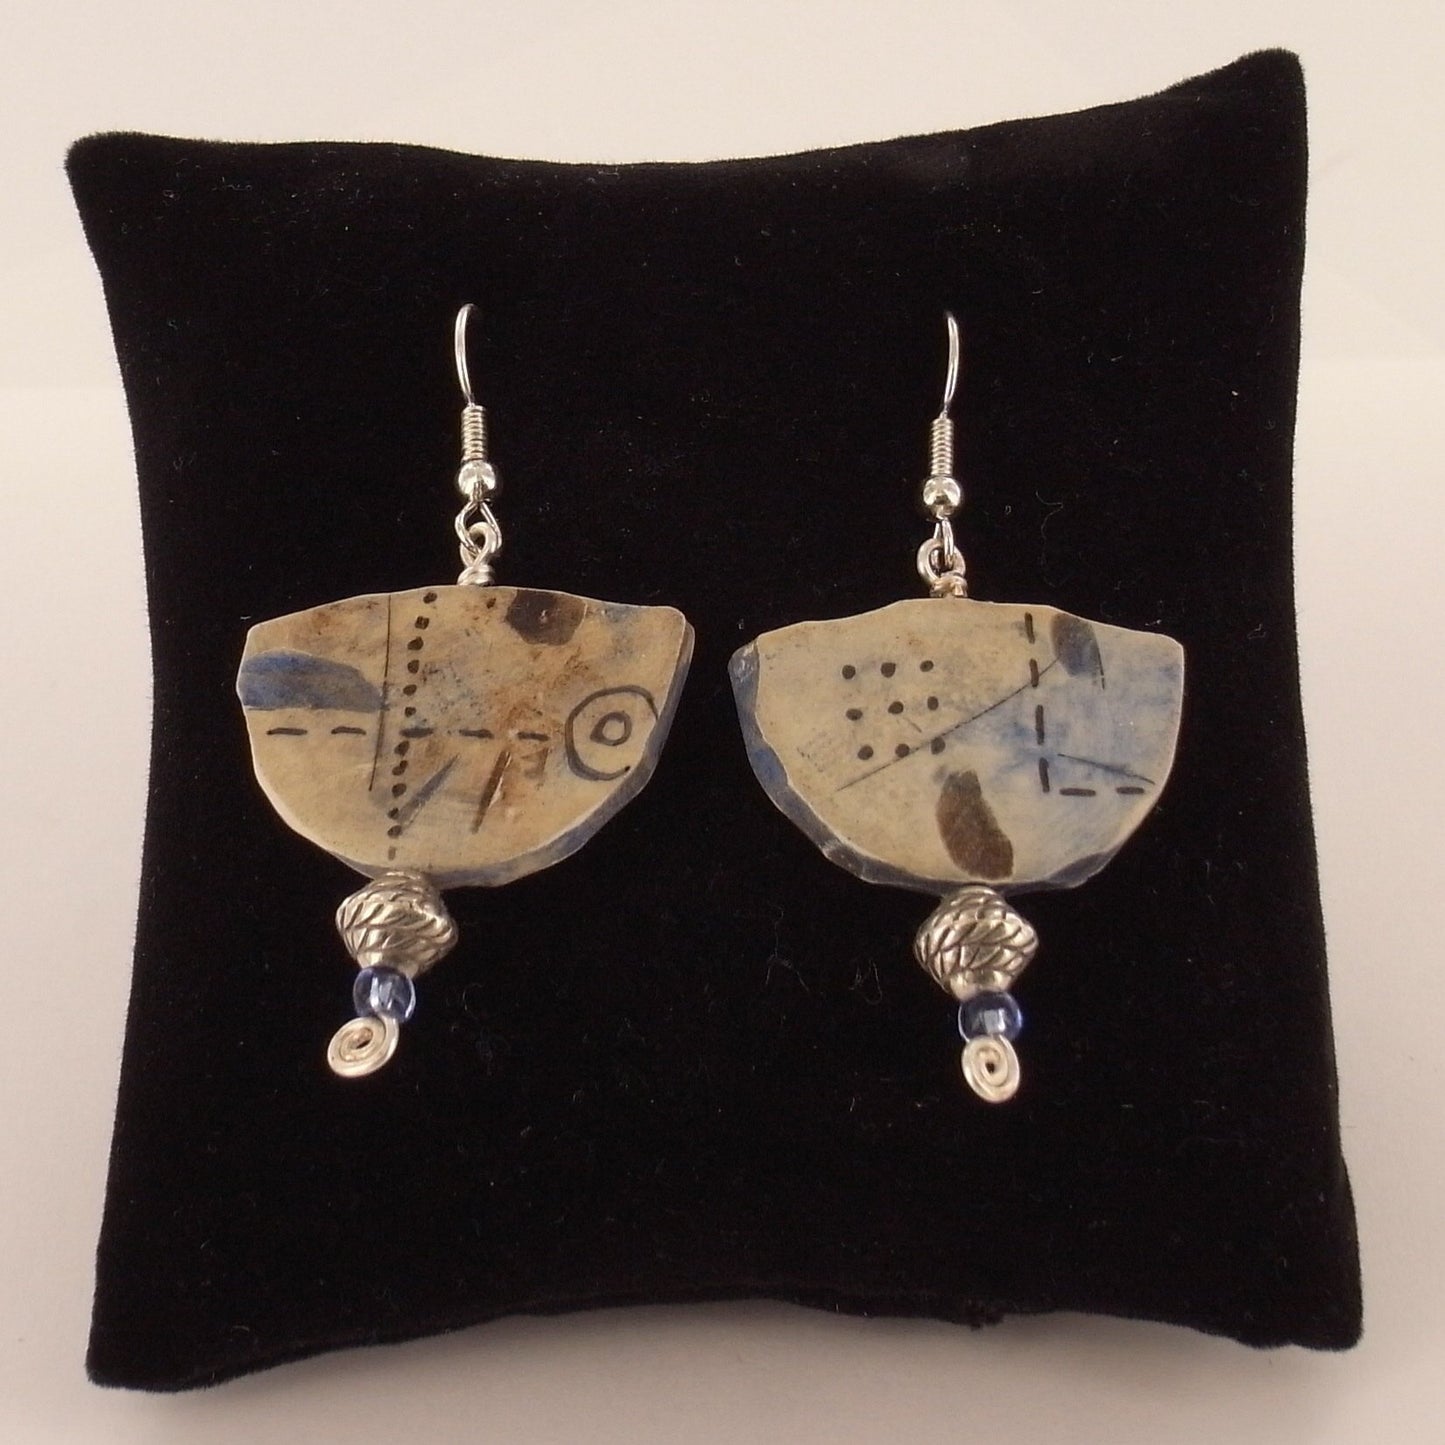
Condition a small piece of clay and roll into a sheet just a little thicker than 1/8”. Cut two circles with the circle cutter. Cut about 1/3 of the circle away to create a rounded half circle. Repeat with the second piece of clay.

With the needle tool, pierce the clay piece vertically along the center axis. Bake according to the manufacturer’s instructions on the package.
With the clay blade, trim the edges lightly around the shapes. Carve some gouges and scratches randomly into the surface on both sides.

Apply two or more colors of paint on the surface and wipe excess away with a paper towel or tissue. Rub the paint thoroughly into the scratches and gouges in the surface as these areas will take the color much more deeply. Allow acrylic paint to dry, or if using oil paints, the drying can be sped up by returning the clay pieces to the oven for 10 minutes.

Draw with a permanent marker lines, shapes, or any desired image or pattern. Form a spiral at one end of a 3” piece of wire. Add accent beads and the clay bead. Form a wrapped loop at the top and attach the earring hook. Repeat for the second earring.
Condition a small piece of clay and roll into a sheet just a little thicker than 1/8”. Cut two circles with the circle cutter. Cut about 1/3 of the circle away to create a rounded half circle. Repeat with the second piece of clay.
With the needle tool, pierce the clay piece vertically along the center axis. Bake according to the manufacturer’s instructions on the package.
With the clay blade, trim the edges lightly around the shapes. Carve some gouges and scratches randomly into the surface on both sides.
Apply two or more colors of paint on the surface and wipe excess away with a paper towel or tissue. Rub the paint thoroughly into the scratches and gouges in the surface as these areas will take the color much more deeply. Allow acrylic paint to dry, or if using oil paints, the drying can be sped up by returning the clay pieces to the oven for 10 minutes.
Draw with a permanent marker lines, shapes, or any desired image or pattern. Form a spiral at one end of a 3” piece of wire. Add accent beads and the clay bead. Form a wrapped loop at the top and attach the earring hook. Repeat for the second earring.
- Choosing a selection results in a full page refresh.
- Opens in a new window.