
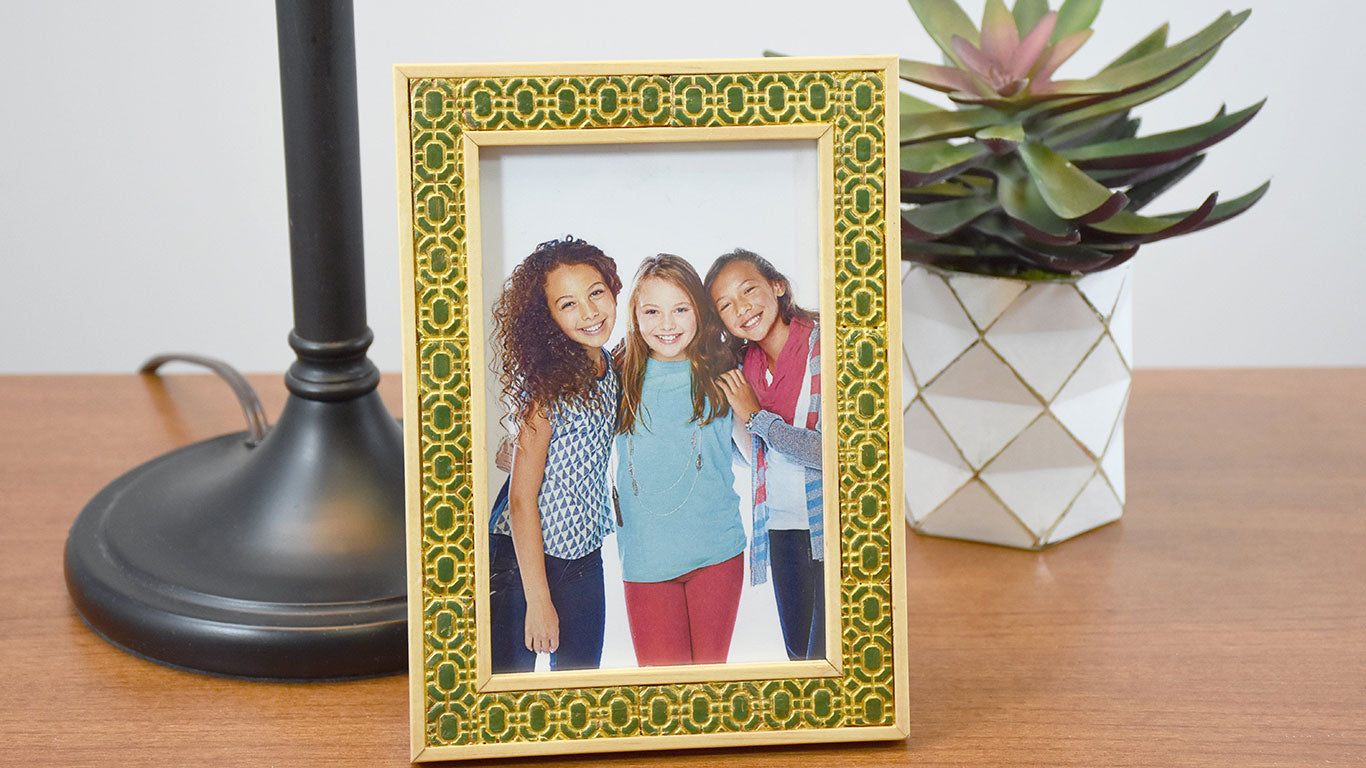
Sculpey III® Italian Look Textured Frame
Sculpey III® Italian Look Textured Frame
Read More
Read Less
Sculpey III® Leaf Green with metallic touches can spruce up any frame! If you can’t find a frame with a channel in it like this one, just create a beautiful textured strip along your frame!
ADDITIONAL SUPPLIES
- Wooden frame (this is 6x4)
- White paper
- Spray bottle with water
- Glue
- Paint (copper and gold colors)
- Paint brush
- Baby wipes
Project Instructions
- Getting Started:
Start with clean hands, unwrap and knead clay until soft and smooth, or condition by running clay though a Pasta Machine. We recommend using a designated machine for clay purposes only. When working with multiple colors, clean hands with soap and water or baby wipes (we have found that baby wipes work best) before switching colors. Shape clay, pressing pieces firmly together. Wash hands after use.
- Baking:
Sheet 1/3 of a block of conditioned Leaf Green out on the middle setting on your clay conditioning machine. Place on a sheet on plain paper. Lightly spray the texture sheet with water and place on top of the clay. Gently remove the texture sheet from the clay. Repeat two more times with the remaining clay.
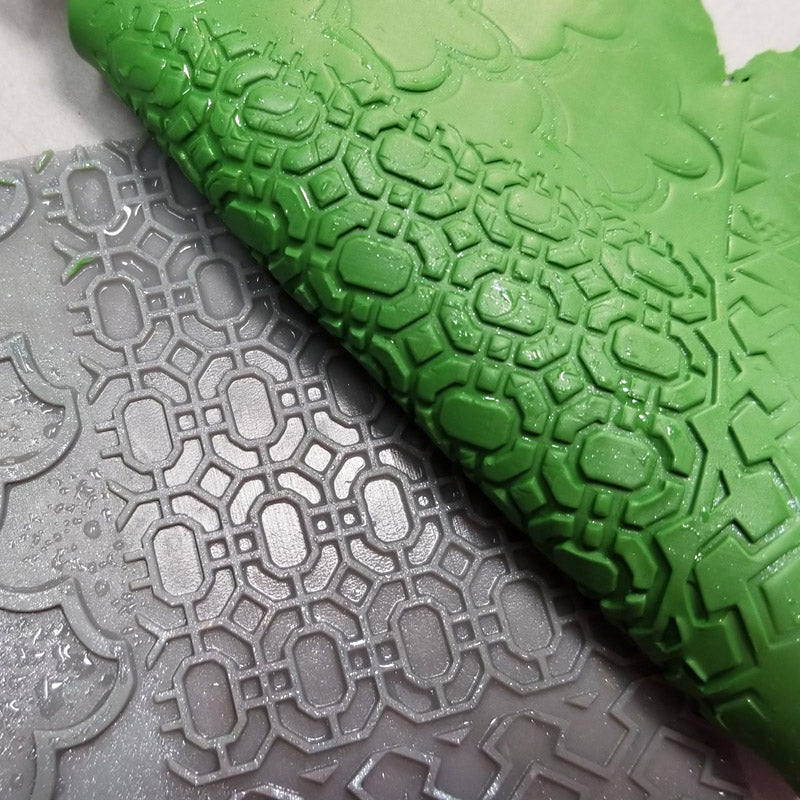
Trim the clay to fit either into the channel of the selected frame or to create a border on the frame. Trim each texture to match each other at the ends. When you have all your pieces in place, carefully remove them and place in order on a sheet of paper and bake according to the directions in Step 1. I find it’s a great idea to take a quick photo with your phone before removing the pieces to the paper!

Once the clay has baked and cooled, reassemble the pieces in your frame. Once you have all the pieces in place, gently remove each piece one at a time and glue into place.

When the glue has dried, apply your selected highlight paint color to a section of the texture. Wipe quickly with a baby wipe. Paint the frame as well or keep it natural. Notice I started with a Copper color! NOTE: Paint will help fill small gaps in the clay strips as well!


I decided to add an overcoat of Gold paint to the frame just like I did the Copper paint in Step 5. The two colors add a subtle richness and dimension to the frame. Once the paint is dry, add your favorite photo!

