
Liquid Sculpey® and Art Resin Poured Tray
Liquid Sculpey® and Art Resin Poured Tray
Designed by Teresa Pandora Salgado
Read More
Read Less
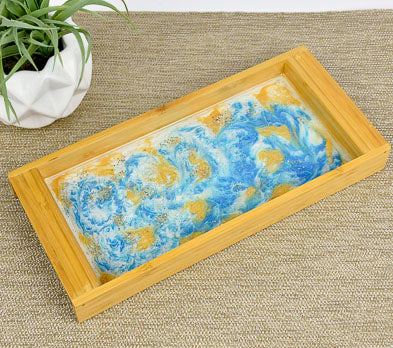
Liquid Sculpey and Art Resin team up with a simple wooden tray to create a visual delight for your home decor!
TIME TO COMPLETION: 75 minutes
ADDITIONAL SUPPLIES
- Wooden Tray
- White Acrylic Paint
- Gold Glitter
- Turquoise Glitter
- Art Resin
- Torch
- Mixing Cups
- Packing Tape
Project Instructions
- Getting Started with Liquid Sculpey:
- Baking:
Preheat oven to 300F. Pour 1 ounce of LS Clear into a mixing cup. Add Sculpey Clay Softener/Thinner and stir until smooth and pourable.

Pour the LS Clear into the tray. Tilt the tray until the bottom is evenly covered.

Add LS Peacock in lines and dots to create an interesting distribution of color.

Use the pointed end of the Etch & Pearl tool to make small swirls in the lines and dots.

Add accents of LS Gold in the open areas between the Peacock swirls.

With LS Pearl, make fine, squiggly lines over the design. Drag the pointed edge of the Etch and Pearl Tool through the entire design.
Add gold and turquoise glitter by sprinkling in tiny pinches high above the tray.
Add gold and turquoise glitter by sprinkling in tiny pinches high above the tray.

Bake at 300F for 15 minutes, cool and peel the sheet off the tray.

Paint the bottom of the tray with white acrylic paint. Press the sheet into the wet paint. Allow to dry for one hour.

Seal edges of the outside of the tray with packing tape, Mix Art Resin according to package directions. Pour the resin over the bottom of the tray. Cure 24 hrs.
Remove the tape and enjoy your beautiful tray.
Remove the tape and enjoy your beautiful tray.
