
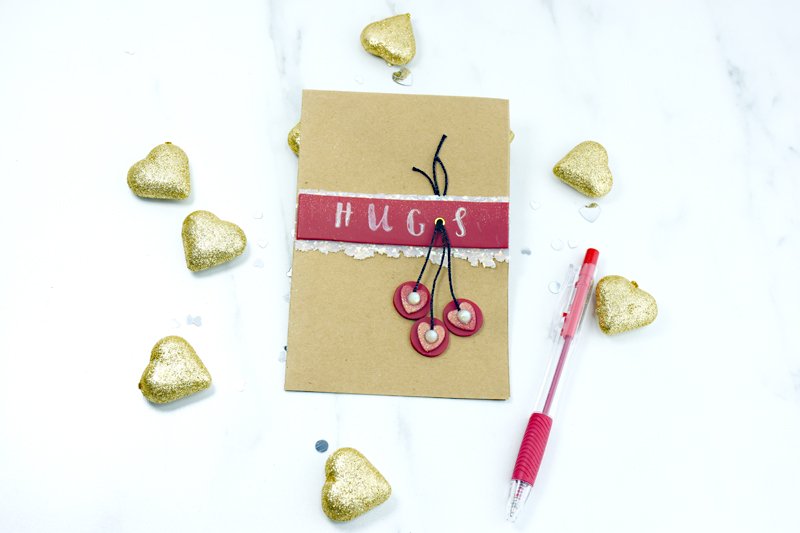
Premo™ HUGS Note Card
Premo™ HUGS Note Card
Read More
EVERYONE can use a HUGS card!!
Read Less
ADDITIONAL SUPPLIES
- Heavy weight craft paper
- Alphabet stamps
- Permanent ink
- Black Cord
- Gold eyelet
- Wax paper or plastic wrap
- Craft knife
- Glue
Project Instructions
- Getting Started:
Start with clean hands, unwrap and knead clay until soft and smooth, or condition by running clay though a Pasta Machine. We recommend using a designated machine for clay purposes only. When working with multiple colors, clean hands with soap and water or baby wipes (we have found that baby wipes work best) before switching colors. Shape clay, pressing pieces firmly together. Wash hands after use.
- Baking:
Sheet 1/4 bar of each Rose Gold Glitter and Cayenne through the pasta machine on the thickest setting. Layer them so they overlap each other 1/2”. Press them together along the overlap or roll over them with the acrylic roller.

Press the two colors together through the pasta machine on the thickest setting. Fold the sheet over Rose Gold to Rose Gold and Cayenne to Cayenne. Press through the pasta machine putting the folded end through the rollers first.

Keep folding and pressing (always matching like color to like color) with the folded end first on the thickest setting until a nice blend is achieved. This is a variation on the Skinner Blend. Once you have the blend that you like, press it through the pasta machine without folding it on the second thickest setting and then again on the third thickest setting to make the sheet thinner.

Stamp the message H U G S using the rubber stamps and permanent ink onto the Cayenne/Rose Gold blend. I stamped mine so that the letters go right across where I thought my blend was the prettiest. Trim a straight edge above and below the letters. Sheet Opal through the pasta machine on the thickest setting. When the clay is smooth, press it through on the second thickest setting and again on the third thickest setting. You’ll notice when you press the Opal clay through the pasta machine that the edges become very raggedy. I incorporated this look into my finished design. I was diligent about pressing the sheet through the machine in such a way that I would end up with just the right width of piece - slightly wider than my HUGS piece - so that the ragged edges of the Opal clay would show.

Sheet Cayenne through the pasta machine on the third thickest setting. Cut out little hearts using the heart shaped mini cutter out of the blended sheet and place them on top of the solid Cayenne sheet.

Cut out around the little hearts with the circle shaped mini cutter. Divide the cord into three equal pieces. Tie a knot in the end of each one. Trim the tail end very close to the knot. Embed the knot into the center of a heart.

Use the largest Etch ‘n Pearl to place a pearl of Opal in the center of the heart, holding the knot in place. Repeat with the remaining two hearts.

Layer the HUGS strip over the Opal strip. Press the two pieces together so they attach to each other. Cut out a piece of paper 8” x 12” from the craft paper. Fold the paper into quarters so that it is 4” x 6”. Place a piece of snap wrap, or wax paper, or clear kitchen wrap over the folded card. You can lay your clay pieces on top of the barrier paper to help you lay out your design without staining the card below. Trim the ends of the HUGS strip to match the sides of the card. Once I arranged my pieces I decided that I would like to put a little eyelet in the HUGS strip to run the heart strings through.

Press a little gold eyelet into the clay as shown as deeply as possible. Bake the HUGS strip and the three hearts according to Step 1.

When the pieces have completely cooled, carefully remove any clay from the center of the eyelet with the craft knife. Thread the heart strings through the eyelet. Arrange the pieces on the front of the card. Glue them into place. Arrange the hearts and their strings and then glue the hearts to the card as well. Allow to dry completely.
