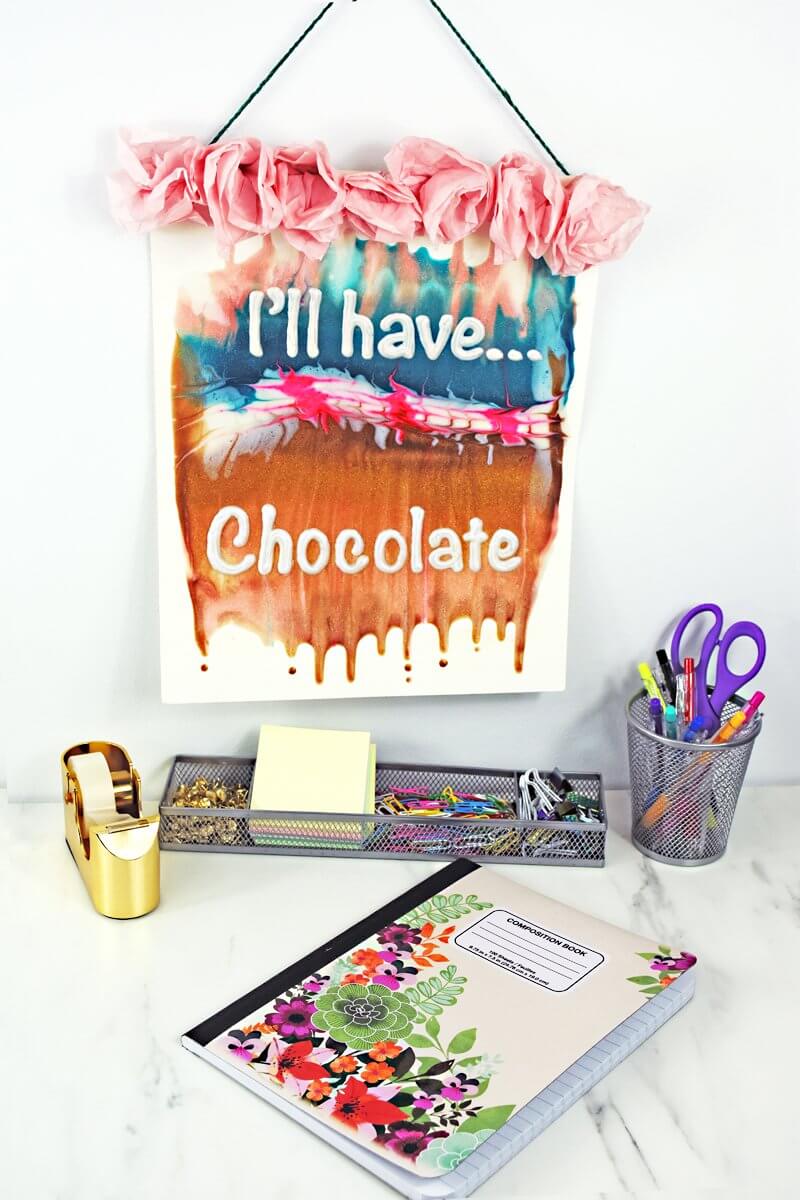
Liquid Sculpey® “I’ll Have Chocolate” Tilt Painting Banner
Liquid Sculpey® “I’ll Have Chocolate” Tilt Painting Banner
Designed by Amy Koranek
Read More
Read Less
For this project instruction, I’ll share with you my method of “tilt painting”. However, since we’re using liquids, please know that the outcome will be very unique each time this process is completed. My advice: relax, enjoy the process, and you’ll enjoy the results too.
ADDITIONAL SUPPLIES
- Card Stock for canvas - 10” X 12” - Please make sure ahead of time that the oven that you use for baking your finished piece will be big enough
- Smooth glass baking plate - for this project we used a glass turntable from an old microwave. You can also use a pie plate or any glass piece that is smooth and has no markings on it
- Paper baking cups or silicone baking cups for mixing colors
- Metal Tablespoon
- Alcohol ink - Magenta
- Paper towel
- Printed phrase - “I’ll have... Chocolate” and sized them to match the area that was available to place them in after my piece was baked
- White craft glue
- Coordinating ribbon for hanging.

Project Instructions
- Getting Started:
- Baking:
For the Tilt Painting technique, your liquids should all be the same consistency and very fluid. Squirt approximately 2 tablespoons of each Peacock Pearl, Bronze, Pearl, and Rose Gold into separate baking liners. In this photo you can see that the LS is quite thick. It should be thinned to a consistency that will easily run, similar to the consistency of acrylic paint.

Thin each color with both Clear LS and Sculpey Thinner & Clay Softener (SCTC). Place a quarter sized amount of Clear LS in each color. Place a dime sized amount of SCTC in each color. Stir each one completely with a tool from the Starter Set. Please note in this photo, I also show Gold LS. I decided not to use the Gold color in this project. I only used Rose Gold, Pearl, Peacock Pearl, and Bronze. Stir each color to feel the consistency. Thin each color further as necessary with Clear LS and SCTC until they are equal in consistency.

Pour a line of Pearl LS about 1” wide right across the middle of the card stock horizontally. Stop before the vertical edges of the card stock.

Drip three drops of alcohol ink in the Pearl stripe. This is only 1 drop in each position. Alcohol inks are very potent so use sparingly. Allow the ink to set for a few minutes untouched until it begins to crackle and spread.

Add wide stripes of Bronze, Rose Gold, and Peacock Pearl as shown. Keep each stripe away from the vertical edges of the card stock. I poured all the remaining Pearl I had across the top and bottom.

Pick up the piece and tilt the liquid toward one of the short ends. The liquids will begin to mix randomly. Then tilt the piece toward the other short end. In this photo, I have tilted the piece back and forth at least four times.

Keep tilting it back and forth continuing to mix the colors but stop while the colors are still at least an inch from the short ends. I tried very hard to tilt the piece so that I have clean edges all the way around the liquids. Once you like the partially mixed colors, lay the piece flat in front of you so it doesn’t mix any more. With the needle tool, drag vertical lines starting at the bottom and dragging it all the way through the liquids to the top. The dragging will make cool lines through the colors.

Clean the needle tool with a paper towel. Drag a few lines horizontally through the middle. I dragged the needle tool one way and then the other to create this pattern.

Dip the ball ended tool into the little bit of Bronze that is left in the mixing cup. Dab drops of Bronze at the end of the drips at the bottom. Clean the ball tool off with paper towel. Dip the ball ended tool into Rose Gold and apply little drops at the top of the piece.

Bake the tilted piece at 300 °F for 20 minutes. While it is baking, lay the printed phrase under a glass baking plate. Trace the letters onto the glass plate in Pearl LS directly through the squirt tip of the bottle. For this project, my Pearl LS is very thick which makes it perfect for tracing letters because it will not run. Trace all the words onto the glass and then bake them at 300 °F for 20 minutes.

When the tilted piece and the words are completely cool, peel the words from the glass baking plate. Glue them to the banner with a very thin layer of white craft glue applied to the backs of the letters with your finger tips. Allow to dry completely. Glue ribbon to the top back of the piece and long enough to tie at the top to make a hanger.


