
Liquid Sculpey® Embellished Dream Catcher Notebook
Liquid Sculpey® Embellished Dream Catcher Notebook
Designed by Iris Weiss
Read More
Read Less
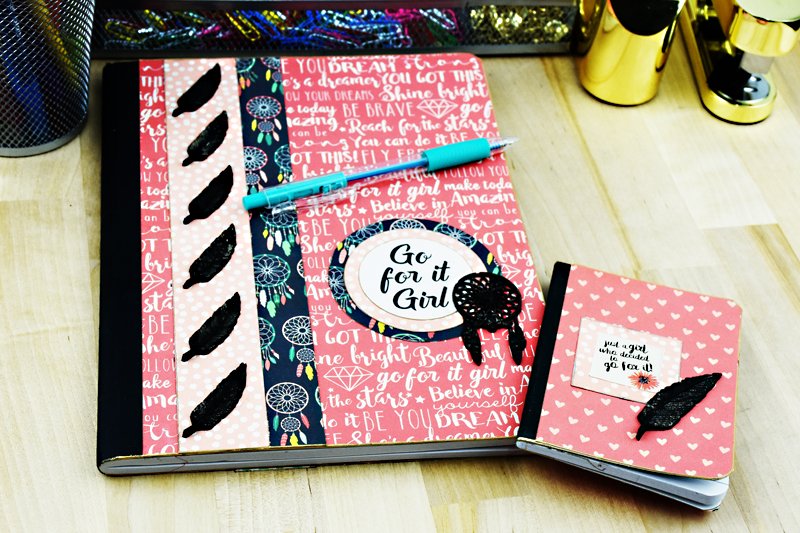
Create an on-trend inspirational notebook that is so easy to make you can make one for all of your friends!
ADDITIONAL SUPPLIES
- Wink of Stella Glitter Brush – Clear
- Echo Park Paper Collection – Just Be You
- Note – Most all of paper collections available have papers and stickers with inspirational quotes
- Scrapbook Tape Runner (White craft glue may be substituted)
- Strong White Craft Glue that dries clear
- Scissor or Exacto Knife
- Metal Ruler
- Large Circle Template
- Deco Color Gold Premium Pen (optional)
- Tim Holts Distress Oxide Ink - Frayed Burlap color
Project Instructions
- Getting Started:
- Baking:
As directed on package individually stir Black and Silver Liquid Clay. (I use a Starbucks”s green plastic stopper – works perfectly). In a small container mix Silver and Black Liquid Clay. Carefully fill the dream catcher and the small feather using your stir tool to scoop and fill the mold. Use the small scraper tool that comes with the mold to clean any excess clay from the top of the mold. Bake according to the directions in Step 1 above. Repeat to create 6 of the small feathers.
When feathers and dream catchers are completely cool embellish with Wink of Stella Brush Pen. Set aside.

Select your background piece of paper, lay notebook on the reverse side of the paper, as shown and trace around to edge of the notebook. Do the same for the back of the book. Trim the paper using a scissor or an Exacto knife and metal ruler.

Attach the paper to the front and back of the notebook using the tape runner or glue. Go around the edges with the gold pen.

Optional - ink around all of the paper edges using Tim Holts Distress Oxide Ink, Frayed Burlap color

Create the rest of the paper layout to your liking, including an inspirational saying. To cut out the circles I used a large circle template and scissor. Attach paper using the tape runner or glue


Attach the feathers and dream catcher using Strong White Craft Glue, as pictured in the finished notebook photo. Allow to dry.

Using a mini composition notebook create a companion piece using the same paper pack and a Large Sculpey Liquid Clay feather created from the Boho Chic mold.

- Choosing a selection results in a full page refresh.
- Opens in a new window.