
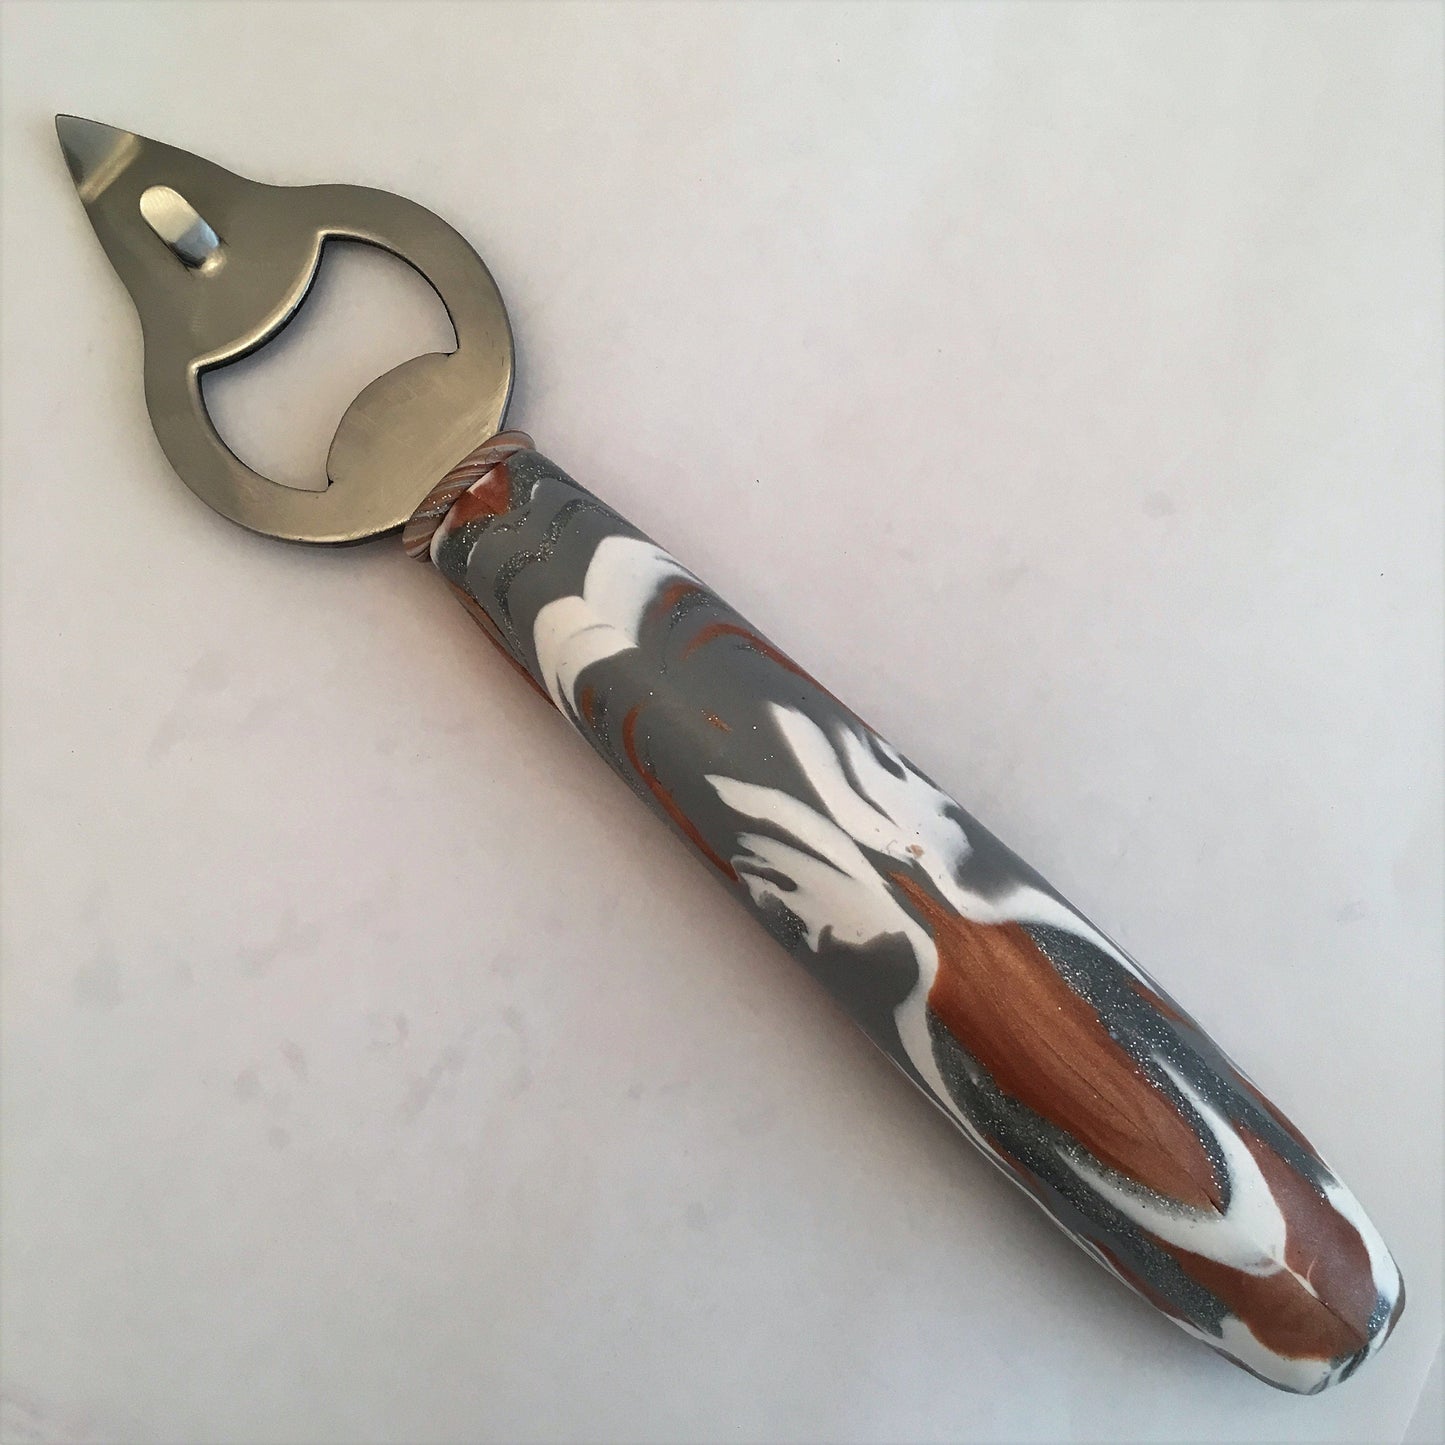
Sculpey Premo™ Bottle Opener
Sculpey Premo™ Bottle Opener
Read More
Looking for the perfect gift or want to jazz up your bar tools? This DIY Natasha Mirror Image technique is an easy to achieve technique that will have your friends asking 'where did you buy that?'
Read Less
ADDITIONAL SUPPLIES
- Bottle Opener
Project Instructions
- Getting Started:
Start with clean hands, unwrap and knead clay until soft and smooth, or condition by running clay though a Pasta Machine. We recommend using a designated machine for clay purposes only. When working with multiple colors, clean hands with soap and water or baby wipes (we have found that baby wipes work best) before switching colors. Shape clay, pressing pieces firmly together. Wash hands after use.
- Baking:
Roll one stick of each color into a thick rope. Stack them together as shown.

Chop the ropes up into small pieces.

Scatter the colors to mix them up randomly. Wad the color chips up in your hand.

Roll the chips up into a ball.

Smash the ball and then fold it in half. Repeat this a couple more times.

Gently roll and twist the log.

Cut the log in half. I’m showing the log here with the cut sides down on the work surface.

Roll the half logs with the roller to gently flatten them.
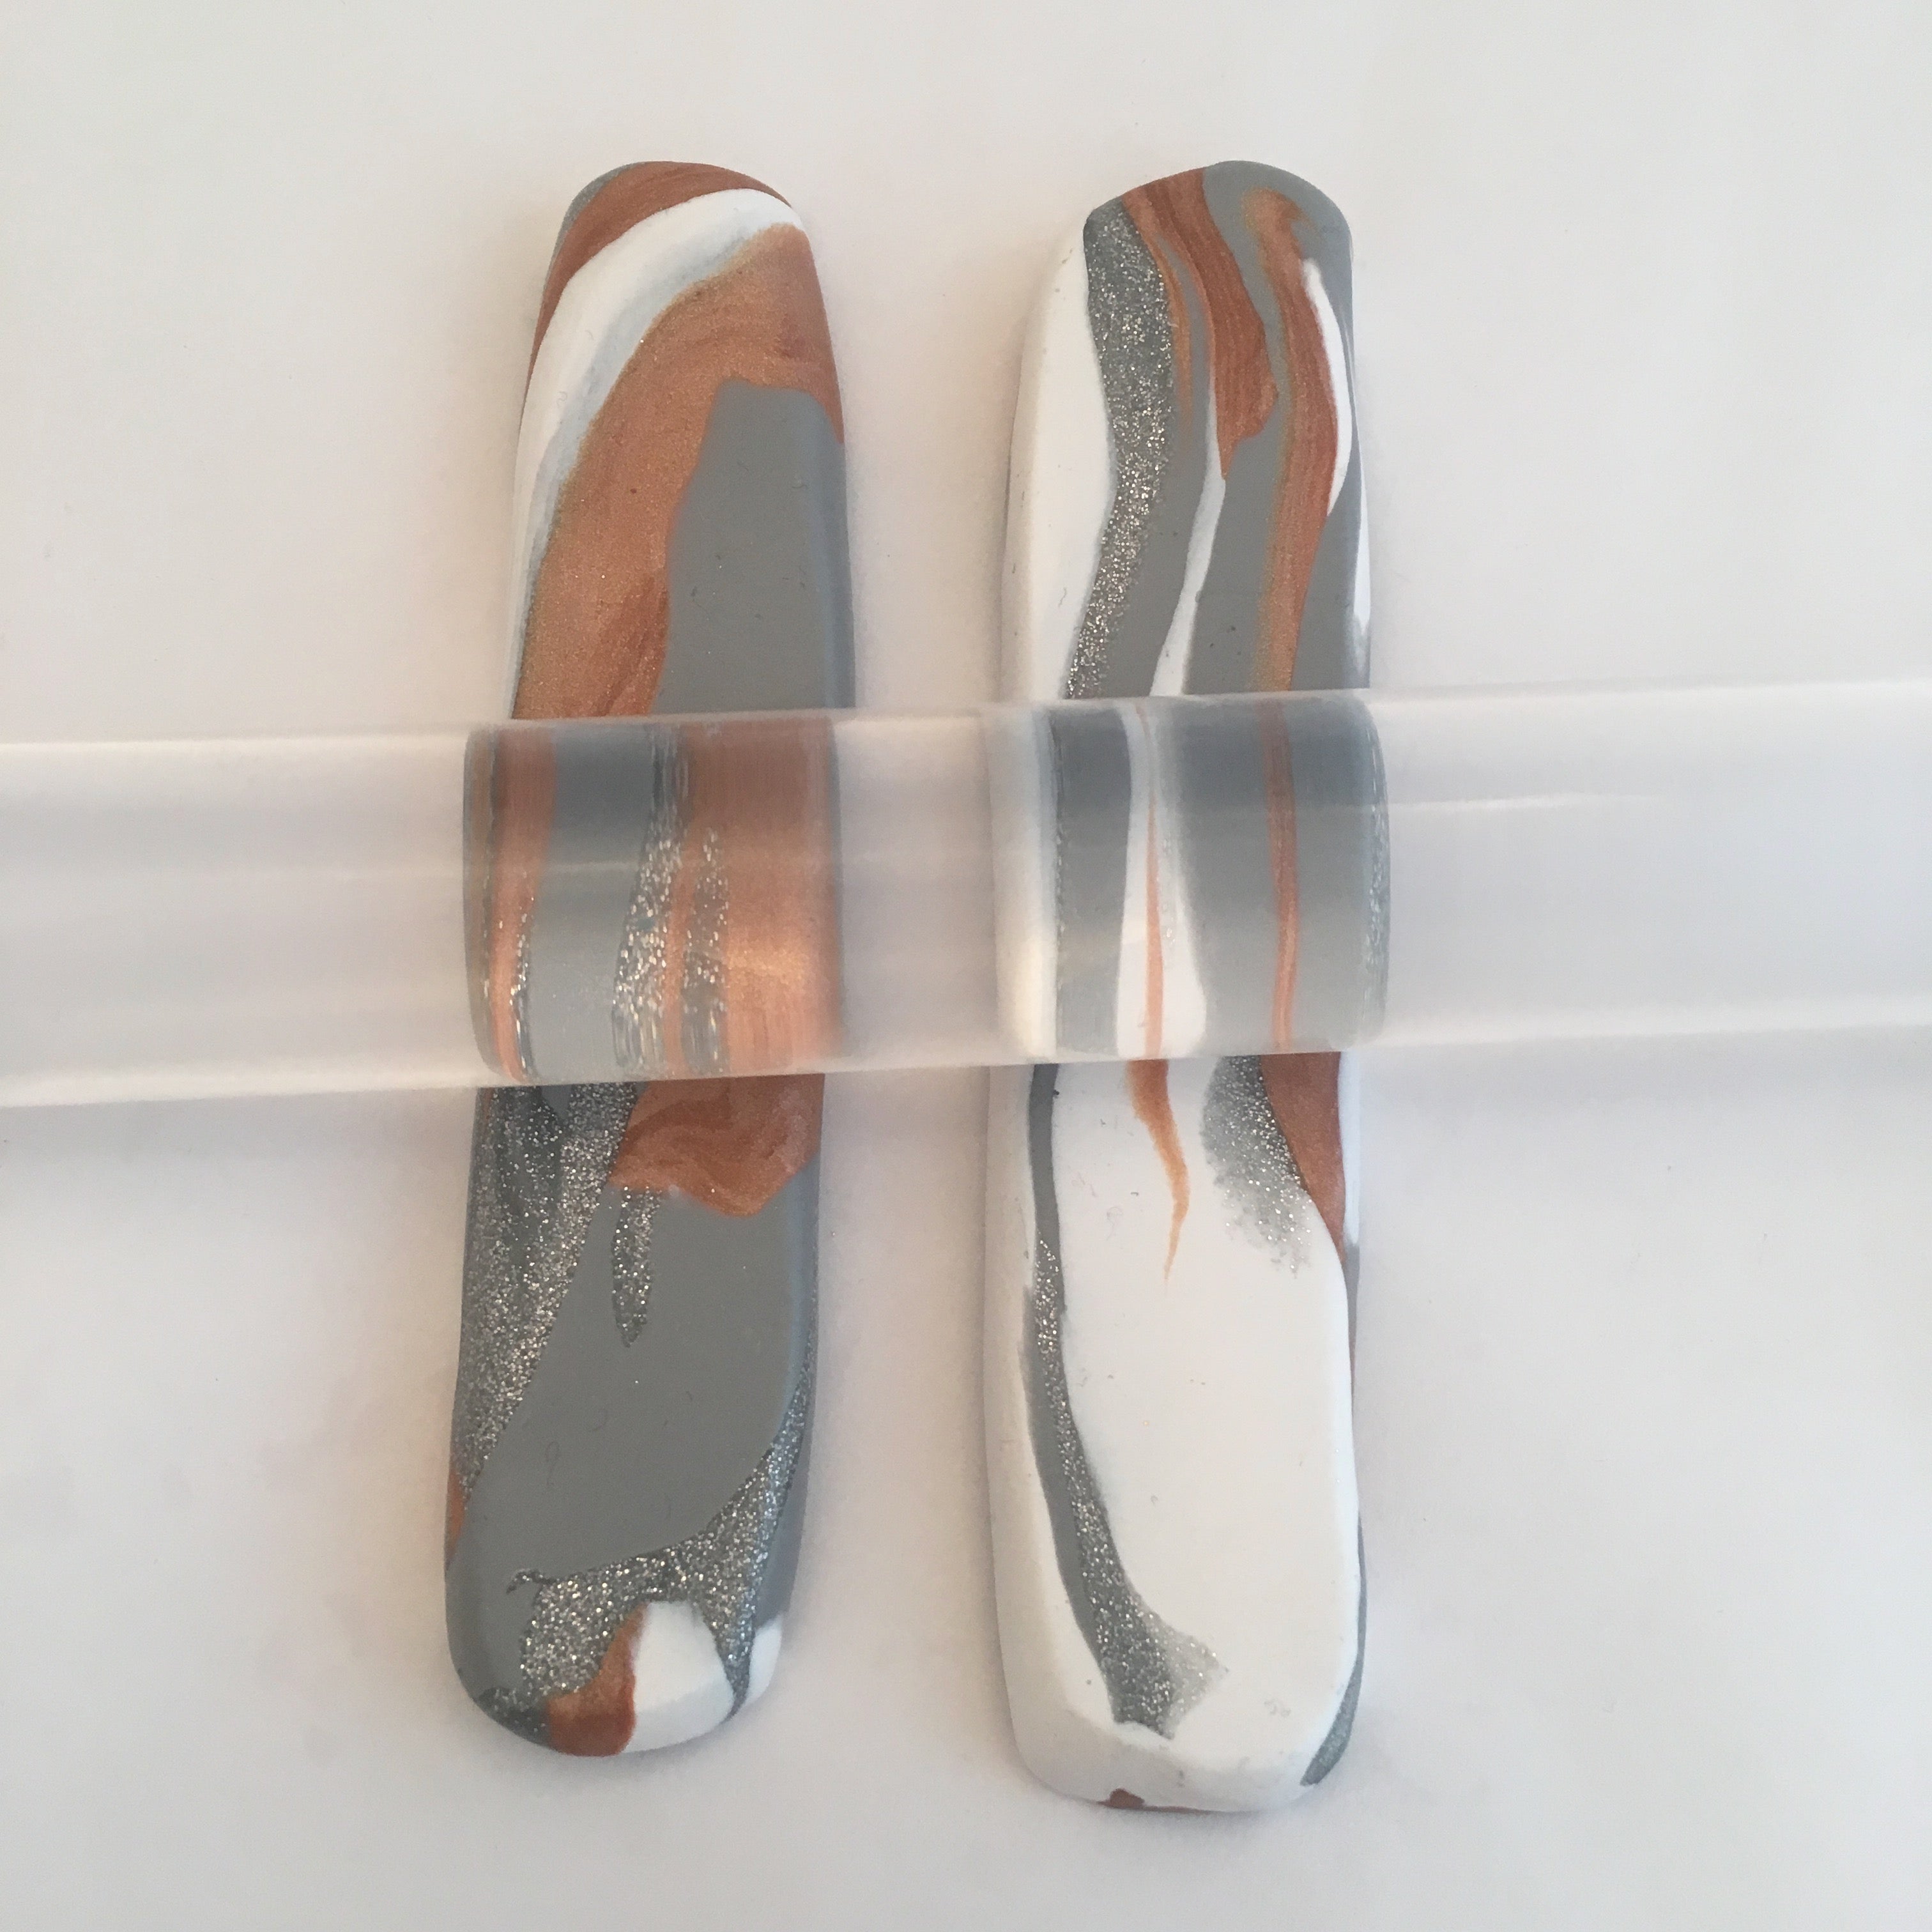
Slice each half log in half again.

Open the cuts sides like a book, matching the patterns like a mirror image.

Compare the clay pieces to the bottle opener handle to make sure the clay pieces are about the right size to cover one side of the handle. At this point, my clay pieces were pretty thick so I sliced some of the excess clay off of the backs of them.

Flatten each piece carefully with the roller. Each piece should be wide enough to wrap half way around the handle. Be careful not to flatten each piece too quickly because you don’t want to distort your awesome design.

Gently wrap one of the pieces around one side of the handle.

Trim the clay so that you have a straight edge along the midway point of the handle side. Trim the other side too.

Wrap the second piece around the other side of the handle. Carefully trim it to match up to the edges of the first piece. It’s okay if there’s a little gap in between the front and back pieces because you can carefully stretch the clay to fill it.

Gently push the clay pieces together to fill the gap. Trim the clay at the top and bottom of the handle.

Put a little disc of scrap clay on the end of the handle. Use your fingers to smooth the seams between the disc and the sides.

Gently roll the handle on the edge of your work surface so that the opener part hangs off of the surface. This will help smooth the clay and the seams.
The front and the back will have different cool patterns.

Roll a little rope of twisted scrap clay. Place the rope around the top of the clay to finish it nicely. Bake the opener following the baking instructions above. Allow to cool completely.
