
Sculpey Soufflé™ Roses are Gold, Dishes are Blue
Sculpey Soufflé™ Roses are Gold, Dishes are Blue
Designed by Amy Koranek
Read More
Read Less
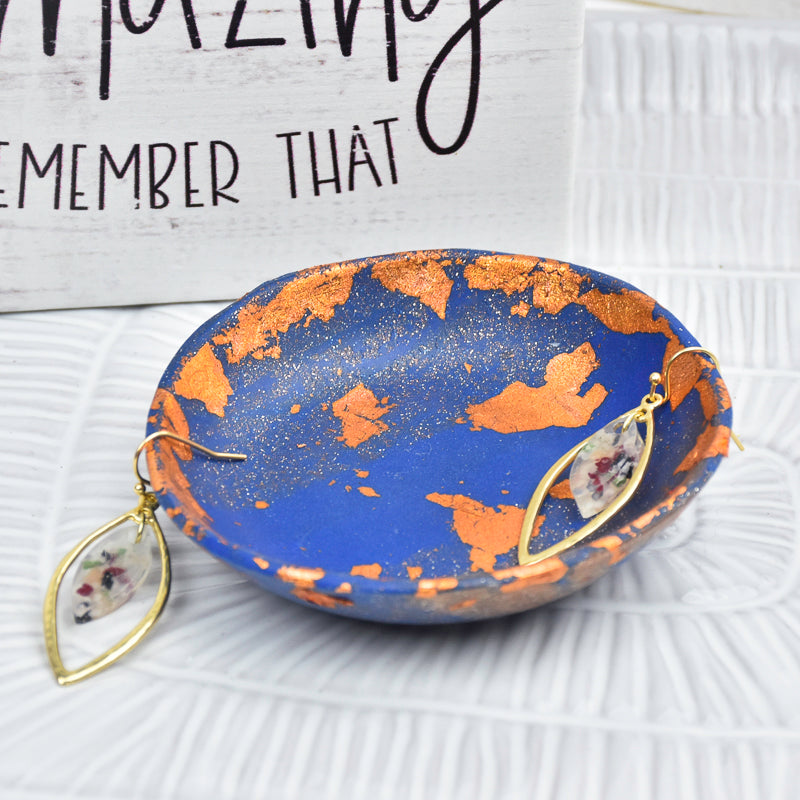
I couldn’t resist the cheesy play on words here. The shine from Premo Rose Gold Glitter and the suede like texture of Midnight Blue Soufflé are a winning combo in this little stash dish design.
COMPLETION TIME:60 Minutes to make and bake.
ADDITIONAL SUPPLIES
- 4” Circle cookie cutter or 4” circle paper template
- Copper composite leaf
- Tweezers
- Metal or glass bowl form
Project Instructions
- Getting Started:
Start with clean hands, unwrap and knead clay until soft and smooth, or condition by running clay though a Pasta Machine. We recommend using a designated machine for clay purposes only. When working with multiple colors, clean hands with soap and water or baby wipes (we have found that baby wipes work best) before switching colors. Shape clay, pressing pieces firmly together. Wash hands after use.
- Baking:
For the color blend we will use an entire bar of Soufflé Midnight Blue and 1/2 bar of Premo Rose Gold Glitter. First sheet each color through the pasta machine on the thickest setting to condition the clay and to create smooth sheets. Then tear the Rose Gold Glitter sheet into strips, place the strips on top of the Midnight Blue randomly, and press this sheet through the pasta machine on the thickest setting. Fold the sheet and press through, folded side first. Keep folding and pressing through the pasta machine until you have a partial blend that you like. I really wanted to be able to see the Midnight Blue, the Rose Gold, and a blending of them both, so I did not blend the two colors completely together.

Cut out a 4” circle from the clay sheet. Use a 4” cookie cutter or cut around a circle template with the 5-in-1 Knife Tool. Smooth the cut edges with your fingertips.

Next place copper composite leaf randomly in the center of the clay. Also place bits of the leaf around the outside edge of the clay. Tweezers can come in handy for picking up small bits of leaf and applying it to the clay.

Bend the excess leaf pieces that are hanging off the edge around the side to the back of the sheet.

Here is a look at the back so you can see how I wrapped the excess leaf around.

Next, form the clay to a bowl form. I keep various bowls in different shapes and sizes on hand for these types of projects. Metal, glass, and ceramic are great choices for bowl forms because they can easily go right in the oven with the clay. But remember that whatever the surface the bowl form is, the clay will mimic that surface. So if your bowl form is very shiny, the clay will look very shiny wherever it touches the form. My favorite bowl forms are brushed aluminum because the brushed surface will not change the look of the clay at all.
You also need to decide if you want to shape your dish to the inside or the outside of the form. In this project, I shaped the dish to the inside of the bowl form to make sure the leaf would not be disturbed on the inside of my dish. For a dish of this size and shape, the inside is going to be appreciated the most. Therefore, I want the inside to be the focal point and the most well- preserved during baking.
Carefully drape the clay down into the dish. You must work slowly and carefully to make sure you do not trap air between the clay and the form. Trapped air will expand in the oven and cause a bubble.
Bake the clay in the form following the baking instructions for Soufflé.

When the clay and the form are completely cool, carefully remove the dish from the form. Break the seal along the edge with your fingernail, fingertip, or a blunt tool that won’t harm the clay.

Since the bottom of my bowl form has a round bottom, my dish doesn’t sit very well. Making a foot for my dish will remedy this situation. From some of the leftover sheet of blended clay, cut out a 2” circle. Then remove the center of the 2” circle with a 1.5” cutter.

Press the circle to the bottom of the bowl. Make sure it attaches really well. Press down gently from the top rim of the dish flattening the foot onto the work surface to make sure the foot is nice and flat on the bottom. This time position the bowl on the outside of the bowl form, upside down, and bake again following the baking instructions for Soufflé.

When the dish and the form are completely cool, remove the dish and enjoy using it to store jewelry, trinkets, and small items.

- Choosing a selection results in a full page refresh.
- Opens in a new window.