Sculpey Premo™ Mosiac Vase
Sculpey Premo™ Mosiac Vase
Designed by Syndee Holt
Read More
Read Less
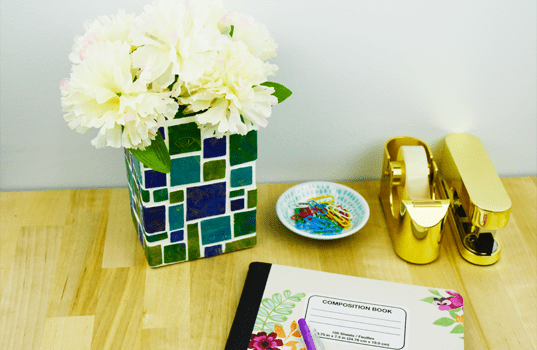
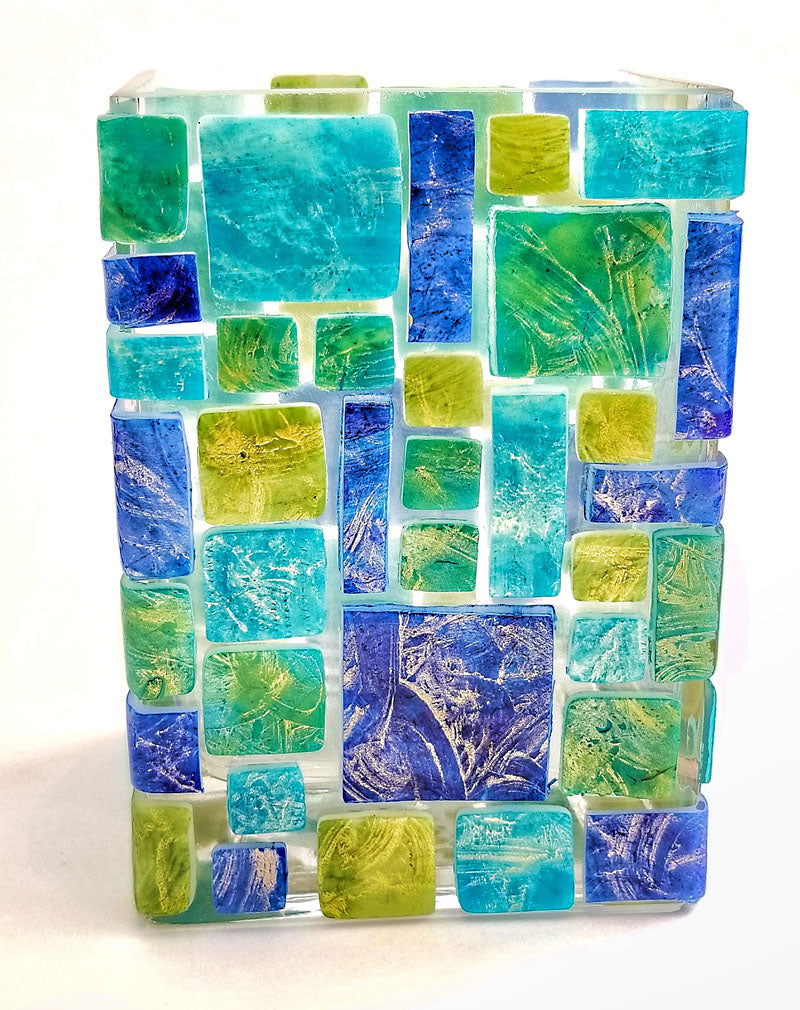
A glass vase is covered in colorful squares of translucent clay. Fill with your favorite flowers. You can also use with a candle or fairy lights to show off the beautiful translucent squares! NOTE: Clay amount will be dependent on the size of the vase. The vase shown is 6 inches high by 3 inches deep.
ADDITIONAL SUPPLIES
- Alcohol inks – Pinata Baja Blue, Sapphire Blue, Lime Green
- Ink dauber or cotton balls
- Small gelli plate
- Gold acrylic paint (Lumiere)
- Small watercolor paintbrush
- Unsanded white grout
- Glass square or rectangle vase
- Plastic sheet to grout on
- Large basin of water
- Sponge
- Small jar to mix grout in
- Small rubber spatula
- Baby wipes
- Clear instant glue

Project Instructions
- Getting Started:
Start with clean hands, unwrap and knead clay until soft and smooth, or condition by running clay though a Pasta Machine. We recommend using a designated machine for clay purposes only. When working with multiple colors, clean hands with soap and water or baby wipes (we have found that baby wipes work best) before switching colors. Shape clay, pressing pieces firmly together. Wash hands after use.
- Baking:
Cut two bars of Translucent clay in half. Sheet each half on the second from widest setting on the clay conditioning machine. Add several drops of the Lime Green ink and the Baja Blue ink to one sheet. Use the dauber or cotton ball to blot the colors together. Repeat this process using only a single color on the remaining 3 sheets of clay so that you have one sheet each of Lime Green, Sapphire and Baja blue. Allow all the inks to dry completely.

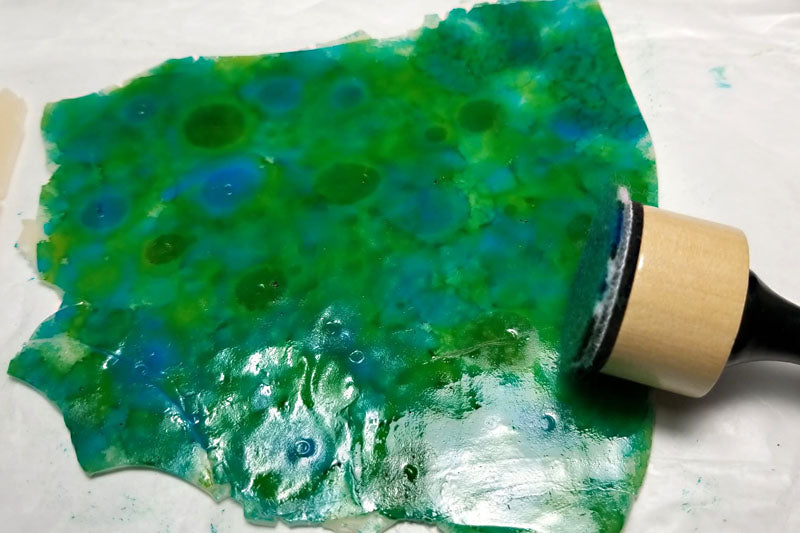
Swirl a VERY SMALL amount of gold paint on the gelli plate and gently press the sheet of clay, ink side down, against the gelli plate. You may need to quickly press the edges to the remaining paint on the gelli plate. Clean the plate immediately with a baby wipe


Repeat the gelli print with the remaining three sheets of clay (make sure that the inks are completely dry first). You will have 4 sheets of gorgeous clay.


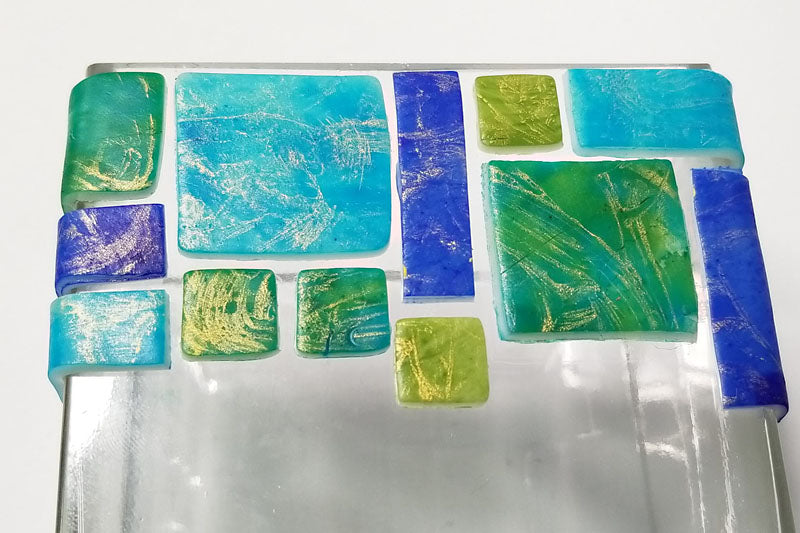
Use the square cutter set to cut a variety of squares to apply to the vase. You can bend the squares around the corners of the vase. Make sure you leave room between each square for the grout. Note: that you can also cut the squares into rectangles to add to the design!


Bake the finished vase as directed in step 1. Allow the vase to cool completely in the oven. Once you remove the vase, apply a coat or two of Sculpey Gloss glaze to each tile. I prefer to dip my glaze brush into water first, daub it on a towel and then dip just the tip into the glaze. This will give you a thin, smooth coat of glaze. You may want to apply two coats! While you are glazing, check for any tiles that are loose and will need to be glued into place before the grouting process.

Spread your plastic sheeting (old plastic tablecloths work great). Fill your basin with water. Put a smallish amount of grout in your other disposable container and slowly add water. Mix well and add more grout or water as needed. We are aiming for a stiff frosting type mix.

The grout will start to slowly set up as you use it, so work quickly! Apply the grout to one side of the vase and gently scrap the excess off with a spatula. Once you have the surfaces as clean as you can with the spatula, use the damp sponge to gently wipe the top surfaces using a circular motion. Don’t worry about getting the tiles perfectly clean at this point, allow the grout to set up a little more before the final wiping and cleaning. Repeat for the other 3 sides. Finally pay particular attention to the top and bottom of the vase – adding, removing and smoothing the grout at these edges. Allow the vase to dry completely.

