Sculpey III® Agave Style Candle Holder
Sculpey III® Agave Style Candle Holder
Read More
Read Less
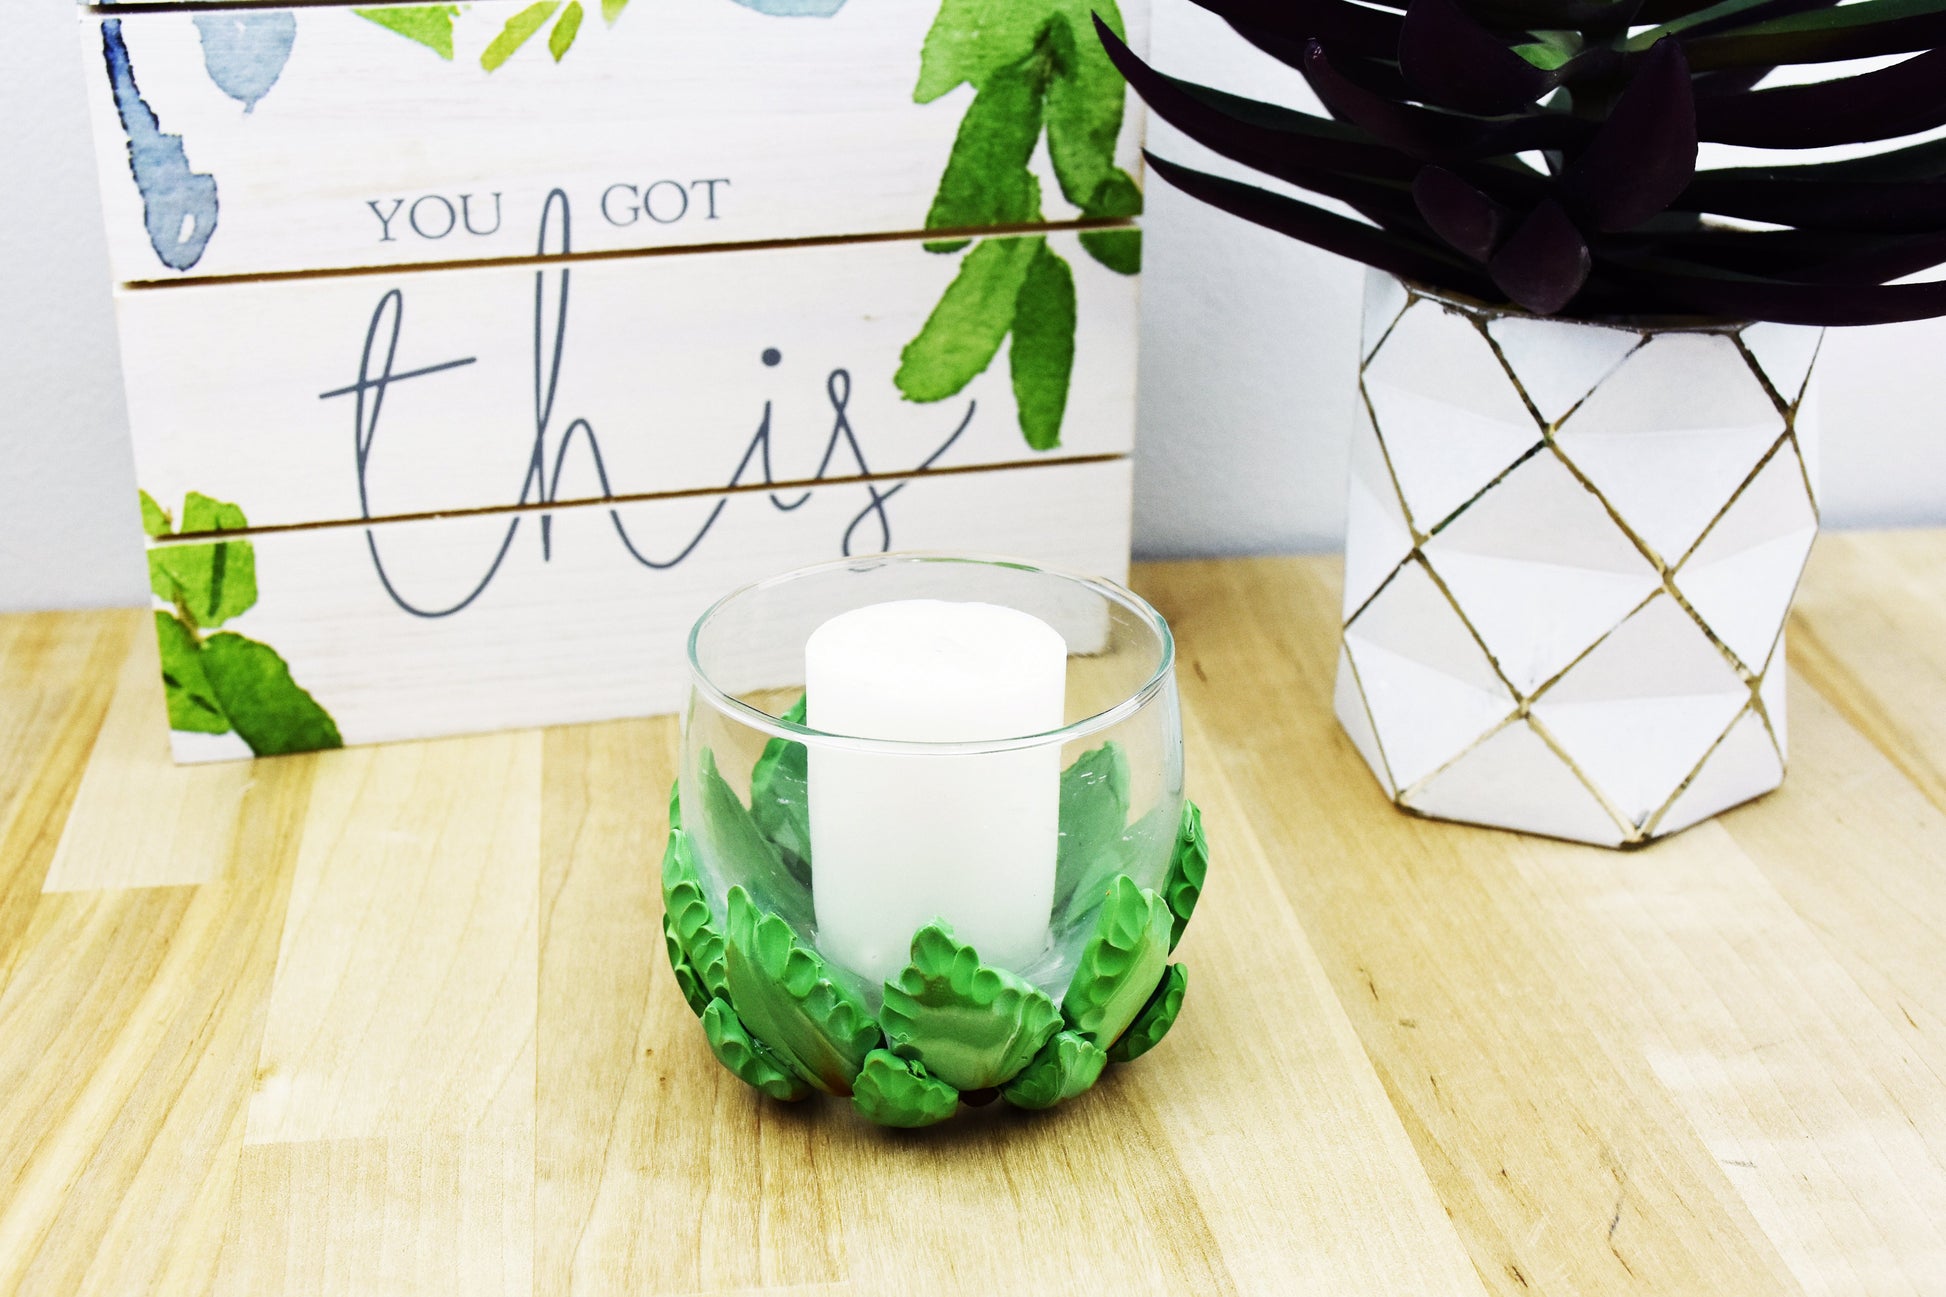
This cool little Agave style candle holder is a snap to make with the Sculpey® cutters and tools!
ADDITIONAL SUPPLIES
- Small rounded glass candle holder
- Plastic deli paper or plastic wrap
- Burnt ochre or brownish colored soft pastel
- Cosmetic foam sponge
- Small smooth tile
- Small damp sponge

Project Instructions
- Getting Started:
Start with clean hands, unwrap and knead clay until soft and smooth, or condition by running clay though a Pasta Machine. We recommend using a designated machine for clay purposes only. When working with multiple colors, clean hands with soap and water or baby wipes (we have found that baby wipes work best) before switching colors. Shape clay, pressing pieces firmly together. Wash hands after use.
- Baking:
Sheet the conditioned clay out on the widest setting. Cut the sheet in half and double up the layers. Place the sheet of deli paper or plastic wrap over the clay the press the largest triangle cutter firmly through the stack. Repeat to make at least 6 or 7 leaves. See how the plastic rounds the edges slightly? Use the edge of the Etch n’ Pearl to roll along the back edges and smooth those edges as well. NOTE: I began to mix a little White clay into the String Bean and decided that I liked the marbled look of the clay instead! You can either mix the colors completely, use the String Bean color on it’s own or use it marbled like I did!

Press the triangles gently to the glass with no overlap of the leaves. Repeat around the holder.

Use the medium Style n’ Detail tool to texture the edges of the leaves at the top to where they join at the bottom. Repeat around the holder

Create several smaller triangles with the medium cutter in the same method and position them at the bottom overlapping two leaves as shown. Use the Style n’ Detail tool on the edges. Repeat around the holder.

Put a small layer of Hazelnut clay, sheeted on the widest setting, on the smooth tile to create the pearls. Use the largest Etch n’ Pearl to create several small pebbles to put in the open sections of the leaves at the bottom of the holder. NOTE: press the tool into the damp sponge before pressing into the clay – this will help the clay release from the tool and stay on the tile! Then use the edge of your blade to slide under the pearl and position it on the design.

If desired, scrape a small amount of the soft pastel onto a scrap of paper and use a cosmetic sponge to add some “dirt” detail to the leaves. Bake as directed above in Step 1 and enjoy!