
Liquid Sculpey® and Soufflé™ Boho Canvas Collage
Liquid Sculpey® and Soufflé™ Boho Canvas Collage
Designed by Syndee Holt
Read More
Read Less
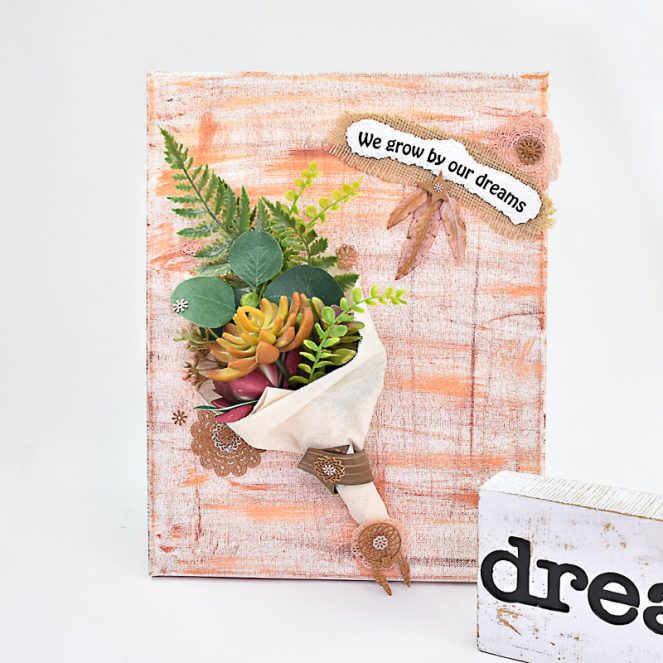
Sculpey™ teams up with Sargeant Arts to create a multi-media boho wall collage using Liquid Sculpey® clays, molds and Soufflé™ bar clay.
ADDITIONAL SUPPLIES
Sargent Arts Tools:
• 5 count Mixed Hair Paint Brush set,
• Acrylic paint – Brown, black and Peach
• 11x14 mounted canvas
Have on hand:
• Paper towels
• Faux botanicals
• Small amount of burlap,
• Instant gel glue
• Craft blade like Exacto
• Small hot glue gun and glue stick.
Project Instructions
- Getting Started:
Start with clean hands, unwrap and knead clay until soft and smooth, or condition by running clay though a Pasta Machine. We recommend using a designated machine for clay purposes only. When working with multiple colors, clean hands with soap and water or baby wipes (we have found that baby wipes work best) before switching colors. Shape clay, pressing pieces firmly together. Wash hands after use.
- Clay Baking:
- Liquids Baking:
Stir the Rose Gold Liquid Sculpey (LS) and squeeze a small amount in the two larger lace molds. Use the provided paddle to spread the clay and remove any excess from the upper surface of the mold. Make sure that clay is spread into the smaller molds as well. Bake the mold as directed above for 30 minutes. Allow to cool before removing the pieces from the molds. Repeat once more.

Fill the dreamcatcher mold in the Boho Chic mold with the Bronze LS – make sure to stir before using and use the scraper to remove excess from the upper surface. Squeeze a thin line of the bronze into each of the feather molds. Use a toothpick to pull the bronze out into the feathers as shown. Fill the rest of the mold with the Rose Gold LS. Bake the molds as directed above for 30 minutes. Allow to cool before removing the pieces from the mold


While the molds are baking, work on the canvas. I chose to use the Brown and Peach acrylic paints to create a kind of burlap look to the canvas.

Use the large square brush (shown) to apply some of the Peach paint to a wadded paper towel and swipe across the canvas. Small amounts of the brown can be added as well.

Use the brush to dry brush both horizontal and vertical lines as well. I dip the tip of my brush into the paint and then swipe a time or two on a piece of paper before applying the dry brush to the canvas. Allow the canvas to dry. Don’t forget to dry brush the edges of the canvas as well!


Wash your hands and then knead the block of Igloo Souffle until it is soft and flexible. Form the clay into a patty and place on a sheet of clean paper. Use the acrylic roller to roll the clay into about a 3/8 inch thick sheet. Use the craft blade to cut out a random shape (think cloud) that is big enough to paint your saying on. Use the tip of your brush to texture the edges. NOTE: If you are like me, you might want to make two of these – I’m not that great at lettering! Set on the bake tray.

Knead and roll out the Cowboy Souffle and trim to about 1.5 inches wide by 5 inches long. Use the edge of an old credit card to texture the clay. Check to make sure that you have enough clay to wrap around the bottom of the bouquet. Bake both clays as directed above. You can bake this wrap flat because Souffle is flexible enough to wrap easily after baking!

Once the clay is baked and cooled, wrap it around the bottom of the bouquet and glue into place. NOTE: I also stained this piece with the Peach paint to highlight the textures. NOTE: If you can't find a faux bouquet that is pre-wrapped, just add a wrapped square of material and glue it closed!
Use the #2 pointed brush and the Black acrylic paint to letter your saying on the baked Igloo clay. NOTE: you can use a soft lead pencil to mark your lettering and then just paint over it! Set aside to dry.

Now the most fun part! Assembling all your elements together. I loved my feathers and decided to feature them right under the sign. I topped it with the star from the Boho Chic mold. Trim the burlap to fit just larger than the sign and fray the edges. Use the hot glue gun to glue the sign to the burlap and then into place on the canvas. I tucked a large Pink Gold lace and a Bronze Boho element under the top edge of the sign.


I layered lace and boho elements to the bouquet using the hot glue gun. It’s fun to layer the large and smaller elements from the molds! I even added some of the smaller elements scattered into the bouquet itself.


Sign your work and enjoy!