
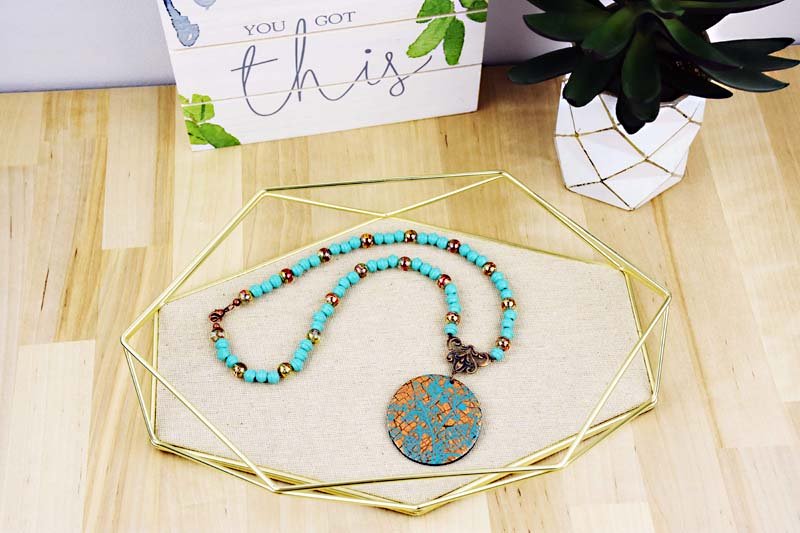
Sculpey Soufflé™ Torched Copper Look Foil Pendant
Sculpey Soufflé™ Torched Copper Look Foil Pendant
Read More
Foils and Sculpey polymer clay have always played nicely together, but why not add a silkscreen into the mix? A simple project that looks complex and unique.
Read Less
ADDITIONAL SUPPLIES
- Copper leaf
- Silkscreen
- Teal acrylic paint
- Paintbrush
- Jump ring
- Connector
- Beading wire
- Beads
- Crimp pliers
Project Instructions
- Getting Started:
Start with clean hands, unwrap and knead clay until soft and smooth, or condition by running clay though a Pasta Machine. We recommend using a designated machine for clay purposes only. When working with multiple colors, clean hands with soap and water or baby wipes (we have found that baby wipes work best) before switching colors. Shape clay, pressing pieces firmly together. Wash hands after use.
- Baking:
Sheet out the conditioned Poppy Seed clay on the second from widest setting on the Sculpey Clay Conditioning Machine. I used about a 3x3 inch piece of clay. Place the sheet of clay face down on the sheet of Copper foil from the Sculpey Surface Enhancement Kit. Press to affix the foil to the clay. Use a craft blade or scissors to trim the foil sheet closer to the clay.

Flip the sheet over and use the Sculpey Acrylic Roller to further press the foil into the clay, but try not to stretch the sheet too much! Some cracks may appear in the foil – this is OK! Pick the sheet up in your hands and use your fingers to gently roll the sheet and crackle the foil. Stop when you like the crackles!


Place the silkscreen (shiny side down!) on top of the foil covered clay, making sure that the area of design you are most interested in is on the clay. Use the acrylic roller again (lightly!) to help ensure that the screen is in full contact with the foiled clay.

Use a small paintbrush to apply a bead of paint across the top of the screen you selected (I used the leaf portion of the larger screen with the birds). Quickly, use the Sculpey Squeegee (or an old gift card/credit card) to pull the paint quickly, but gently across the surface of the screen. Remove the screen at once and go rinse it under running water. (you can use a bowl of water but the running water cleans it without having to rub it!) Put the wet screen between 2 paper towels to help press the water from the screen. Allow the paint to dry on the foiled sheet of clay.


Once the paint has dried completely, use the round cutters to select the area you want for your pendant (I recommend either the largest or second largest cutter). Once you have the area located, press the cutter firmly into the clay.

Use the needle tool to put a hole in your designated top of the pendant. Bake as directed in Step 1 above with the foiled side up. The foil should take on some beautiful colors when it is baked!

Brush a thin coat of Sculpey Gloss Glaze onto the surface of the pendant. I prefer to dip my brush into water and then just the tip of the brush into the Glaze when applying it.
Stringing the necklace: Slide a jump ring through the hole in the top of the pendant and attach to the connector as shown. (It's from Filigree and Me.)

Cut two 24 inch lengths of the beading wire. Thread one piece of the beading wire through one of the top wholes in the connector. This will double the wire so even out the ends so you can thread the beads on. Once you have the length that you want, thread the crimp bead onto BOTH wires then thread on the clasp. Loop the wire back through the crimp and the top bead, adjusting the excess wire in the loop to pull it tightly against the top bead. Use crimp pliers to crimp the crimp bead and trim the wires. Repeat on the other side.
