
Sculpey Premo™ Apricot Leaf Charm Pendant Necklace
Sculpey Premo™ Apricot Leaf Charm Pendant Necklace
Designed by Cindi McGee
Read More
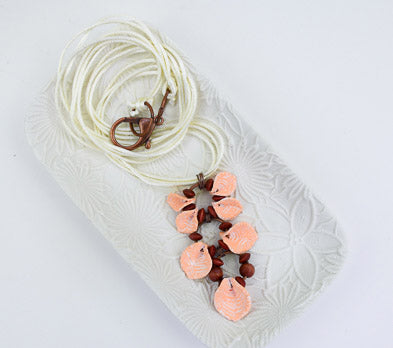
Gorgeous little Apricot leaves tumble with copper rings and wooden beads to create this unique pendant.
TIME TO COMPLETION: 80 minutes including baking
Read Less
ADDITIONAL SUPPLIES
- White acrylic paint
- Paintbrush
- Craft knife
- Aluminum foil
- Paper towels
- Large copper rings (about 1” diameter - 3)
- Copper jumprings in two sizes (6 medium, 3 larger)
- Small wooden beads
- Ivory cording
Project Instructions
- Getting Started:
Start with clean hands, unwrap and knead clay until soft and smooth, or condition by running clay though a Pasta Machine. We recommend using a designated machine for clay purposes only. When working with multiple colors, clean hands with soap and water or baby wipes (we have found that baby wipes work best) before switching colors. Shape clay, pressing pieces firmly together. Wash hands after use.
- Baking:
Roll Apricot clay to desired thickness. I rolled to a setting #4 on my pasta machine.

Crumple foil tightly, then unroll and create a wrinkled sheet of foil. Place the clay sheet onto the foil, then roll it with a clay roller to transfer the crumpled pattern to the back of the sheet.

Flip sheet over, place foil on the top and roll over it to texture the top of the sheet of clay.

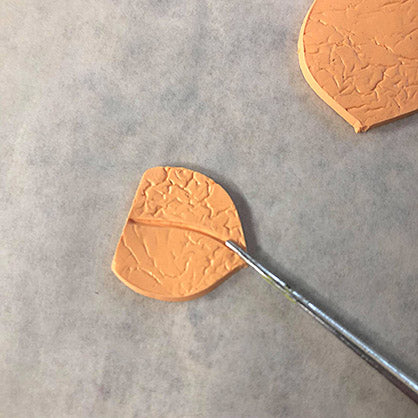
Place the template over the clay sheet, use the craft knife to cut 1 of the larger leaf shapes, 2 medium, and 4 small.

Use the pointed end of the Etch & Pearl tool to draw a line from the tip to the top of the leaf shape.
Use the tool to add lines on either side of the center line to mimic leaf veining.
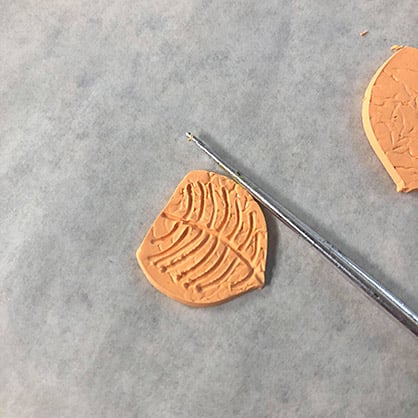
Use the tip of the tool to add texture to the outer edges of the leaves.

Gently pinch the flat top of the leaves inward.

Carefully make a hole through the pinched section with the tool. Be sure your hole is large enough for the ring(s) you plan to use for your pendant.
Bake the leaves according to manufacturer instructions. Let cool.
Bake the leaves according to manufacturer instructions. Let cool.

To create an “antiqued/whitewashed effect,” apply white acrylic paint to the leaves.

Let it set briefly then use a paper towel to wipe away the excess paint, leaving just the paint in the indented areas.

Begin with the largest leaf. Add it to one of the large copper rings, with wooden beads on either side to accent the leaf.
Add 3 medium jump rings to the top of the ring, then add the second large ring.
Add 3 medium jump rings to the top of the ring, then add the second large ring.

Add one of the medium leaves to each side of the ring, with wooden beads on either side.
Add 3 medium jump rings to the top of the ring, then add the third large ring.
Add 3 medium jump rings to the top of the ring, then add the third large ring.

Add the 4 small leaves to the top ring, with the wooden beads between them as desired.

Add 3 large jump rings to the center of the top ring.

Insert 3 strands of ivory satin cording through the 3 rings added in Step 16. Add closure.

Here's a closeup look at my final pendant
