
Premo™ Sticks and Stones Earrings and Pendant
Premo™ Sticks and Stones Earrings and Pendant
Read More
Read Less
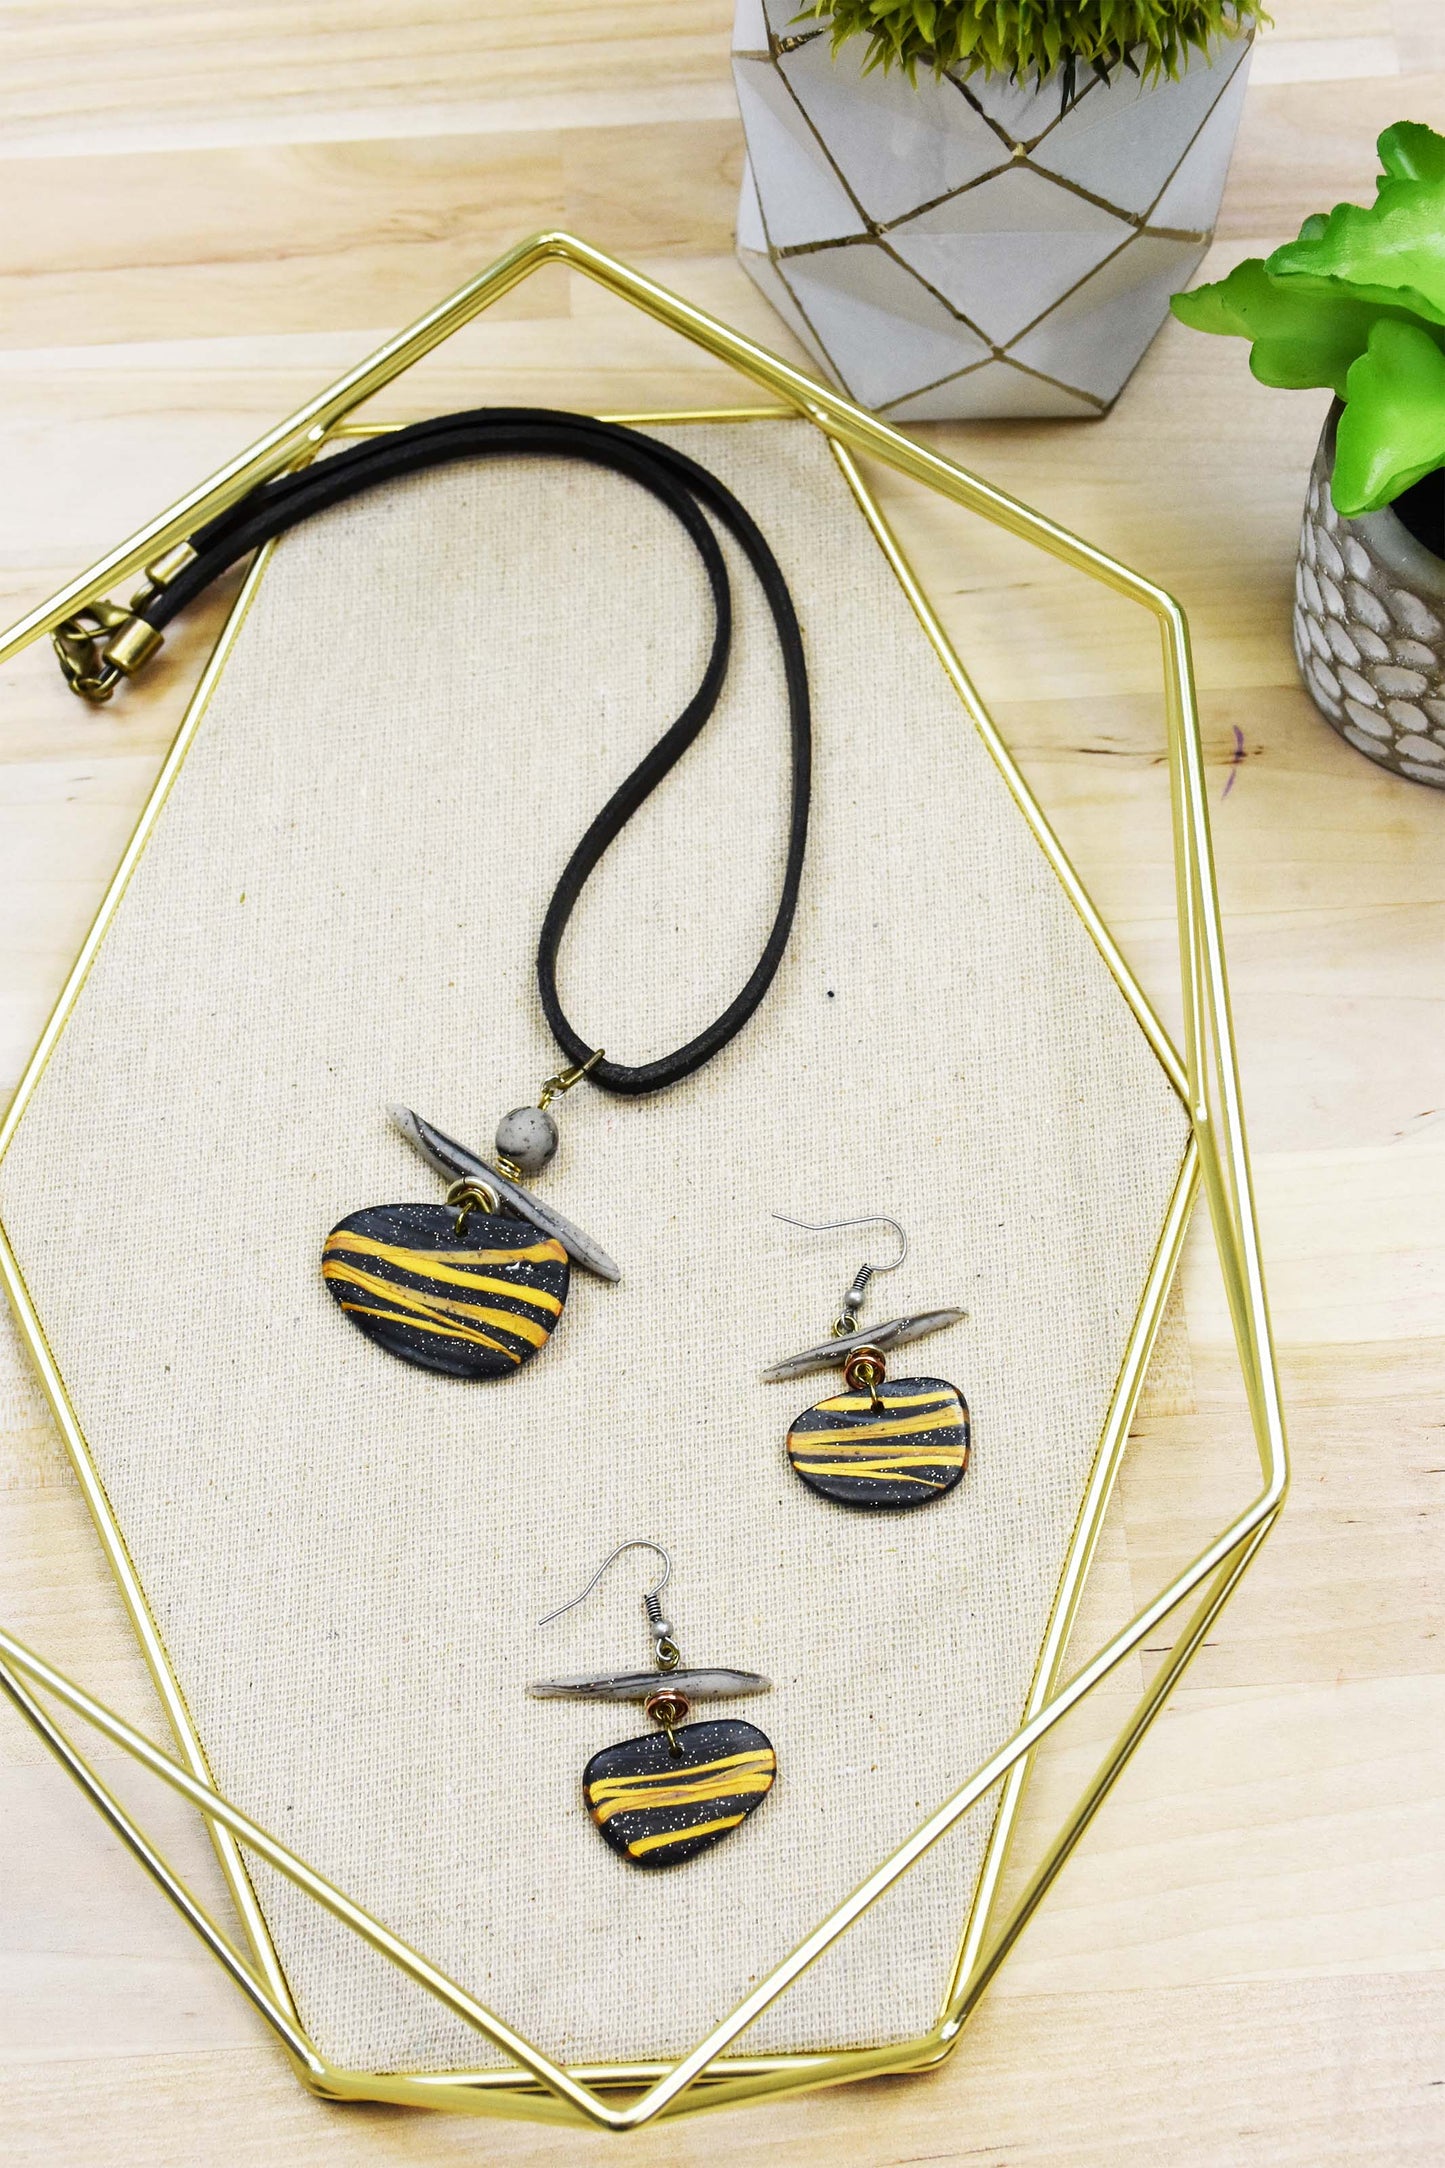
These earrings are right on trend with the mixed metals and stone!
ADDITIONAL SUPPLIES
- 4mm, 6mm, and 8mm Jump rings in various metal tones
- 2” Eye pins in any metal tone (3)
- Ear wires in any metal tone (2)
- 16” - 18” Necklace cord with clasp
- Round nose jewelry pliers
- Flat nose jewelry pliers
- Wire cutters
Project Instructions
- Getting Started:
Start with clean hands, unwrap and knead clay until soft and smooth, or condition by running clay though a Pasta Machine. We recommend using a designated machine for clay purposes only. When working with multiple colors, clean hands with soap and water or baby wipes (we have found that baby wipes work best) before switching colors. Shape clay, pressing pieces firmly together. Wash hands after use.
- Baking:
Make a little slab by marbling together 1/4 bar of Twinkle Twinkle with little strands of Gray Granite. The slab should be fairly thick - around 3/16” in thickness.

Make another little slab of Gold clay that is the same thickness.

Use the clay blade to slice a curved line all the way through the marbled slab. Use the clay blade to cut a very thin stripe from the Gold slab. Place the Gold stripe up next to the curved cut in the marbled clay. Place the remaining marbled piece back on top of the Gold.

Cut through the marble/gold slab randomly with another curved line. Repeat by placing a Gold line into the cut and then replacing the marbled clay. Do this cut and replace technique several times but always making sure the Gold is basically going in a horizontal direction across the marbled piece. Vary the thickness of the Gold lines to keep everything looking more natural.

Flatten the pieces together with the Acrylic Clay Roller. When you’re sure the pieces are all stuck together really well, flatten the piece by pressing the short end of the slab through the Clay Conditioning Machine on the thickest setting.

Use the Medium sized cutters to cut out two little stone shapes. Flip one of the shapes over so they mirror image each other. Smooth all the cut edges with your fingertips so they look more like naturally washed stones.

Use the Large cutter to cut out a pendant piece from the marbled clay. Smooth all the edges with your fingertips.

Make a little log of Gray Granite. Roll very thin threads of Twinkle Twinkle and line the log with them. You can even use scraps of the other colors to make this part more natural and random.

Roll the log very thinly to about 1/4” thick.

Cut off a 3/4” section and roll it to a long tapered piece about 2” long. Don’t let the stripes twist very much. We don’t want these pieces to have an organized stripe to them. Only let them twist enough to wiggle a bit. Compare this stick piece to the width of your large stone piece. You only want the stick to just be slightly longer than the width of the stone. Make adjustments now so that the pieces look nice together. Make two more little sticks that will be a nice length for each of the smaller earring stones as well. Also make a 3/8” round ball bead to finish off the pendant. Poke holes in the tops of each of the stones for assembly with the Needle Tool. Poke holes through the middle of the sticks. Poke a hole through the ball bead. Bake all the pieces following the baking instructions in Step 1.

Allow the pieces to cool completely before assembly. For the earrings, place a 2” eye pin through the hole in each one. Bend the eye pin and run the tail back through the loop just above the stone.

Add two jump rings in various colors to the eye pin. Add two more jump rings to each eye pin. String the stick pieces on. Trim the eye pins to 3/4” tails. Curl a loop in each tail tightly above the stick with round nose jewelry pliers. Add the ear wire to each loop.

For the pendant, place a 2” eye pin through the hole, bend the eye pin so the eye ends up right above the stone. Run the tail of the eye pin through the eye. Add a series of mismatched jump rings onto the eye pin. Then string the stick on top of those. Add three more smaller jump rings, and the clay ball bead. Trim the eye pin to 3/4” tail above the pendant. Curl a loop down tightly to the top of the clay ball bead. Attach to a neck cord with another jump ring.

