
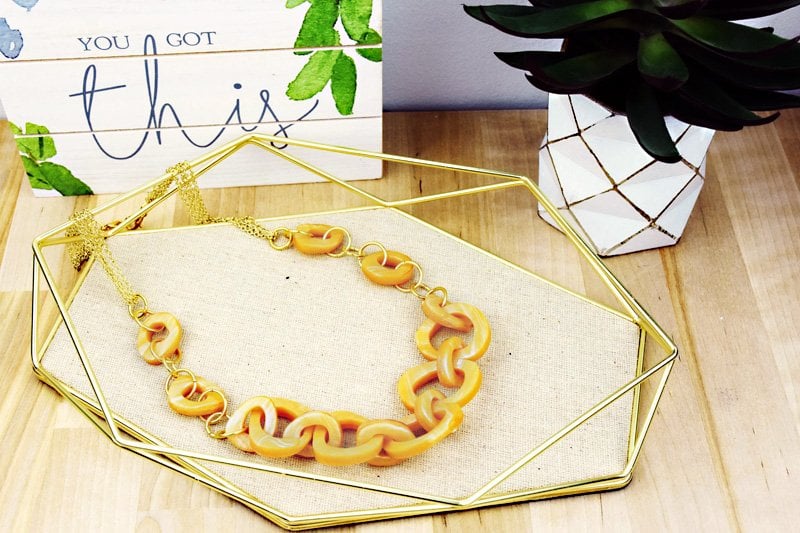
Sculpey Premo™ Amber Chunky Chain Necklace
Sculpey Premo™ Amber Chunky Chain Necklace
Designed by Amy Koranek
Read More
Read Less
Premo Sculpey Amber helps you make a stylish statement with this self linking statement necklace. Create the necklace length perfect for you.
ADDITIONAL SUPPLIES
- Heat gun – optional
- Sharp craft knife
- Super glue gel
- Paper towel
- 10mm Gold tone heavy jump rings (10)
- 8mm Gold tone heavy jump rings (6)
- 6mm Gold tone jump rings (2)
- 48” Gold tone chain (divided into four 12” pieces)
- Gold tone lobster clasps (2)
- Flat nose pliers
- Wire cutters
Project Instructions
- Getting Started:
Start with clean hands, unwrap and knead clay until soft and smooth, or condition by running clay though a Pasta Machine. We recommend using a designated machine for clay purposes only. When working with multiple colors, clean hands with soap and water or baby wipes (we have found that baby wipes work best) before switching colors. Shape clay, pressing pieces firmly together. Wash hands after use.
- Baking:
Use the entire bar of Amber to create a thick log. Make sure the clay is well conditioned before making the log shape. Roll very thin strips of Pearl and press them randomly to the sides of the Amber log.

Roll the log to make the strips of Pearl clay embed into the Amber. Roll the log and twist it to make stripes. Fold the log in half and then in half again. This will make a mottled and marbled look. If you keep rolling, twisting, and folding the log, the colors will blend into each other more and more. Repeat this process until you have the look that you want.

Roll the marbled clay up into a round smooth ball. Use the Acrylic Clay Roller to make a nice smooth pancake that is 1/8” thick.

Using the large Irregular Oval Cutter, cut out five shapes from the pancake. Cut the centers out of each one using the medium Irregular Oval Cutter.

Cut the centers out of the medium sized pieces using the small Irregular Oval Cutter. Cut out five more medium sized pieces from the pancake of marbled clay and remove the centers from these as well. I set all the small pieces aside and used them to make the Tinted Beaded Bracelet.

Bake the five large shapes and the ten medium shapes following the baking instructions for Premo. My pieces have a glossy shine to them. I did this with a heat gun as soon as they came out of the oven. Turn the heat gun onto the high setting and move it over the pieces from a distance of 4”-6”. As soon as the pieces start to look shiny, the process is complete. This is a trick that can be used to make any of the translucent clays look even more translucent. When the pieces are completely cool, use a very sharp knife and make a straight cut all the way through the edge of each large piece.

Carefully assemble the large shapes and the medium shapes chain link style as shown. Glue the cut in the large shapes back together with super glue gel. Carefully wipe excess glue away with paper towel while the glue is still wet. Hold the repaired cut tightly for 30 seconds to make sure you have a good bond. This will be the center section of the necklace.

Next, add a 10mm jump ring to each end of the center section, then an 8mm jump ring to each end, and another 10mm jump ring to each end. Connect the last 10mm jump ring to a medium sized shape. Repeat this sequence on both sides of the necklace again: 10mm, 8mm, 10mm, medium shape. Finally add a 10mm jump ring and an 8mm jump ring to each end.

To finish, I cut four pieces of gold tone chain each 12” long. Open a 6mm jump ring and carefully thread it to the end links of two 12” chains. Thread these two pieces of chain through the 8mm jump ring at the end of the necklace design. Bring the other end of the chain back to the 6mm jump ring and string these onto the ring as well. While the jump ring is still open, add a lobster clasp. Close the jump ring. Repeat this pattern on the other side of the necklace. The finished necklace has a double lobster claw clasp which is very easy to manage for both right-handed and left-handed wearing.
