
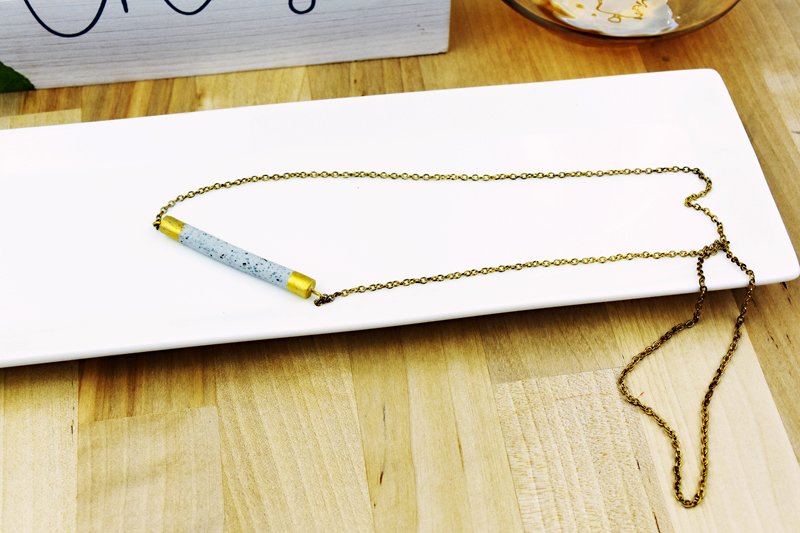
Original Sculpey® Granite Bar Pendant with Gold Finishes
Original Sculpey® Granite Bar Pendant with Gold Finishes
Designed by Syndee Holt
Read More
This sleek pendant is a snap to make and will compliment your entire wardrobe. Not a fan of gold? Try Copper! Copper looks great with this Granite-look clay.
Read Less
ADDITIONAL SUPPLIES
- 2 gold eye pins but to about 1/2 inch (12mm) length
- Gold acrylic paint
- Paint Brush
- Painters tape
- Gold necklace
Project Instructions
- Getting Started:
Start with clean hands, unwrap and knead clay until soft and smooth, or condition by running clay though a Pasta Machine. We recommend using a designated machine for clay purposes only. When working with multiple colors, clean hands with soap and water or baby wipes (we have found that baby wipes work best) before switching colors. Shape clay, pressing pieces firmly together. Wash hands after use.
- Baking:
Pinch off a small amount of the conditioned clay to create a ball about 1 inch (25mm) wide. Place the ball on your worksurface and gently roll to elongate the ball into a cylinder that is about 3/8 inch (9mm) wide. Trim the cylinder to your desired length -mine is about 2 inches (50mm).

Once you have your bar rolled to the desired width and length, carefully insert the eye pins in each end by pressing them gently into the clay. Once the pins are inserted in each side, bake according to the directions in Step 1.

Once the bar has baked and cooled, carefully remove the eye pins and use a small piece of painters tape to tape off a section of each end of the bar. NOTE: Use sharp scissors to cut the tape and get a straight edge. Use the brush to apply the Gold acrylic paint to the taped ends of the bar – don’t for get to paint the very ends of the bar! I set my bar on a round cutter to dry, but a bottle cap can work as well!

Once the paint has dried, remove the tape and reinsert the eye pins with a small drop of instant glue on the ends of the pin. When the glue has dried in a few moments, add the chain and you are set!
